This article was co-authored by Alessio Iadicicco. Alessio Iadicicco is an Apparel Manufacturing Specialist and the CEO and Co-Founder of MarkersValley, an online apparel and manufacturer sourcing platform that connects luxury fashion brands to a network of highly-vetted, truly Italian manufacturers. He holds a Bachelor's degree in Economy and Management of Financial Enterprises from The University of Naples Federico II. MarkersValley has connected fashion brands in over 100 countries and has a network of over 100 independent Italian factories and artisans. MarkersValley has been featured in Forbes, EQ, St. Louis Business Journal, Il Mattino, and Corriere Della Sera.
There are 10 references cited in this article, which can be found at the bottom of the page.
wikiHow marks an article as reader-approved once it receives enough positive feedback. In this case, 100% of readers who voted found the article helpful, earning it our reader-approved status.
This article has been viewed 300,703 times.
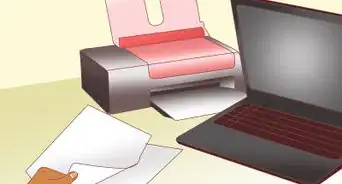
Printing on fabric allows you to take your crafts projects to a different level! If you don’t want to spend money on fabric transfer paper, you can do it yourself with freezer paper, fabric, and an iron. Freezer paper is thick and has plastic or wax coating on one side. Start by cutting it into a sheet 8.5 inches (22 cm) by 11 inches (28 cm) in size and make sure you use an inkjet printer. Inkjet printers use ink and are commonly sold as home printers while laser printers, which won't work for this project, use toner and are typically used in office settings. With all the right tools, you can be making things like custom pillowcases, tapestries, and quilt squares in no time!
Steps
Selecting an Image and Cutting the Fabric
-
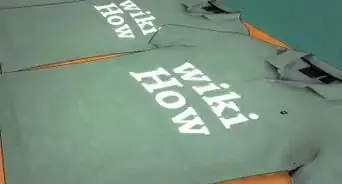
1Choose an image. If your printer prints color, choose a colorful graphic. Otherwise, stick with black-and-white designs. Keep in mind that photos may change resolution and size during the transfer process, so you might want to avoid trying to enlarge and print a small, colorful graphic with lots of little details because it will turn out looking pixelated. [1]
- Digital printing is definitely the cheapest option when it comes to custom T-shirt designs.
-
2Adjust your printer's settings. The printer settings will change the result, so experiment with the scale, paper type, and quality settings. Play with the printer’s quality settings and do a few test prints to figure out which settings give the sharpest image. For instance, the photo setting will give you the most detailed image while the regular or quick setting will result in a fuzzy, distorted image (which can be great for a rustic look!).
- If you want the graphic to cover 1/4 or 1/2 of the fabric, go to your printer’s advanced settings and adjust the scale to 25% or 50%. Set the scale to 100% to fill the entire sheet.
- Experiment by changing your printer paper settings to “matte photo,” “glossy photo,” or “semi-glossy photo” to find out which setting looks best with your graphic and the look you’re trying to achieve.
Advertisement -
3Cut a piece of fabric to 8.5 inches (22 cm) by 11 inches (28 cm). Use sharp fabric scissors to cut a piece of fabric into the same size as your printer paper. It may help to place a piece of printer paper onto the fabric beforehand to use as a cutting guide.[2]
- Consider using fabric that is 100% cotton, like a 200 count muslin for the best transfer results (and more vibrant colors).
- If your design has colors, use white fabric (or as close to white as possible) to make sure the colors stay true to the design.
- For black and white designs, feel free to use whatever color fabric you like so long as it’s not so dark that the ink won’t show up (i.e., black or dark navy ink won’t show up well on black or dark blue fabric).
- Make sure you trim rough or frayed fabric edges so they don’t get caught in your printer. Not only could this ruin your project, loose thread inside your printer could also damage its internal parts.
-
4Cut a sheet of freezer paper to 8.5 inches (22 cm) by 11 inches (28 cm). Use scissors or a crafting mandolin to cut the freezer paper to 8.5 inches (22 cm) by 11 inches (28 cm). You will be “marrying” the freezer paper and fabric together so they need to be the same size.[3]
- When purchasing freezer paper, make sure it says “freezer” on the box—don't confuse wax paper with freezer paper.
- If you’re using a craft mandolin and plan to transfer several prints, stack a few sheets at a time to cut down on time.


Ironing the Fabric to the Freezer Paper
-
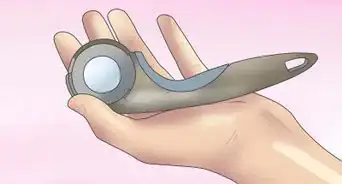
1Set your iron to the dry and high setting. Preheat the iron so it’s ready to go once you’ve lined up the fabric to the freezer paper. The high heat will heat the shiny wax on the freezer paper, which will act as a kind of glue.[4]
- Make sure the iron is on a safe, heat-proof surface and away from flammable materials like cleaning products, aerosol cans, and other items.
-
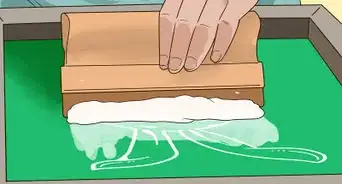
2Lay the fabric on top of the freezer paper and iron them together. Press the piece of fabric onto the shiny side of the freezer paper, aligning each corner closely as possible. Then, gently press down on the iron as you smooth it over the fabric. Be sure you run the iron over each edge to ensure each side is joined together.[5]
- This will join the freezer paper and fabric together, allowing both to pass through your printer.
- Iron on a smooth, flat surface for best results. If your ironing board has bumps, consider using a thin towel placed on a heat resistant countertop as a makeshift ironing board.
-
3Use sharp fabric scissors to trim off any fringe or rough edges. The ironing process may have produced more fringe or rough edges, so be sure to cut those off so they don’t jam up your printer. Check each edge and corner to make sure the 2 sheets are fully bonded.[6]
- If the conjoined sheets aren’t bonded in certain places like the sides or corners, go over those areas again with the iron.


Printing on the Fabric
-
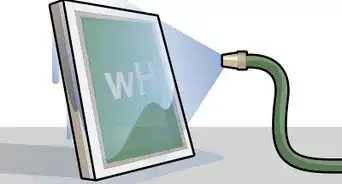
1Place the ironed sheet into your printer’s tray so it prints on the fabric. Be sure to place the fabric either face-down or face-up depending on how your printer feeds the paper from the tray to the printing area. You want the ink to go directly onto the fabric. If you’re not sure how your printer feeds paper through, do a test run by printing onto regular printer paper.[7]
- Only inkjet printers can print onto fabric, so double-check that your printer isn’t a laser printer.
- You may also want to do a test print of the image so the sizing, color, and orientation settings are correct. If not, you may need to adjust your printer settings.
-
2Double-check your printer settings and print. Before you press the print button, make sure that you’ve selected your desired print settings. For instance, you might want to select the highest quality settings possible or change the size of the print.[8]
- If your printer has a high-quality photo setting, select that one because it will give you the clearest image.
-
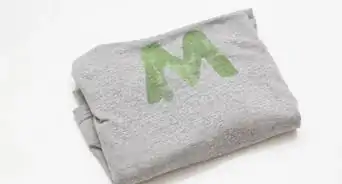
3Place the print onto a flat surface and let it dry for 24 hours. Place the printed product onto a dry, flat surface and let it dry for at least 1 day. Even if it feels dry to the touch, it’s better to wait to peel it off just in case.[9]
- It may be tempting to peel some of it back right away to get a peek, but doing so could cause the ink to run and, as a result, distort and smudge the image.
-
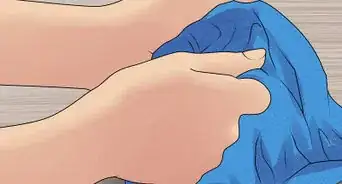
4Wedge your fingernail into a corner and peel the fabric and freezer paper apart. Once the ink is dry, wedge your fingernail into one of the corners between the two sheets and carefully peel them apart. Go slowly and be careful not to stretch or pull on the fabric.[10]
- It may help to place the bonded sheets near the edge of a flat surface and bend one of the corners back.


Setting and Caring for Your Printed Fabric
-
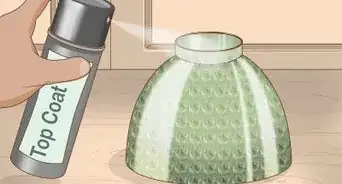
1Treat the printed fabric with a fabric-setting spray to keep it from fading. Purchase a fabric setting or finishing spray from any craft store. Hold the canister about 6 inches (15 cm) to 8 inches (20 cm) away from the fabric and coat the entire surface with an even layer. This will ensure the ink doesn’t rub off or wash away.[11]
- Some home-printing fabrics come pre-treated to help retain color better. These don’t require any setting sprays or sealants.
- Some fabric-setting sprays should be used while the ink is still wet—refer to the instructions on the bottle.
-
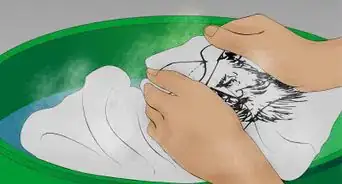
2Soak the printed fabric in hot water and fabric guard for 20 minutes. Fill a tray large enough to hold the printed fabric with about 32 fluid ounces (950 mL) of hot water and stir in the recommended amount of fabric guard. Stir it around until it’s well incorporated and then place the printed fabric into the solution for 20 minutes. Rinse it with cold water and let it dry for 24 hours.[12]
- Refer to the directions on the back of the bottle to determine how much you should use.
- Fabric guard acts as a protective shield on each fiber of the fabric. It will keep your graphic looking vibrant and protect the cloth from stains.
- This ink-setting method works best with pigment-based inks which are commonly used in printers geared toward high-quality photography prints. You can use it with dye-based inks as well, but note that a little of the dye may seek out of the fabric while it’s soaking.
-
3Spray the printed fabric with an upholstery protector. Hold the upholstery protector 6 inches (15 cm) to 8 inches (20 cm) away from the dried fabric and spray a layer onto the entire surface. Use a steady stream and work in lines instead of spraying it in a random fashion.[13]
- You may want to place the printed fabric onto a sheet of newspaper before spraying it to protect your floors or other surfaces.
- If you plan to regularly wash the fabric, it’s best to avoid upholstery protector and use a setting spray or solution.
-
4Wash the printed fabric in cold water, if necessary. If you used the printed fabric on something that’s going to require washing like clothing or a pillowcase, make sure to use cold water. You can use your regular detergent so long as it doesn’t contain bleach.[14]
- Avoid putting your printed fabric in the dryer because it might shrink the fabric and distort the image—especially if it’s mostly cotton. If you must use the dryer, choose a no-heat or low-heat setting.


Community Q&A
-
QuestionWill a printed fabric on freezer paper fade?
 Community AnswerIt depends on several factors. Inkjet ink by its nature will lose color when wet. Experiment before making your project. The freezer paper is just there to stiffen the fabric so it can go through the printer. It's the water that may cause the colors to run and fade. Laser printers burn color into the fabric and usually does not run or fade. Some inkjet printers have ink specifically for fabrics. One method to seal the color of the design into the fabric is to use heat from an iron. Iron the printed design. Again experiment to see if the colors run or fade when wet.
 -
QuestionDo I have to use a laser printer? My husband thinks laser ink is overpriced?
 Community AnswerYou have to use ink jet. Most have wet ink cartridges, not powdered toner, and this is what's required.
 -
QuestionDo I print on the fabric side or the freezer paper side? Do I remove the freezer paper once printed?
 RainiaraCommunity AnswerPrint on the fabric side (double check which way it needs to face when feeding into your printer). And yes, gently peel the paper and fabric apart after the ink has fully dried.
Warnings
- Finishing sprays and upholstery protectors should only be used in well-ventilated areas.⧼thumbs_response⧽
Things You’ll Need
Selecting an Image and Cutting the Fabric
- Freezer paper
- Fabric
- Fabric scissors
Ironing the Fabric to the Freezer Paper
- Iron
- Heat-resistant surface
Printing on the Fabric
- Printer
Setting and Caring for Your Printed Fabric
- Fabric-setting spray
- Water-soluble fabric guard (best for pigment-based ink)
- Upholstery Protector (optional)


References
- ↑ https://youtu.be/o2UzbGLaBK4?t=358
- ↑ https://quiltingdigest.com/how-to-print-on-fabric-with-freezer-paper/
- ↑ https://www.amomstake.com/diy-pillow-freezer-paper-image-transfer/
- ↑ https://www.pamashdesigns.com/blog/2017/5/22/ways-to-print-on-fabric-at-home-using-your-inkjet-printer
- ↑ https://www.pamashdesigns.com/blog/2017/5/22/ways-to-print-on-fabric-at-home-using-your-inkjet-printer
- ↑ https://www.amomstake.com/diy-pillow-freezer-paper-image-transfer/
- ↑ https://www.pamashdesigns.com/blog/2017/5/22/ways-to-print-on-fabric-at-home-using-your-inkjet-printer
- ↑ https://youtu.be/o2UzbGLaBK4?t=371
- ↑ https://youtu.be/o2UzbGLaBK4?t=578
- ↑ https://sewguide.com/printing-onto-fabric-with-inkjet-printer/
- ↑ https://youtu.be/o2UzbGLaBK4?t=465
- ↑ https://youtu.be/o2UzbGLaBK4?t=548
- ↑ https://www.pamashdesigns.com/blog/2017/5/22/ways-to-print-on-fabric-at-home-using-your-inkjet-printer
- ↑ https://www.smithsonianmag.com/smart-news/case-washing-clothes-cold-water-180955459/
About This Article

If you want to print an image but don’t want to spend money on fabric transfer paper, you can use freezer paper instead. Cut a piece of fabric and a sheet of freezer paper that are both 8.5by 11 inches. Set your iron to the dry and high setting, lay the fabric on top of the freezer paper, and make sure the shiny side of the freezer paper is facing the fabric. Iron the fabric smoothly onto the freezer paper so they adhere. Place the ironed sheet into your printer’s tray so it's set to print on the fabric side. Then, pick your image from your computer and send it to your printer. Once the image is on the fabric, allow it to dry on a flat surface for 24 hours. After the ink is dry, peel the fabric and freezer paper apart. To learn how to care for your printed fabric, keep reading!


