This article was co-authored by Haley Snyder. Haley Snyder is a former Division I Student-Athlete and Softball Player. With over a decade of experience, she specializes in softball mechanics, fundamentals, and pitching. Haley holds a BA and MA from Stanford University, where she competed in the PAC-12 Conference as a pitcher.
There are 9 references cited in this article, which can be found at the bottom of the page.
wikiHow marks an article as reader-approved once it receives enough positive feedback. This article received 17 testimonials and 80% of readers who voted found it helpful, earning it our reader-approved status.
This article has been viewed 668,037 times.
Softball is a fun game in which people of all ages can participate. Although not everyone can have a top-notch coach to help teach them the basics, learning how to play softball on your own is easy and enjoyable!
Steps
Understanding the Basics
-
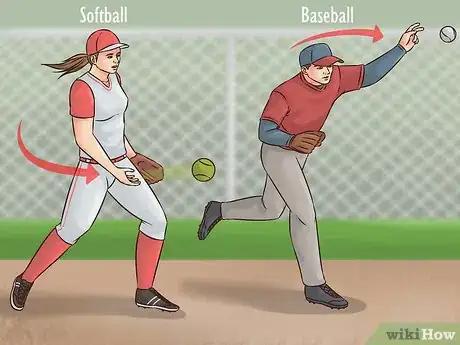
1Know the difference between softball and baseball. Softball and baseball are variations of the same game. The primary difference is that a softball is pitched underhand, while a baseball is pitched overhand. As the name implies, there is also a difference in the balls used.[1]
- Softballs are larger and a bit heavier than baseballs. Softballs are less dense and slightly softer than baseballs. Softballs are typically neon green or yellow in the interests of visibility (especially at night).
- Softball fields are typically smaller than baseball fields (because the reaction time of a softball pitch is a lot less then a baseball reaction time). Softball games last for seven innings instead of the nine innings typical of higher-level baseball games.[2]
- The bats used in softball have a wider barrel than the bats used in baseball.
-
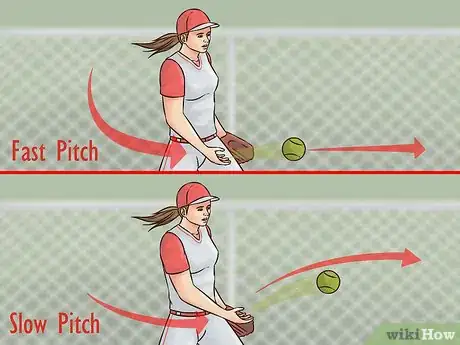
2Understand the difference between slow-pitch and fast-pitch softball. There are two types of softball competition, with slight differences between them. Both follow the same general rules.
- Slow-pitch is typically coed, and, as the name suggests, the ball is pitched by lobbing it in a high, slow arc toward home plate.[3]
- Fast-pitch is played primarily by women and features very quick pitches with large wind-ups.
Advertisement -
3Know the rules. Most softball games consist of seven innings, each with two halves. The first (or "top") half is when the visiting team bats. The second (or "bottom") half is when the home team bats. Each half-inning is played until the fielding team manages to get out three batters or baserunners.
- The pitcher will pitch to a batter until one of four things happens[4]
:
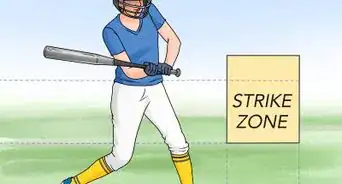
- The batter gets three strikes against him/her. A strike occurs when the batter swings at a pitch but misses it (or hits it foul with less than two strikes against him/her), or when the pitch passes through the strike zone but the batter does not swing at it.
- The pitcher throws four "balls," which are pitches that fail to pass through the strike zone and which are not swung at by the batter. In this case the batter "walks," meaning they is awarded first base.[5]
- The pitcher hits the batter with a pitch. In this case, too, the batter is awarded first base. (This applies only to fast-pitch softball. There is no such thing as a hit batter in slow-pitch.)
- The batter reaches base safely by virtue of a hit, a fielder's choice, or a fielding error (or rarer occurrences such as catcher's or runner's interference).
- To get a batter out, a pitcher can record three strikes against the batter, or a fielder can catch a batted fly-ball (in either fair or foul territory) before it hits the ground.
- If the batter hits a ground ball, they will be out at first base if a fielder can secure the batted ball and throw it to the first baseman who steps on first base before the batter can do so.
- To get a runner out, an infielder can tag the runner with the ball (or the gloved ball) while the runner is between bases.
- In the case of a "force out," a runner is forced to advance to the next base when there is nowhere else for him/her to go, and s/he may be put out by any infielder who while holding the ball steps on the base before the runner arrives there. In this case the fielder does not have to tag the runner. A force out commonly occurs when a batter hits the ball to an infielder, who throws it (or runs it) to first base before the batter can run there.
- When a batter hits a fair ball s/he may attempt to run as far around the bases as s/he thinks possible without being tagged out by the defense. Every time a runner crosses home plate, they score one “run” (or point) for their team.
- At the end of seven innings, the team with more runs wins the game. If the score is tied, the choice can be made to let the game end in a tie or play one or more extra innings until one team is ahead at the end of an inning.
- The pitcher will pitch to a batter until one of four things happens[4]
:
-
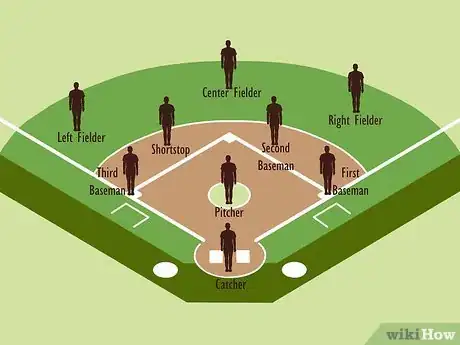
4Know the positions. When a team is fielding (playing defense), each player is assigned a specific position on the field. There are two general areas of the field, the infield and the outfield.
- The infield is the dirt section of the field. The infielders consist of the pitcher, catcher, first baseman, second baseman, shortstop, and third baseman.
- The outfield is the grassy section farther from home plate consisting of left, center, and right field with an outfielder stationed in each. Some leagues (particularly in slow-pitch) allow a fourth outfielder such that the positions are left, left-center, right-center and right field.
- Although the catcher and pitcher are infielders, they are specialized positions that involve added practice time, often separate from the rest of the team.
Gathering Your Equipment
-
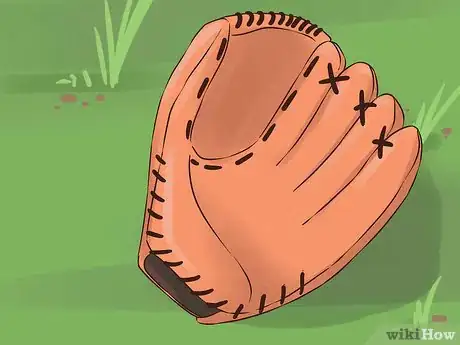
1Find the right glove. When you're playing defense, you'll wear a leather glove on your non-throwing hand to help you catch thrown or batted balls.[6]
- If you purchase a new glove, you will want to "break it in" by removing the stiffness of the new leather. There are several methods of doing this, including baking the glove in an oven with special oil applied, leaving it in the sun, or playing a lot of catch with it.
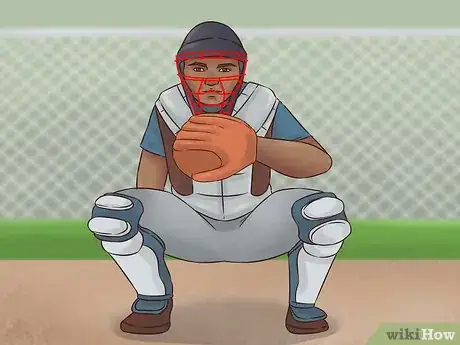
- Playing the catcher position in fast-pitch requires a special glove. The gloves of catchers (and first basemen) are called mitts. They are made of heavier construction than the typical softball glove.[7]
-
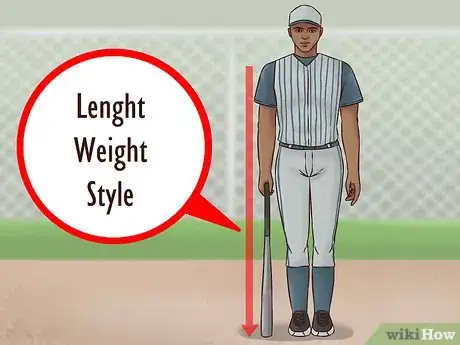
2Choose a bat. Softball bats are not all the same. They must be chosen with a player’s size and strength in mind. When you look for a bat, look at three primary factors: the length, the weight, and the style.
- To find a bat that is the right length, stand up straight and hold a bat by its knob at the end. If you can hold your arm straight down, and the bat touches the ground, it is the right length for you. If you have to bend your elbow, it is too long. If the bat doesn't touch the ground, it's too short.
- To find a bat that is the right weight, look at the drop. The drop is the numerical difference between the bat's height (in inches) and its weight (in ounces). The drop will range anywhere from -8 to -12. Lighter bats (near -12), are good for weak or slow batters. Heavier bats (near -8), are best for strong batters. You can also test the suitability of the bat's weight by placing it in your throwing hand and holding it straight out in front of you. If you can easily hold it at arm's length for a full minute or more, it is not too heavy for you.
- There are two main types of softball bats available, aluminum and composite. Each type is appropriate for both beginners and experienced players, but aluminum bats are more popular. These are also available in single- or double-walled construction. Single-walled are cheaper but slightly less effective than double-walled bats. Composite bats will hit the ball farther, but they can crack easily in cold weather.
-
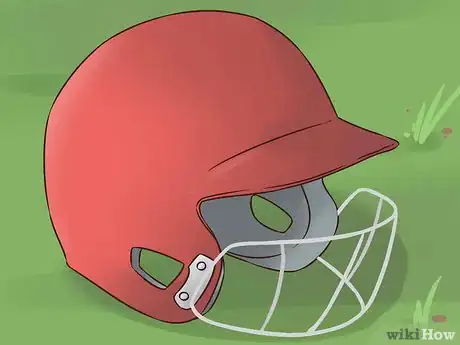
3Purchase a batting helmet. Playing softball, especially fast-pitch, can be dangerous if you don’t take safety precautions. Most fast-pitch leagues require batters to use a caged batting helmet (pictured above), but even if they don’t, it is best to wear one when you are up to bat.
-
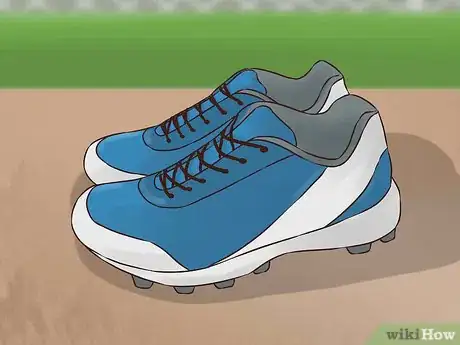
4Get a pair of cleated shoes. Cleats are used in several sports and give you better traction while running after a ball or between bases. For softball, rubber or plastic cleats are appropriate. Metal cleats are typically banned in softball leagues, as they pose a danger to sliding runners and infielders who try to tag them.
-
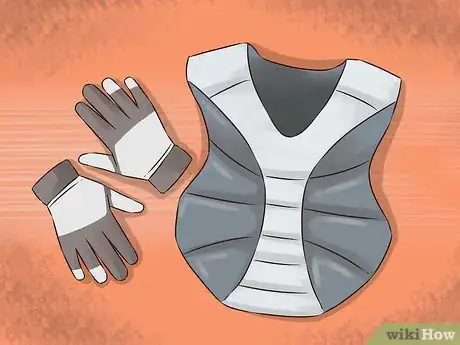
5Look for additional, optional gear. These include batting gloves, which cushion the hands, protect against blisters, and improve bat grip. If you are a fast-pitch catcher, you will want to use a mask, chest protector and shin guards. Some players who frequently slide into bases choose to wear sliding pads.
Learning to Bat
-
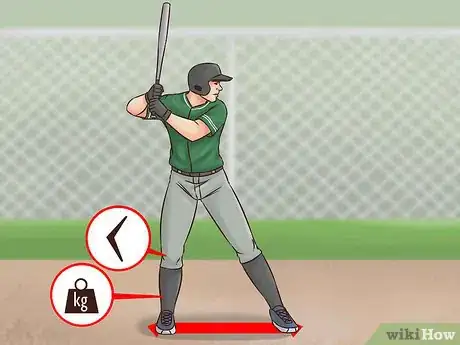
1Ready your stance. When you’re up to bat it is not enough just to stand at the plate. Here are a few batting-stance tips to keep in mind every time you go up to hit:
- Keep your feet at shoulder width from each other. Place them equi-distant from home plate (unless you're trying to hit down one foul line or the other).[8]
- Bend your knees and lean slightly toward home plate.
- Put more weight on your back leg. When you swing you will push off using your back leg for power.
- Keep the appropriate distance from the plate. To know how far away you should stand, stick your bat straight out over home plate as if you were in mid-swing. The barrel of the bat should be above the center of the plate. If not, back up or move closer to the plate.
-
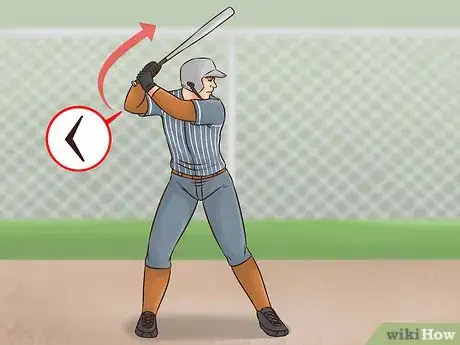
2Hold the bat in a comfortable grip. When you bat you should be holding the rubber grip near the knobbed end. Your throwing hand should be higher on the bat than your non-throwing hand, and your hands should be touching each other as they grip the bat.
- Line up your knuckles on the handle of the bat.
- When you take your stance the bat should be held at a slight angle from vertical above your back shoulder.
- Hold the bat with your hands near your ear.
-
3Prepare to swing. Maintain your batting stance as the pitch comes toward you. Keep your knees bent and the bat positioned near your ear.
-
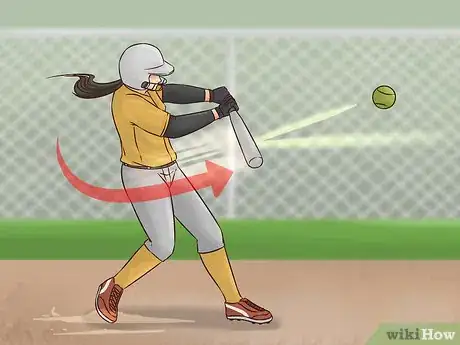
4Swing to hit the ball. Keep the bat horizontal as it sweeps through the strike zone. Don't reach for a bad pitch. Patiently wait for a good pitch. Swinging at a bad pitch rarely results in a hit.
- Swing “shoulder to shoulder.” This means that your chin starts out near your non-throwing shoulder, and you swing all the way around so that your throwing shoulder finishes near your chin.
- Swing hard with a strong follow-through. This means to continue the swing until the bat almost touches your non-throwing shoulder. If you hit the ball, don’t drop the bat as soon as you make contact, as you will lose half of your power. Use all your strength and continue the swing until the bat has moved to the other side of your body.
- Move your feet. Most batters take a small step with their front foot toward the pitcher as they swing. The back foot normally remains planted, although you may find that you pivot on the ball of your back foot as you swing.
- An exception to the rule of keeping your back foot planted on the ground occurs if you're trying to hit to the opposite field. For instance, if a right-handed batter is trying to hit to right field, s/he may want to move her/his right foot farther from the plate just before swinging, thus facing more toward right field.
- Rotate your body with the swing. Remain flexible while you swing by twisting your torso slightly. This will add power to your swing.
- Keep your eye on the ball. Watch it all the way from the pitcher's hand to the point of contact with the bat. This will improve your chances of hitting the ball solidly.
- Once you hit the ball, softball etiquette requires that you not throw the bat. Instead, drop it as carefully as possible outside the baseline so that nobody trips over it.
-
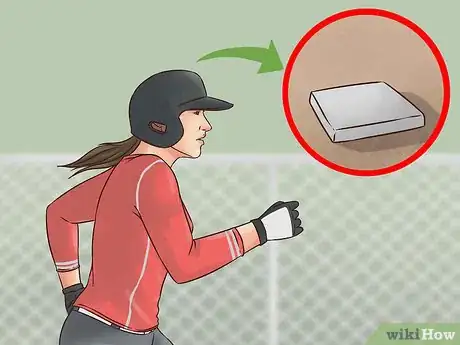
5Move toward first base once you've hit a fair ball. Your goal is to get on base safely.
- If you're not sure whether your batted ball will land in fair territory, run hard toward first base until an umpire has indicated the ball is foul. Your first-base coach will help you decide whether to stop at first base or keep running. Your job is making it safely to or beyond first base rather than watching what is happening in the outfield. That's the coach's job.
Learning to Throw
-
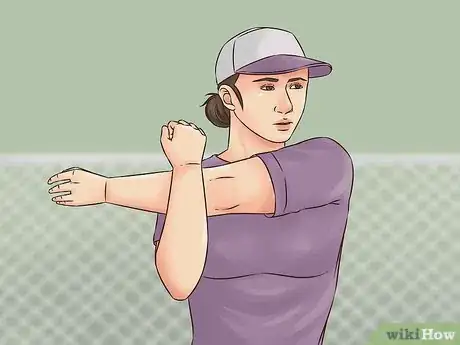
1Stretch your arms before starting to throw. Injuring your arm is easy to do if you don’t warm up your muscles first.
-
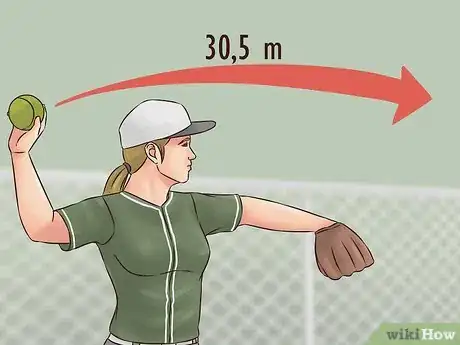
2Start by throwing to a nearby target. Although it's easy to get excited and start throwing at a target 100 feet (30.5 m) away, this is definitely not what you should do. Throwing too hard at first can increase the likelihood of injuring yourself.
- Start throwing at a target ten feet away. This may seem too close, but as your arm gets loosened up you will gradually back away from your target.
- To emphasize basics, start out by throwing from a kneeling position while holding your throwing elbow in place. This will force you to snap your wrist as you throw, a technique you should always use when throwing, because it adds power to your throw. After doing this for a while you can progress to standing.
- After every twenty or so throws you can back farther from your target. Don't back so far that you're making uncomfortably long throws repeatedly. Save that for the games.
-
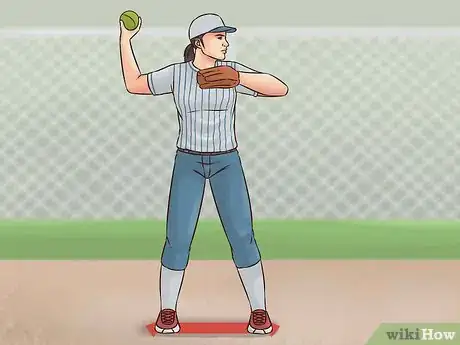
3Get in the correct throwing stance. Start by standing perpendicular to your line of throw. When you begin the throw your throwing shoulder will face away from your target.
- Your feet should be level with each other and shoulder-width apart.
- To start a throw, you will probably want to hold the ball inside your glove near your chest. Keep a grip on the ball while it's in the glove.
-
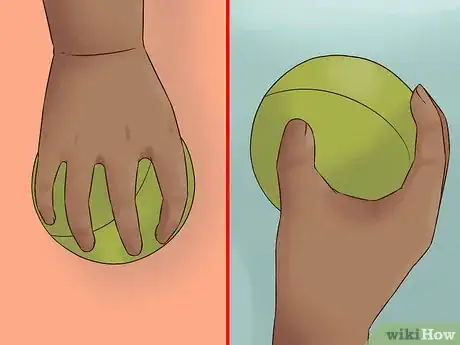
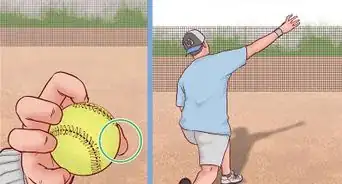
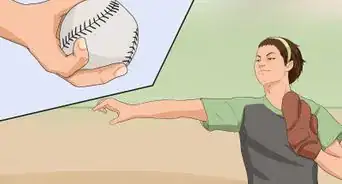
4Grip the ball correctly. The best way to hold the ball is with your fingertips touching a seam.[9]
-
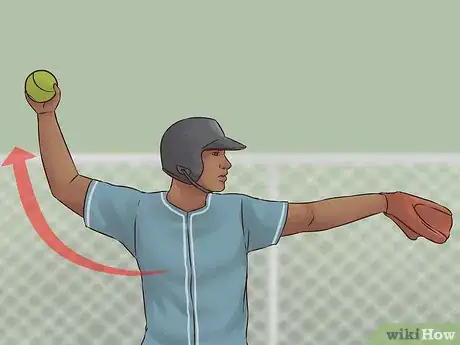
5Wind up your arm to throw. Pull the ball from your glove, drop your arm down and back, then bring it up and around past your head to throw.
- Avoid drawing your elbow straight back as if you were pulling a slingshot or bow and arrow. This will limit the power and distance of your throw.
- Don’t worry about dropping your throwing arm all the way down your side before bringing it back and around. Wind up your arm, and use the full weight of your body to aid in making the throw.
-
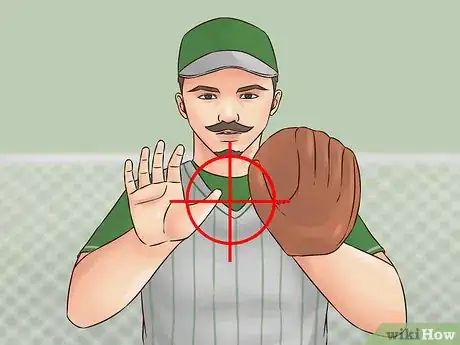
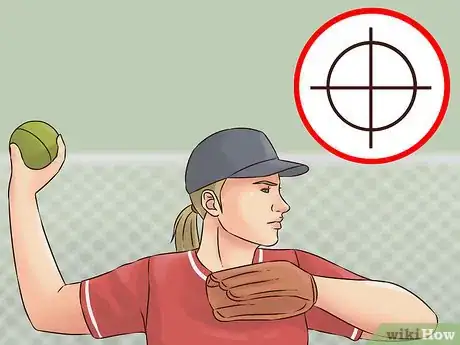
6Aim for your target. If you are playing catch, your target should always be your partner’s chest. This goes for game throws, too.
-
7Make the throw. Bring your throwing arm down and back, and then around past the top of your head. Release the ball when your arm is fully extended in front of you. The release point depends on how high and far you want to throw. A higher release point means a higher (and longer) throw.[10]
- You should have a strong follow-through on every throw you make. Your throwing hand should end up near the middle of your body after you have released the ball. This will help prevent you from developing a sidearm delivery and causing injury to your shoulder or elbow.
- Turn your shoulders and head toward your target on every throw. Be sure to maintain eye contact with your target. This will help direct the muscles in your body to throw where you want. Looking away can cause the ball to fly off in the wrong direction.
- Take a small step with your front foot on a short throw, a longer step for a longer throw.
- Use your gloved hand to point at your target as you wind up to throw, and then drop that arm to your side as you deliver the ball.
- Practice different kinds of pitches so it's harder for the batter to adjust.[11]
-
8Don’t worry about speed at first. The most important part of throwing is accuracy, not speed or strength. When you are first learning, focus on simply getting the ball to your target. You'll develop speed soon enough.
- As you practice, try pitching the ball at different speeds. Eventually, try having at least 1 pitch that's at least 10 mph (16 km/h) faster than your other pitches.[12]
Learning to Catch
-
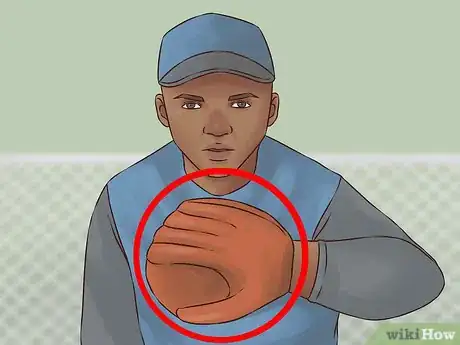
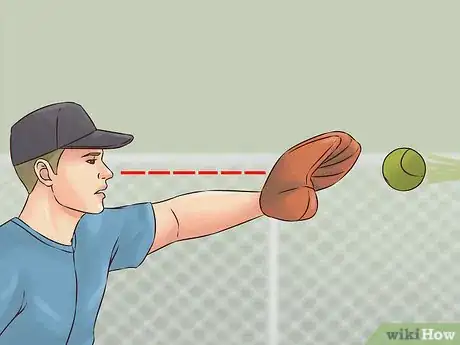
1Hold your glove properly. When you are playing catch it's important that your glove be held in front of your chest.
- Don't hold your glove with the pocket facing you or with the fingers pointing toward the ground. If you try to catch a ball like that, it could bounce up and hit you in the face.
- Don't hold your glove vertically, because if you don’t have a good grip on the ball it might pop out of your glove right after you’ve caught it.
- Hold the glove wide open so that there is room for the ball to land. If your glove is even partially closed, the ball may hit the outside of the glove and fall to the ground instead of landing inside.
-
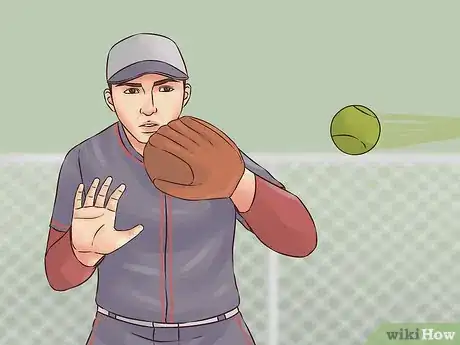
2Get in the ready position. If you are playing catch, the best position to be in is the “ready position,” with your knees slightly bent and your torso leaning slightly forward on the balls of your feet. This allows you to shuffle in any direction to catch a ball not headed straight for you.
- Keeping your feet too close together could cause you to trip or make it harder to get a good jump on a ball hit far away from you.
- Keep your eyes open. Softballs, contrary to what the name suggests, can be painful if they hit you. Keep your glove in the ready position to catch a stray ball coming your way.
-
3Play catch whenever you can. The best way to practice catching is simply to play catch. Practice throwing and catching in the ready position. Concentrate on holding your glove the right way.
- To start, have balls thrown toward your chest. This is the most basic catching practice and will help you to warm up.
- Squeeze the ball in your glove every time you make a catch to keep it from bouncing out of the glove. Use your throwing hand to trap the ball inside as soon as it enters the glove.
- Have your partner throw balls slowly to start before making stronger throws. This will help you get used to the contact and grip necessary to catch the ball.
-
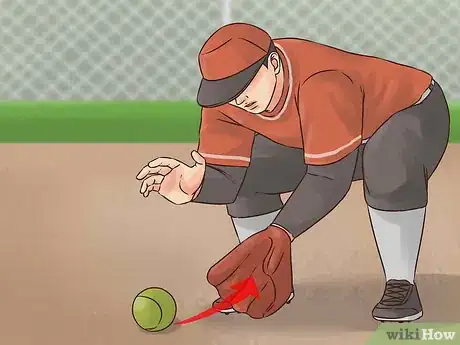
4Learn to catch grounders. A grounder is a ball hit or thrown that rolls or bounces along the ground. You catch them with a different method than balls in the air.
- Get in the ready position, but instead of holding your glove to your chest, hold it near the ground. The tips of the fingers should touch the dirt or grass to prevent the ball from rolling under the glove.[13]
- Be ready to move to either side, as rocks or tufts of grass can cause the ball to make a sudden change in direction.
- Although your glove should be open toward the ball with the fingertips touching the ground, don’t hold it so that the ball could bounce up and hit you in the face. Keep it at a slight angle to prevent this.[14]
- Stand up after catching a grounder to make a throw. Don’t try to make a throw from your position near the ground.
-
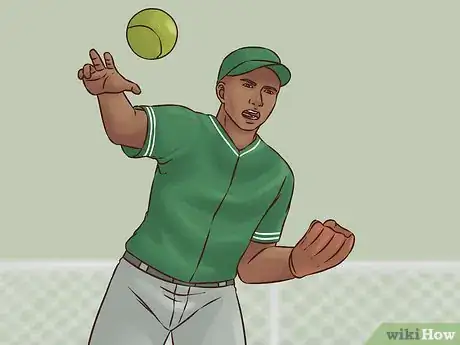
5Learn how to catch pop-flies. A pop-fly is a ball hit high in the air above the infield or shallow outfield.
- Hold your glove near your face.
- Move under the ball. If you need to back up, don't run backwards, because you could trip and fall. Instead turn your body so that you can run back sideways while looking up at the ball.
- Position yourself so that you don't have to reach out to catch the ball. Stand directly beneath it so that you catch it near your face. Reaching for it will increase the likelihood that the ball will bounce off or out of your glove.
- If necessary, block out the sun or field lights with your glove to help you see before making the catch.
- Bring the glove back to your chest before grabbing the ball with your throwing hand. This will help you realign your body into the proper throwing position.
Expert Q&A
-
QuestionHow do you become a good softball pitcher?
 Haley SnyderHaley Snyder is a former Division I Student-Athlete and Softball Player. With over a decade of experience, she specializes in softball mechanics, fundamentals, and pitching. Haley holds a BA and MA from Stanford University, where she competed in the PAC-12 Conference as a pitcher.
Softball Player Try to throw different types of pitches during the game. For instance, you'll want a pitch that works well inside and another that works well outside.
 -
QuestionHow do you teach a beginner to throw a softball?
 Haley SnyderHaley Snyder is a former Division I Student-Athlete and Softball Player. With over a decade of experience, she specializes in softball mechanics, fundamentals, and pitching. Haley holds a BA and MA from Stanford University, where she competed in the PAC-12 Conference as a pitcher.
Softball Player Remind them to throw the ball underhand when they're pitching and overhand when they're fielding.
 -
QuestionHow do you tell if you hit a home run?
 Community AnswerJust because you hit the ball high, doesn't mean it was a home run. If the ball goes over the fence, that is an automatic home run. Also, if you hit one far but it doesn't go over the fence, it could still be a home run - but you would have to run very fast, and the fielders would try to get you out.
References
- ↑ https://americanprofile.com/articles/baseball-vs-softball/
- ↑ https://americanprofile.com/articles/baseball-vs-softball/
- ↑ http://www.mahalo.com/how-to-play-softball/
- ↑ https://web.mst.edu/~ima/rules/Softballrules.html
- ↑ https://web.mst.edu/~ima/rules/Softballrules.html
- ↑ https://protips.dickssportinggoods.com/sports-and-activities/softball/choosing-the-right-softball-glove
- ↑ https://protips.dickssportinggoods.com/sports-and-activities/softball/choose-softball-catchers-mitt
- ↑ https://www.softball-spot.com/softball-hitting-basics-1/2116/
- ↑ https://www.softball-spot.com/softball-pitching-part-1/2170/
- ↑ https://www.softball-spot.com/softball-pitching-part-1/2170/
- ↑ Haley Snyder. Softball Player. Expert Interview. 23 June 2021.
- ↑ Haley Snyder. Softball Player. Expert Interview. 23 June 2021.
- ↑ https://www.coachup.com/nation/articles/fielding-a-ground-ball
- ↑ https://www.coachup.com/nation/articles/fielding-a-ground-ball
About This Article
Softball is a fun sport where 2 teams, consisting of at least 9 players each, try to score runs by hitting a softball, rounding the bases, and crossing the home plate. Softball games are 7 innings long. Each inning has 2 halves: the top half and the bottom half. To start the top half of the first inning, the fielding team splits up into 9 positions on the field: pitcher, catcher, first baseman, second baseman, third baseman, shortstop, left fielder, center fielder, and right fielder. The batting team decides on a batting order and the first batter steps up to the home plate. The pitcher throws the ball to the batter using an underhanded throwing motion and the batter attempts to hit the ball. The batter's goal is to successfully hit the ball into fair territory and run around as many bases as possible. Once the batter runs around all 3 bases and crosses home plate without getting out, they score a run for their team. The 3 most common ways a batter gets out is by hitting the ball up in the air so that a fielder is able to catch it before it hits the ground, by swinging and missing the pitch 3 times, or by hitting a ground ball and being tagged by a fielder with the ball while running between the bases. Once the batter hits the ball into fair territory, they must run to at least first base without getting out. The batter can try to run more than 1 base but they must stop on a base without being tagged out to be “safe.” At this point, the next batter steps up to the plate and takes their turn. Once the fielding team manages to put out 3 batters or baserunners, the top of the first inning is over. During the second (or "bottom") half of the inning, the teams switch positions so the fielding team gets a chance to bat. Gameplay continues this way for 7 innings and the team with the most runs after 7 innings wins the game. To learn what kind of equipment you’ll need, read on!
