This article was co-authored by Anthony "TC" Williams and by wikiHow staff writer, Christopher M. Osborne, PhD. Anthony "TC" Williams is a Professional Landscaper in Idaho. He is the President and Founder of Aqua Conservation Landscape & Irrigation, an Idaho Registered Landscape Business Entity. With over 21 years of landscaping experience, TC has worked on projects such as the Idaho Botanical Garden in Boise, Idaho. He is a Idaho Registered Contractor and a previously Licensed Irrigator in the State of Texas.
This article has been viewed 284,008 times.
Moving a shed can be very simple or more complex depending upon a host of factors including the shed’s size and condition, the distance of the move, and the means of moving to be employed. In every case, however, careful preparation in planning the move and securing the shed properly will pay off. Be smart, be safe, and you can move a shed to avoid drainage problems, get more or less sunlight, update your garden design, or take it with you to your new home.
Steps
Lifting the Shed
-
1Secure the shed structure. Sheds are made to be sturdy on the ground, not while being lifted, pushed, or pulled. Taking time beforehand to support weak points will save you a lot of trouble during and after the move.[1]
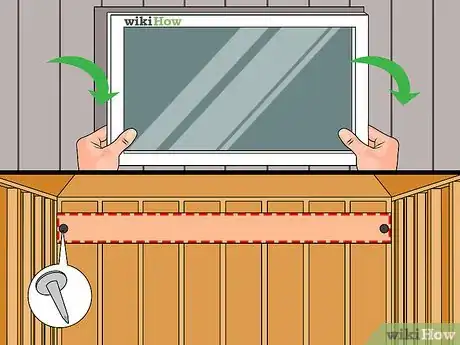
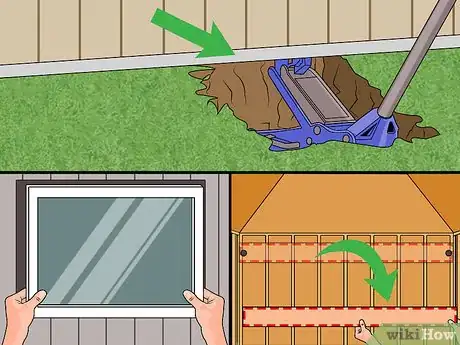
- Remove any windows. Any shifting or warping of the structure could break them.
- Help the shed keep its shape by attaching boards with nails or screws into the studs from corner to corner on each wall, and in an X pattern across the floor. Add additional diagonal supports across window and door openings, as these are weak points during a move.
-
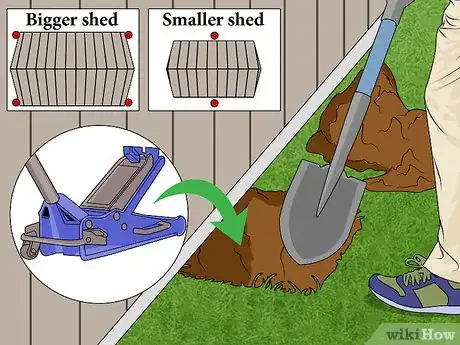
2Dig under the shed so you can place jacks to lift it. Either dig four access holes at each corner, or (for smaller sheds only) two access holes in the middle of opposite sides. Dig only as much as is needed to place your chosen jack securely under the shed frame.[2]
- You may be able skip the digging and tip and lift a smaller shed to fit the jack underneath, especially if it is sitting on a concrete or brick pad. If so, make sure you support the structural integrity first and tip and lift with extreme caution.
Advertisement -
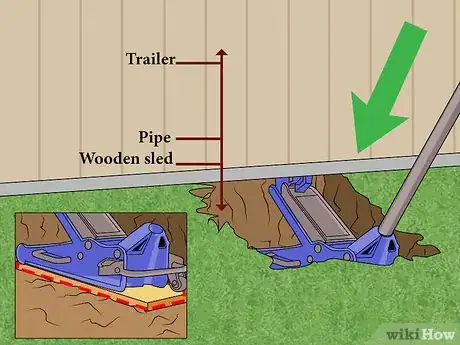
3Jack the shed up to the minimum necessary height. In the best-case scenario, you’ll have multiple jacks so that you can lift the entire structure all at once. More realistically, though, you’ll probably have to jack up one side, prop it up securely with blocks or lumber, then relocate the jack and continue the lift. An automobile jack is a good choice if it will support the load. If not use a larger, hydraulic air/manual bottle jack.[3]
- Another method is to use a length of steel angle iron or multiple pieces that span the entire length of the structure's side, being sure the the jacks will fit securely under the upper side of the angle iron. Attach it by drilling holes in the angle iron at each stud location and securely bolting it in place just high enough to get the jacks in place. Then, operate the jacks in unison and slowly lift the structure.
- If you’re going to move the shed by dragging it on a makeshift wooden sled, you won’t have to jack it up very high. If you’re rolling it on pipes, you’ll need to lift it a bit higher, and if you’re putting it on a trailer hitched to a truck, even higher still.
- Jack up the shed only as high as necessary. The higher it is raised, the more careful you need to be. Make sure all jacks and supports are level, secure, and supporting the structure.
- You can also make repairs to damaged or rotted areas at the bottom of the shed while it’s securely lifted off the ground.
Moving by Hand
-
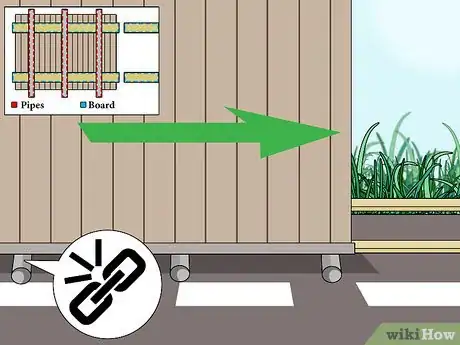
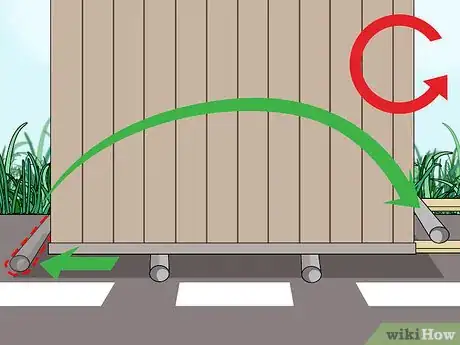
1Prepare pipes and tracks. If you’re moving the shed across your yard, you can roll it on a “conveyor belt” of sturdy pipes. Choose pipes that are longer than the shed and sturdy enough to hold its weight (but not too heavy for you and a friend to lift and move). Thicker walled schedule 40 PVC pipe with a diameter of at least 4 inches (10.2 cm) will often work for smaller sheds, though you should ensure as best as you can that they will support the load.[4]
- Three pipes are often sufficient for smaller sheds. Space out the pipes beneath the shed (to support its weight) and perpendicular to the direction you’ll be moving (so they can roll forward in that direction).
- Especially if you’re moving the shed over soft ground, use two pairs of long, wide boards as tracks over which to roll the pipes. 2" x 10" boards may be a good choice, and consider doubling them to create a 4" base to ensure the boards do not fail. Lay them out like railroad tracks pointing in the direction you’re heading; place one pair beneath the pipes and shed, and one pair in front of that.
-
2Roll, reposition, and repeat. If your shed is still jacked up over the rolling pipes, carefully ease it down onto them. Then, slowly push the shed in the direction you want to go. It is important to emphasize that carefully planning and controlling your movements is extremely important, nor should you underestimate the total weight of the structure. You’ll almost certainly need additional assistance, with the number of helpers depending on the size of the shed. It’s better (and safer) to have too much help than too little.[5]
- As you push the shed forward, the pipe nearest to you will “pop out” from underneath the shed. Carry it around to the front and roll the shed onto it. You will repeat this process over and again until you reach your destination.
- If you are using wooden tracks underneath the pipes, reposition them as you go as well. Think of it as laying a railroad track in front of a (slowly) moving train by ripping up and reusing the tracks now behind the train.
-
3Reverse the lifting process. Once you reach your destination, you may be able to simply push a smaller shed off of the pipes and into place. Especially if the shed is larger or not overly sturdy, it is probably best to utilize your jacks and supports to ease it back down into place.[6]
- Make sure the destination is prepared and level.
- Make sure the shed is still level and square as you remove the braces and prepare it for use again. Make repairs as needed.
Moving by Machine
-
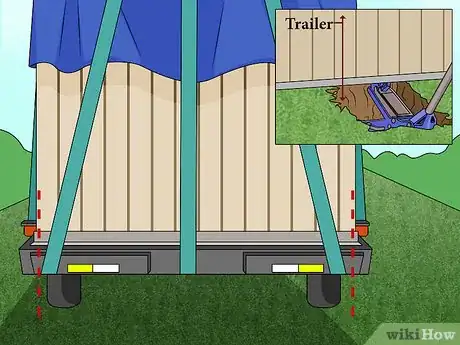
1Place the shed on a trailer. If you are moving your shed farther than across your property, you’ll have to place it securely in a vehicle trailer. If possible to do so safely, jack the shed up high enough that you can simply slide it onto the trailer. Otherwise, you will have to use the trailer’s ramp (or fashion your own) and employ a careful combination of pulling, pushing, and lifting to get the shed into place.[7]
- Make sure the shed is centered on the trailer and secured properly with strong, snug strapping.
- Cover any roof shingles with a secure tarp; high speeds can cause them to shear off. You may also want to cover any window openings with plywood, whether the windows have been removed or not.
-
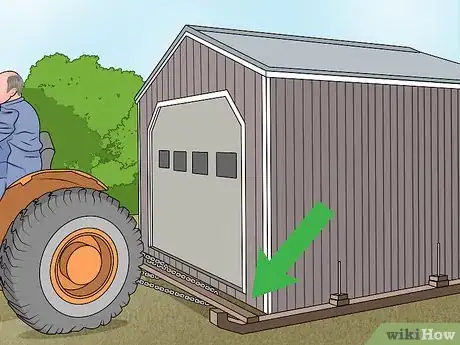
2Drag the shed on a sled. If you have a large yard and fairly level ground, you may want to drag the shed on a makeshift wooden sled, using the power of a pickup truck (or possibly a tractor for smaller sheds). If so, make sure you secure your pulling rope or chain around the shed, not to the sled, or the latter will simply be pulled out from underneath as the truck moves.[8]
- Fashion the sled out of plywood sheets or a similarly thin, fairly smooth material. Make sure that it is larger than the base of the shed. The weight of the shed should pin the sled underneath while moving; otherwise, secure it to the shed structure with screws.
- Wrap the tow line around the entire shed, about midway up the side walls. Latch, hook, or tie it on the side facing the back of the truck so that it is securely snug in place, then run the line and secure it to the vehicle’s tow hitch.
- Drive slowly and steadily, avoiding lurches forward or quick stops. Have a couple of helpers keep an eye on the shed and help guide it as needed.
-
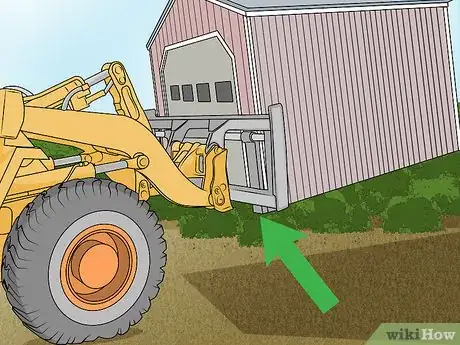
3Use a forklift or a crane. If you have access to a forklift or a “mule” (a machine similar in appearance to a typical forklift), you can use one of these to relocate a secured and propped-up shed with relative ease. And, if you happen to be remodeling your home and there is a crane being used to lift roof trusses, etc., you can use it to quickly move the shed from your front yard to your back, for instance.[9]
- Make sure you have been properly instructed in the safe use of such equipment before trying to move your shed with it.
- Make sure the shed is properly secured to the machine with heavy-duty strapping.
Avoiding Mistakes and Dangers
-
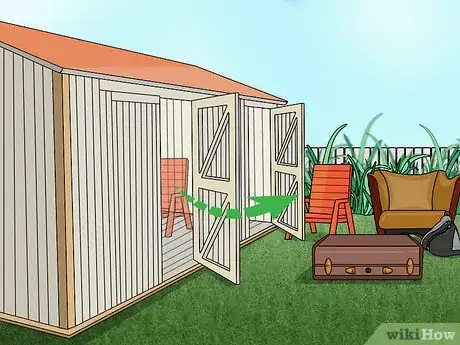
1Empty the shed. Yes, now is the time to empty out the shed and get rid of the junk you don’t need any more. Don’t try to save a bit of time by lifting and relocating a filled shed. Excess weight and shifting, unsecured materials are not conducive to a happy shed moving experience.[10]
-
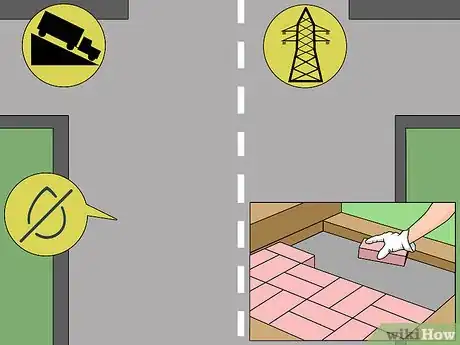
2Plan and clear your path. Don’t pick up the shed first and then try to figure out where it’s going and how to get it there. Make sure there is a clear, open, sufficiently wide, relatively dry, and not-to-steep path between the shed’s present and intended locations. Clear, level, and prepare the shed’s “landing spot” in advance as well; lay down a concrete or brick pad if desired.[11]
- Make sure there are no hanging tree branches in the way as well. And, depending upon the size of your shed, take special note of any electrical lines that might be in the way.
- It can't be emphasized enough, be sure you have planned out exactly how you will move the shed and pay close attention to controlling your movements. Do not underestimate the total weight of the shed.
-
3Know your limits. If you are unsure of your ability to move a shed safely, either hire or follow the lead of someone who knows what they’re doing. You don’t want to destroy your shed while trying to lift or move it, and you certainly don’t want the shed falling on you due to improper lifting or securing.[12]
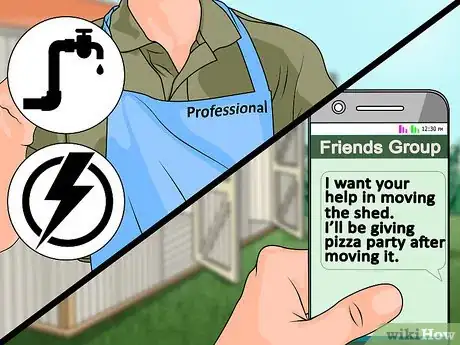
- If the shed is proving too heavy to push, bring in some more helpers before continuing. Bribe your buddies with pizza and their beverages of choice afterward.
- If you have electricity, water, or any other utilities running to the shed, hire a professional to make the disconnections.
-
4Disassemble and reassemble the shed. If the shed is simply too large and/or too fragile, your best option for salvaging and relocating it may be to tear it apart and rebuild it. Remember, that’s how London Bridge ended up in Arizona![13] Of course, you might also just decide it’s time for a new shed by this point.
References
- ↑ http://www.secrets-of-shed-building.com/Moving_a_storage_shed.html
- ↑ http://www.secrets-of-shed-building.com/Moving_a_storage_shed.html
- ↑ http://www.backyardbuildings.com/blog/2014/move-a-shed-easily/
- ↑ http://www.shedliquidators.com/blog/2013/how-to-move-a-shed/
- ↑ http://www.shedliquidators.com/blog/2013/how-to-move-a-shed/
- ↑ http://www.backyardbuildings.com/blog/2014/move-a-shed-easily/
- ↑ http://www.backyardbuildings.com/blog/2014/move-a-shed-easily/
- ↑ http://www.secrets-of-shed-building.com/Moving_a_storage_shed.html
- ↑ http://www.backyardbuildings.com/blog/2014/move-a-shed-easily/
About This Article
Before you try to move a shed, remove any windows so they don’t break, and secure the structure by nailing or screwing board into the studs from corner to corner on each wall, and in an X pattern on the floor. Dig under the shed so you can place jacks to lift it. If you’re moving a large shed, you will need a jack at each corner, or you may only need 2 jacks for smaller sheds. To move the shed a short distance, create a conveyor belt out of sturdy pipes and boards and roll it to its new location, then gently ease it down. Read on to get tips from our landscaping reviewer on how to move the shed with a machine!
