This article was co-authored by wikiHow Staff. Our trained team of editors and researchers validate articles for accuracy and comprehensiveness. wikiHow's Content Management Team carefully monitors the work from our editorial staff to ensure that each article is backed by trusted research and meets our high quality standards.
There are 17 references cited in this article, which can be found at the bottom of the page.
The wikiHow Video Team also followed the article's instructions and verified that they work.
This article has been viewed 55,226 times.
Learn more...
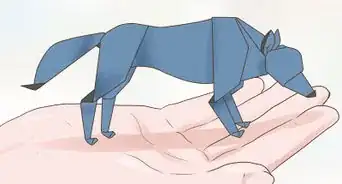
An origami whale is a fun project for anyone who loves marine life. Making a whale is relatively simple for anyone who knows some basic origami folds. You will need a piece of origami paper and a pair of scissors. Carefully fold the paper to create the whale’s body and small details like the flippers and tail.
Steps
Making the Guidelines
-
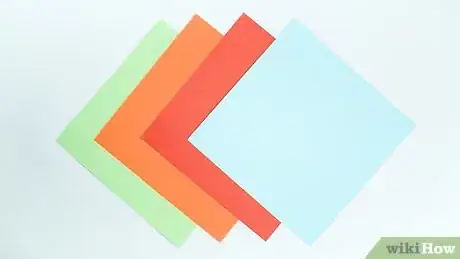
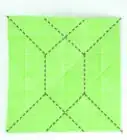
1Lay a square piece of origami paper on a flat surface. A good starting paper size to use is 15 in × 15 in (38 cm × 38 cm). If your piece of paper has a white side and a colored side, place the colored side face down on the table. That side will form the outer part of the whale.[1]
- Bigger pieces of paper are easier to work with. If you’re a beginner, practice folding techniques with a bigger piece of paper.
-
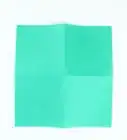
2Fold the paper in half, open it, and fold it in half the other way. Rotate the paper until it looks like a diamond with 1 corner pointing towards you. Bring the bottom point to the top point and flatten the page. Afterward, open the paper and repeat the fold with the opposite corners.[2]
- The paper will have a horizontal and vertical crease running through its center. These creases are guidelines you can use to help you fold the paper into the shape of a whale.
Advertisement -
3Fold the top edges to the center crease. Start with the right side. Bring the right edge over until it aligns with the vertical center crease. Carefully flatten the paper to create another crease. Repeat this with the top left edge without opening the paper back up.[3]
- Make sure the paper is oriented in a diamond shape before you fold it.
- To make a good crease, hold the paper still with a free finger. Pin the flap of paper in place as you smooth it out.
-
4Flip the paper over and bring the tail to the top point. Your paper will look like a kite at this point. Position it so the thin tail points toward you. Then, bring the tail up until it is over the uppermost corner and crease the fold.[4]
- If your paper has a white backside, you will be making this fold on the colored side.
Creating the Whale’s Shape
-
1Turn the paper over and open the pockets with your finger. The folded kite will have 2 little pockets along its bottom edge. Grasp the flaps by their free edges in the center of the paper. Use your finger to move the pockets away from the table. Push against their free edges to make them stand up.[5]
- For the best result, work with 1 pocket at a time.
-
2Bring the pocket’s tip over to the center and flatten it. When you lift the pocket flaps away from the page, the paper’s left and right corners will also lift up. Push against the outside edge of each pocket to bring the corner over to the center of the paper. Then, smooth them out to form a crease.[6]
- When this fold is done correctly, the pockets will form big triangles. The paper will look like an uneven diamond.[7]
-
3Fold the paper’s top layer straight down. Slide your fingers around the edges of the paper. Separate the top layer from the paper underneath it, then bring the point down. The paper will have a crease about ¼ of the way up from the bottom, level with the diamond’s left and right corners. Fold the paper down along this line.[8]
- Make sure you only fold the top layer, or else the paper won’t be in the correct shape for the next step. After you make the fold, the paper will be in the shape of a perfect diamond.
-
4Flip the paper over and push the fin flaps to the left. After you turn the paper over, orient it so the diamond’s longer corners point to the right and left. The flaps are in the middle. Push them over and flatten them against the paper.[9]
-
5Turn the paper over and fold the left point to the center. Flip the paper vertically, keeping the fin flaps pointed towards the left. Then, grab the left corner and align it with the paper’s center point. Crease the fold to finish it.[10]
- Be careful about how you flip the paper. Flipping it the wrong way can affect how your whale turns out.
-
6Fold the bottom edge about ⅓ of the way up the paper. Hold the paper still with the sides of your hands. Carefully bring the bottom edge up slightly, pushing it onto the whale’s body and flattening it. This fold determines how wide the whale’s body will be.[11]
- Making the fold too big can make the whale’s body look too small. You only need to fold the edge up a little, enough to make it horizontally flat.
-
7Bring the top half of the whale down over the bottom half. Fold the entire whale in half along the horizontal crease running through the center. Once you do this, you will be able to see the shape of the whale's body.[12]
- The top half of the paper will overhang the bottom half slightly. This is okay and will be fixed in the next step.
-
8Turn the overhanging top edge down and tuck it into the whale. Flip the whale over so pointed edge is on top and the flat edge is on the bottom. Grasp the pointed edge and fold it down against the whale’s body. Then, unfold it and open the whale’s top edge. Put the fold inside the whale to finish its basic shape.[13]
- Take a look at your work. Make sure both sides of the whale look even. The top and bottom edges will both be level.
Finishing the Flippers and Tail
-
1Move the whale onto its back and pull the fin flaps out. The whale’s back is the shorter side. You will see 2 flaps of paper near the whale’s head. Move each flap back away from the head at a diagonal angle, taking care not to pull them too far. Pull them about ⅔ of the way towards the whale’s body and down.[14]
- If you move the flippers too close to the body, they won’t stand out. Also, pull them down a little so the tips reach above the body.
- Fold the flippers carefully, since the thin origami paper can tear.
-
2Fold the whale’s tail straight up. Grasp the tip and move the tail up, away from the whale’s body. When you do this correctly, the tail’s inner edge will form a perfect diagonal. Press down hard on it to make a good crease.[15]
- Adjust the fold to change the tail’s size. Folding more of the tail makes it bigger. Change it according to how you want your whale to look.
-
3Open the whale and cut a slit in the tail. Unfold the tail, then spread apart the whale along its top edge. Look for the crease in the tail you made with your last fold. Use a sharp pair of scissors to cut along the center of the tail to that crease.[16]
- If you don’t like doing scissors, you can skip this part. Instead, leave your whale’s tail folded.
-
4Fold the whale’s tail flaps up against one another. Close the whale back up, then separate the tail flaps. Grasp the flap closest to you, folding it so it points up towards the ceiling. Fold the other flap in the opposite direction until it is behind the first flap, perfectly aligned with it.[17]
- Push the flaps hard together so they stay in place, or else the tail may unfurl.
-
5Open the tail flaps up and crease them in place. You can adjust the tail flaps to whatever angle you like. Separate them, bringing each flap down so it points out towards the side. When you get them where you want them, press them between your fingers to crease them and hold them in place.[18]
- Your whale is done! You can try decorating yours, drawing on an eye or mouth if you’d like, or you can start over and make another one.
Community Q&A
Did you know you can get answers researched by wikiHow Staff?
Unlock staff-researched answers by supporting wikiHow
-
QuestionDo I need a square paper?
 JayneCommunity AnswerYes, if you'd like the whale to look the same as in the steps, you will need to use square paper.
 -
QuestionHow wet does my paper need to be?
 Emma VienerCommunity AnswerJust damp enough that you'd be able to fold it easily than if it were dry. You can place the paper in your freezer and then let it thaw before you start your creation.
Warnings
- Be cautious when using scissors and other sharp tools. Keep children away from them.⧼thumbs_response⧽
Things You'll Need
- Flat surface
- Paper
- Scissors
References
- ↑ https://www.youtube.com/watch?v=9gBfXhvk5XM&feature=youtu.be
- ↑ https://www.youtube.com/watch?v=9gBfXhvk5XM&feature=youtu.be&t=20
- ↑ https://www.origamiway.com/origami-whale.shtml
- ↑ https://www.youtube.com/watch?v=fx3xxqmm2gw&feature=youtu.be&t=92
- ↑ https://www.youtube.com/watch?v=fx3xxqmm2gw&feature=youtu.be&t=108
- ↑ https://www.youtube.com/watch?v=fx3xxqmm2gw&feature=youtu.be&t=112
- ↑ https://www.youtube.com/watch?v=grsIQErHc44&feature=youtu.be&t=28
- ↑ https://www.youtube.com/watch?v=fx3xxqmm2gw&feature=youtu.be&t=139
- ↑ https://www.youtube.com/watch?v=fx3xxqmm2gw&feature=youtu.be&t=152
- ↑ https://www.youtube.com/watch?v=fx3xxqmm2gw&feature=youtu.be&t=164
- ↑ https://www.youtube.com/watch?v=9gBfXhvk5XM&feature=youtu.be&t=159
- ↑ https://www.youtube.com/watch?v=fx3xxqmm2gw&feature=youtu.be&t=186
- ↑ https://www.youtube.com/watch?v=fx3xxqmm2gw&feature=youtu.be&t=195
- ↑ https://www.origamiway.com/origami-whale-3.shtml
- ↑ https://www.origamiway.com/origami-whale-3.shtml
- ↑ https://www.youtube.com/watch?v=fx3xxqmm2gw&feature=youtu.be&t=262
- ↑ https://www.youtube.com/watch?v=fx3xxqmm2gw&feature=youtu.be&t=276
- ↑ https://www.youtube.com/watch?v=fx3xxqmm2gw&feature=youtu.be&t=292
About This Article
If you want to make an origami whale, lay a square sheet of paper in front of you and fold the opposite corners together to create basic guidelines. Next, fold the top edges to the vertical center line to create triangles. Then, fold the left end in, flip the paper over, and fold the paper in half to create the whale's body. Finally, pull out the flippers and fold the tail up to complete your whale! Keep reading to learn how to decorate your origami whale!
