This article was co-authored by wikiHow staff writer, Eric McClure. Eric McClure is an editing fellow at wikiHow where he has been editing, researching, and creating content since 2019. A former educator and poet, his work has appeared in Carcinogenic Poetry, Shot Glass Journal, Prairie Margins, and The Rusty Nail. His digital chapbook, The Internet, was also published in TL;DR Magazine. He was the winner of the Paul Carroll award for outstanding achievement in creative writing in 2014, and he was a featured reader at the Poetry Foundation’s Open Door Reading Series in 2015. Eric holds a BA in English from the University of Illinois at Chicago, and an MEd in secondary education from DePaul University.
There are 7 references cited in this article, which can be found at the bottom of the page.
This article has been viewed 19,912 times.
Learn more...
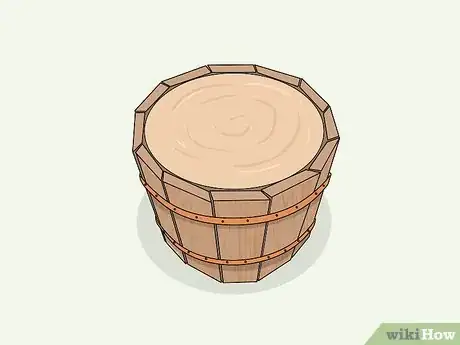
Nothing adds a little rustic touch to a room like a homemade wooden bucket with the classic copper fittings. Crafting an original bucket out of wood is kind of tricky since it’s hard to make a bucket shape using flat materials. This makes the process fairly challenging if you aren’t an experienced woodworker with access to several power saws.[1] Luckily, you can make things easier by purchasing prefabricated slats that are already cut to size instead of cutting them yourself.
Steps
Cutting the Slats and Templates
-
1Purchase slats or cut 12 wood boards to create your slats. Each slat must have a thickness of 3⁄4 in (1.9 cm) and a width of 2 1⁄2 in (6.4 cm). You can either purchase pre-fabricated slats from a construction supply store, or cut a larger chunk of wood into individual pieces. To cut them, pull out a measuring tape and use a carpentry pencil to mark the lengths off with hash marks. Use a straight edge to add the cutting lines. Turn on your table saw and trim each slat to be 12 in (30 cm) in length.[2]
- The dimensions listed in this article will make a bucket with 12 slats that is 12 inches (30 cm) tall and 11 3⁄8 inches (29 cm) wide. You can adjust the dimensions as you’d like, but it’s best if you don’t adjust the number of slats. Using an alternative number of slats requires readjusting the angles for gaps between slats, which can be hard to calculate.
- You’re going to nail a template into the slats to space them out while you construct the bucket. It will be much harder to remove this template if you use a hardwood, like oak or walnut. Instead, opt for a softwood, like pine or cedar.
Warning: You’re going to use a variety of power saws over the course of this project. Always wear gloves, a dust mask, and protective eyewear when operating a power saw. Work in a well-ventilated area and always keep your hands at least 6 inches (15 cm) away from the blade.
-
2Buy or cut 2 templates for the slats using strips of wood that are 40 in (100 cm) long. You can purchase these strips or cut them to size with a table saw. The 2 template pieces are going to be stapled into the slats to help space out the gaps between the slats. If you're cutting the templates yourself, use a table saw to cut 2 templates that are each 40 inches (100 cm) long and 1–2 inches (2.5–5.1 cm) wide.[3]
- Since these templates will be easier to attach if they’re thin, stick with wood strips that are roughly 1⁄2 in (1.3 cm) thick or smaller.
Advertisement -
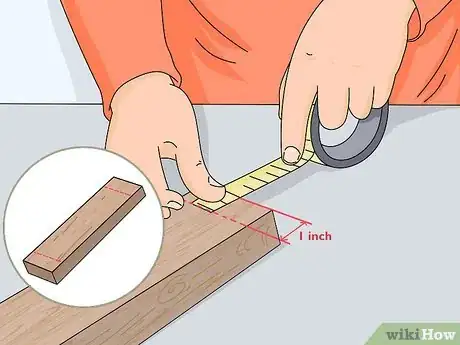
3Mark 1 in (2.5 cm) from the top and bottom of each slat. Use a measuring tape to measure off 1 in (2.5 cm) from the top edge of each slat and make a horizontal hash mark. Repeat this process from the bottom edge of each slat.[4]
- You are going to install the template along these hash marks to hold the slats in place while you install the copper ring that goes around the bucket and holds the slats together. Then, you will remove the template before attaching the slats to the base of the bucket.
Assembling and Spacing the Slats
-
1Line your slats up in a single row next to one another. Set each of your slats down on a flat work surface with the wider side flat. Use a spirit level to line the slats up along the top. Push each of the slats together so that it looks like you have a single rectangular chunk of wood.[5]
- Double-check your hash marks to make sure that they’re parallel along the top and bottom of the slats. If they aren’t, now is the perfect time to redraw them.
-
2Create 3⁄8 in (0.95 cm) of space between each slat with spacers. Brace the top and right side of the rectangular set of slats with spirit levels or a spare board. Then, spread each slat out to create gaps between each slat using prefabricated 3⁄8 in (0.95 cm) spacers. Slide a spacer in between each set of slats at the top and the bottom, 1–2 inches (2.5–5.1 cm) from the hash marks, closer to the center.[6]
- You can make spacers yourself by cutting a scrap piece of wood into 20 blocks that are 3⁄8 in (0.95 cm) each.
- The gaps must be 3⁄8 in (0.95 cm) if you’re using the 3⁄4 by 2 1⁄2 in (1.9 by 6.4 cm) boards. If you are using different slats, divide the thickness of a single slat by 2 to determine how big the gaps must be.
-
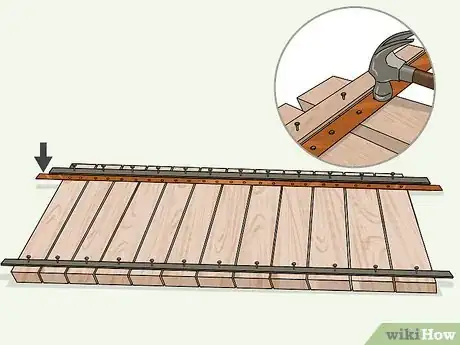
3Nail the templates into the slats using the hash marks as your guide. Set your first template board gently over the hash marks you made at the top. Line the board up so that the bottom edge of the template rests along the line made by the hash marks. Grab a set of thin nails and a hammer. Gently nail the template into each slat. Repeat this process on the bottom set of hash marks you made.[7]
- The nails should be no longer than 1⁄2 in (1.3 cm) in length. The smaller, the better! You have to remove this template after attaching the straps, and the template will be hard to remove if you use long nails.
- Recheck each gap between the slats before nailing the template into place to make sure the spacers haven’t moved.
Warning: Nail extremely gently. If you slam each nail through, the template will be hard to remove and you may spread the slats out from the heavy vibration.
Adding the Copper Straps
-
1Flip the slats over and cut 2 copper strips to size. Purchase 2 flexible copper strips that are at least 40 in (100 cm) long and anywhere from 7⁄8–2 inches (2.2–5.1 cm) wide. Cut the strap to size using a set of tin snips if necessary. Flip the slats over so the template is on the bottom.[8]
Tip: You can find these copper strips in the plumbing aisle at a construction supply store. You may be able to reclaim some copper off-cuts from a plumber or metalworker if you prefer. Make sure that you can easily bend the copper before purchasing it. Reinforced copper plating will not work for this.
-
2Attach the first copper strip to the slats just below the top template. Grab some nails that are 1⁄2 in (1.3 cm) in length or shorter. Set your first copper strip underneath the template at the top. Then, drive a nail through the strip over each slat that it covers. Use the template on the opposite side of the slats as your guide to line the strip up straight.[9]
- You don’t need to worry about the slats moving around while you’re hammering the nails in. The template will hold the slats in place.
-
3Add another copper strap along the second template at the bottom. Take a second, identical copper strap and hold it parallel over the template on the bottom of the slats. Line the edge of the copper strip up with the template on the other side so that the bottom edge of the copper strip matches the top of the template. Nail this strap into the slats so that both strips are parallel.[10]
- There should be a little bit of extra space left over on each copper strip if they are at least 40 inches (100 cm) in length. It doesn’t matter if the extra copper is symmetrical on both sides, or if there’s a little extra copper hanging off of only one end.
-
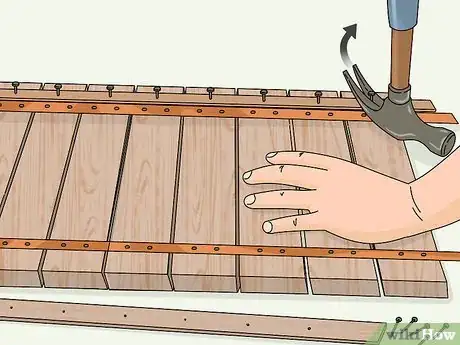
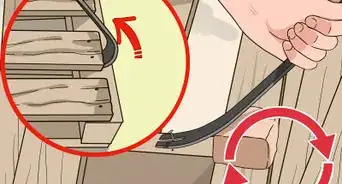
4Remove the templates and carefully extract the leftover nails. Put on a pair of thick gloves and protective eyewear. Carefully pull up the first template by ripping it out of the slats. Use a chisel to get in between the template and the slats if necessary. Use channel locks or pliers to remove any nails that don’t come out. Repeat this process on the second template.[11]
- The thin nail holes won’t readily be visible since they’re sitting on the side that will be the inside of the bucket.
Installing the Base of the Bucket
-
1Roll the bucket up into a cylinder and nail the copper ends together. Set your slats up vertically and gently roll them into a circle with the copper straps on the outside. Adjust the shape of the slats so that the interior edges of each slat are touching one another. At the spots where the copper overlaps, add one more nail to secure the strip in a circle around the bucket.[12]
-
2Outline the interior edges of the slats on a sheet of plywood. Set the rolled-up slats on top of a sheet of plywood. Grab a carpentry pencil and reach inside of the bucket. Carefully outline the interior base of the bucket on the plywood. Aim to mark exactly at the point where the plywood meets the slats to avoid leaving a large gap in your base. Draw along each slat before removing the body of the bucket and setting it aside.[13]
- You don’t need to use plywood if you don’t want to, but it’s a good option for the bottom of the bucket since it’s inexpensive and easy to cut.
-
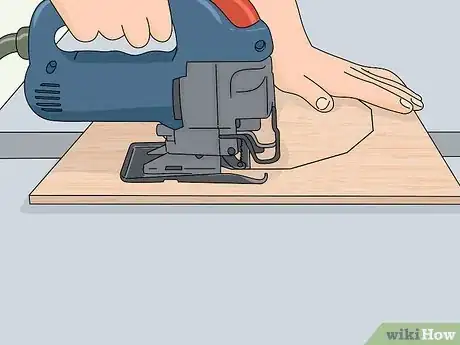
3Cut the outline out with a jigsaw to create the base of the bucket. Trim around the general shape you outlined to make the board easier to work with. Set the plywood on saw horses and use a jigsaw to cut one edge to size. Then, use hand clamps to secure the side you cut to a saw table. Trim each additional side of your outline off with your jigsaw.[14]
- Wear protective eyewear, a dust mask, and gloves when operating your jigsaw.
- You’re doing this by hand without any guidelines, so be careful when making each cut.
- You can use a table saw or miter saw and trim each edge perfectly, but this is really time consuming and the base doesn’t need to be perfect to sit at the bottom of the bucket.
-
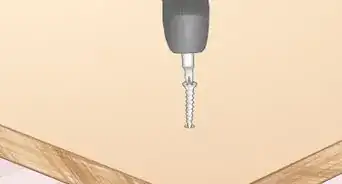
4Drive a staple or screw into every other slat near the bottom of the bucket. Sit your slats up vertically. On every other slat, along the interior of the bucket, put a hash mark 1 in (2.5 cm) from the bottom edge. Then, use a staple gun or screwdriver to run a 3⁄8 in (0.95 cm) carpentry staple or 1⁄2 in (1.3 cm) wood screw halfway through each hash mark.[15]
Warning: Don’t drive your staples all the way into the slats. The base is going to rest on top of the screws or staples where they stick out of the slats, so they can’t be flush with the wood.
-
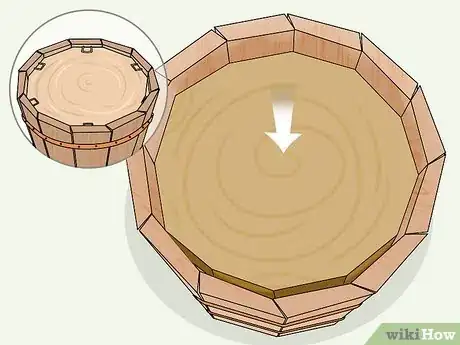
5Slide the base through the top of the bucket to let it rest on the staples or screws. Set your bucket down with the screws or staples at the bottom. Place the plywood base you cut on top of the bucket and rotate it along the slats at the top until it slides down into the bucket. The staples or screws will catch the base and hold it at the bottom.[16]
- After you slide the base through the bucket, you can add a layer of wood glue along the interior rim on the inside if you want to cover any gaps.
-
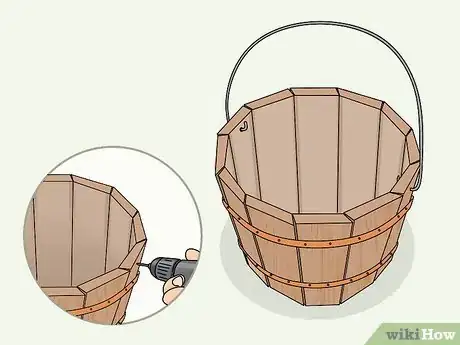
6Add a handle using a soft metal rod and pilot bit if you’d like. You can add a handle if you want an easier way to carry your bucket! Get a flexible metal rod and a drill. Drill pilot holes that match the width of the rod on opposite sides of the bucket. Bend the metal rod to shape by hand or with pliers and slide each end into the pilot holes.[17]
- For a more secure handle, fill the pilot holes with wood glue before sliding the metal rod into the holes.
Warnings
- Always wear a dust mask, gloves, and protective eyewear when operating a power saw. Keep your hands at least 6 inches (15 cm) away from the blade at all times. Always unplug your power saws when you aren’t using them.[18]⧼thumbs_response⧽
Things You’ll Need
- Wood slats
- Wood strips
- Copper straps
- Plywood
- Table or miter saw
- Measuring tape
- Speed square
- Carpentry pencil
- Tin snips
- Nails
- Protective eyewear
- Gloves
- Dust mask
- Chisel
- Screws or staples
- Metal rod (optional)
- Pilot bit (optional)
- Wood glue (optional)
References
- ↑ https://www.woodworkersjournal.com/correct-angles-wooden-bucket/
- ↑ https://www.buildeazy.com/wooden-bucket/
- ↑ https://www.buildeazy.com/wooden-bucket/
- ↑ https://www.buildeazy.com/wooden-bucket/
- ↑ https://youtu.be/KKrFnkQWO2s?t=232
- ↑ https://youtu.be/rVqVJFJ8JuE?t=25
- ↑ https://www.buildeazy.com/wooden-bucket/
- ↑ https://www.buildeazy.com/wooden-bucket/2/
- ↑ https://www.buildeazy.com/wooden-bucket/2/
- ↑ https://www.buildeazy.com/wooden-bucket/2/
- ↑ https://www.buildeazy.com/wooden-bucket/2/
- ↑ https://youtu.be/KKrFnkQWO2s?t=235
- ↑ https://www.buildeazy.com/wooden-bucket/2/
- ↑ https://www.buildeazy.com/wooden-bucket/2/
- ↑ https://www.buildeazy.com/wooden-bucket/2/
- ↑ https://www.buildeazy.com/wooden-bucket/2/
- ↑ https://www.buildeazy.com/wooden-bucket/2/
- ↑ https://www.osha.gov/Publications/osha3080.pdf


