X
This article was co-authored by wikiHow staff writer, Nicole Levine, MFA. Nicole Levine is a Technology Writer and Editor for wikiHow. She has more than 20 years of experience creating technical documentation and leading support teams at major web hosting and software companies. Nicole also holds an MFA in Creative Writing from Portland State University and teaches composition, fiction-writing, and zine-making at various institutions.
This article has been viewed 56,209 times.
Learn more...
This wikiHow teaches you how to create a basic shop in Roblox using a dialog script. Creating a dialog script is like writing a conversation between the merchant and the buyer.
Steps
-
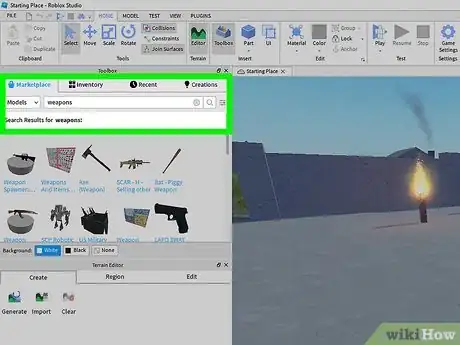
1Pick three weapons from "Weapons" in the toolbox. Your weapons appear in the "Workspace" branch in the explorer tree.
-
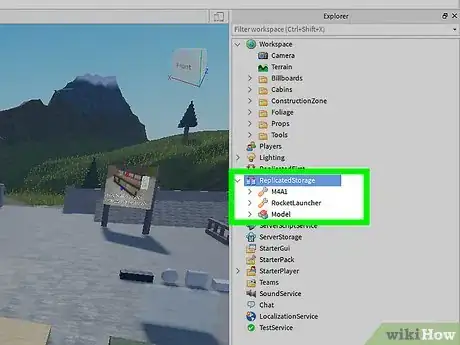
2Drag the weapons into the "Replicated Storage" branch.Advertisement
-
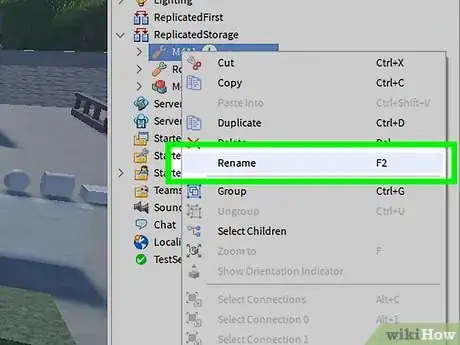
3Rename the three weapons. To rename a weapon, right-click its name and type something unique (without spaces). Be descriptive!
-
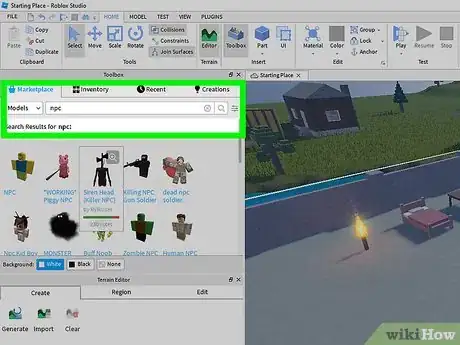
4Make an NPC. NPCs are commonly made from bricks, countertops, or boxes, although you are free to use whatever you wish. If you decide to use bricks, make sure you've anchored the bricks in place.
-
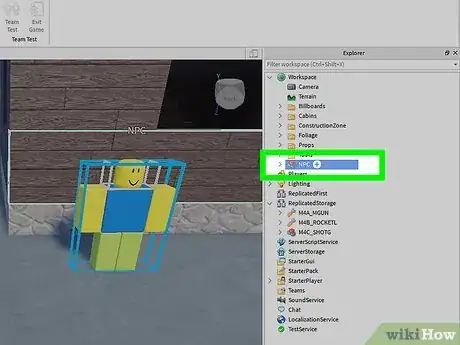
5Select the three pieces of your NPC and rename them "NPC." To do this, drag the mouse to select all three pieces, right-click the selected area, and then click Group. Call the group "NPC."
-
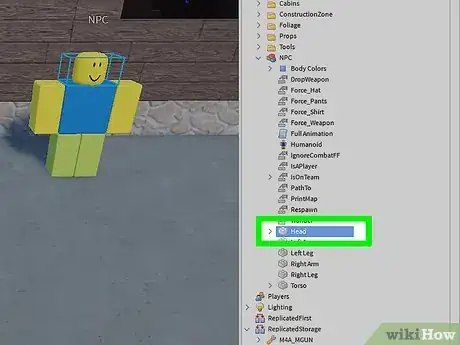
6Select the NPC's head from the right panel and click Head.
-
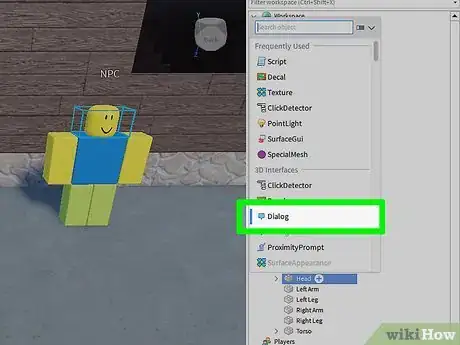
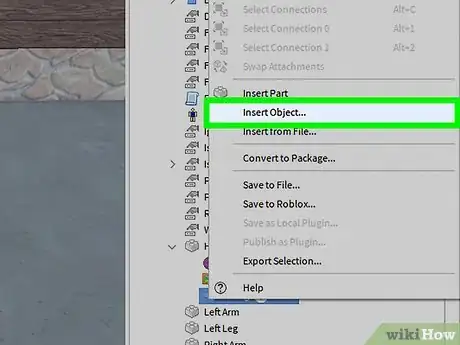
7Insert a dialog. To do this, right-click Head and go to Insert > Object > dialog.
-
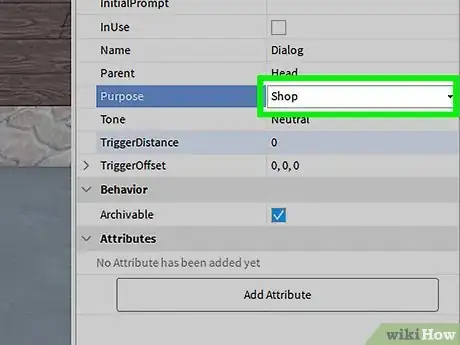
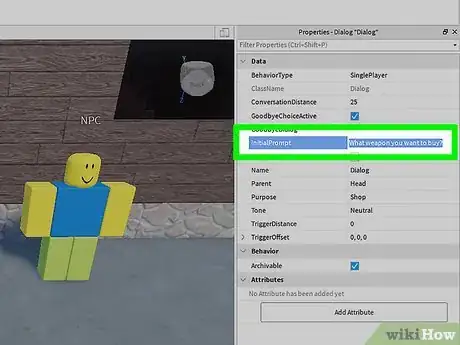
8Change the "Purpose" property to "Shop." It's in the Properties section.
-
9Type what you want your NPC to say. This goes into the initialprompt box.
-
10Select the dialog in Explorer and go to Insert > Object.
-
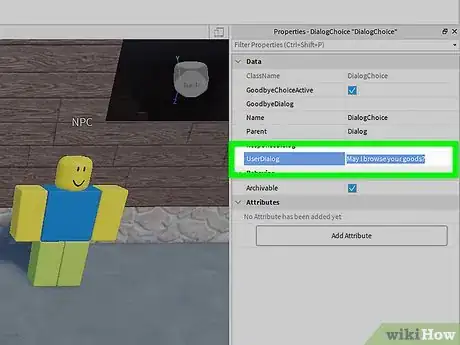
11Select DialogChoice and change the UserDialog property value. Change it to something like, "May I browse your goods?"
-
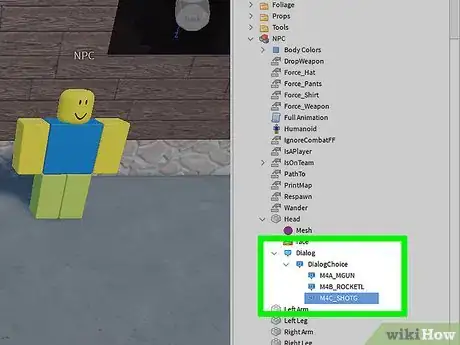
12Add a response and dialog choices. Set the ResponseDialog property to "Sure!" Then, insert three "DialogChoices" into the "DialogChoice" we just made. Rename them from their defaults and set their UserDialog properties to the names of the weapons.
-
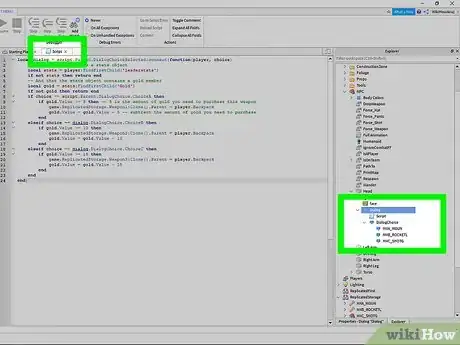
13Add a script into the dialog (not dialog choice). Now you can add the lua code for your script.[1] . It should read:
local dialog = script.Parent.DialogChoiceSelected:connect(function(player, choice)
    -- Check the player has a stats object
    local stats = player:FindFirstChild('leaderstats')
    if not stats then return end
     -- And that the stats object contains a gold member
    local gold = stats:FindFirstChild('Gold')
    if not gold then return end
    if choice == script.Parent.DialogChoice.ChoiceA then
        if gold.Value >= 5 then -- 5 is the amount of gold you need to purchase this weapon
            game.ReplicatedStorage.Weapon1:Clone().Parent = player.Backpack
            gold.Value = gold.Value - 5 -- subtract the amount of gold you need to purchase
        end
    elseif choice == dialog.DialogChoice.ChoiceB then
        if gold.Value >= 10 then
            game.ReplicatedStorage.Weapon2:Clone().Parent = player.Backpack
            gold.Value = gold.Value - 10
        end
    elseif choice == dialog.DialogChoice.ChoiceC then
        if gold.Value >= 15 then
            game.ReplicatedStorage.Weapon3:Clone().Parent = player.Backpack
            gold.Value = gold.Value - 15
        end
    end
end)
-
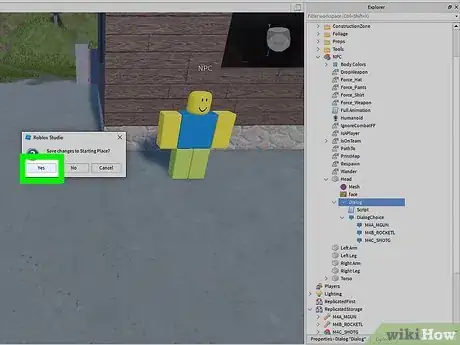
14Save your game. Your store is now ready to use.
Advertisement
Community Q&A
-
QuestionHow do I use the complicated code in Roblox Studio?
 Community AnswerCopy and paste what is says above, However, make sure that you paste it in the right place our else it will not work.
 -
QuestionDoes a shop have to have clothing?
 BlobbieNadoCommunity AnswerNo, your shop does not have to have clothing. Your shop can be whatever you want to! Just note, some users may want to see clothing and others may not.
 -
QuestionWere do you put the items?
 Community AnswerYou can always build your own items, or use the toolbar to find one you like and place them wherever you want in your shop.
Advertisement
References
About This Article
Advertisement
