This article was co-authored by wikiHow Staff. Our trained team of editors and researchers validate articles for accuracy and comprehensiveness. wikiHow's Content Management Team carefully monitors the work from our editorial staff to ensure that each article is backed by trusted research and meets our high quality standards.
This article has been viewed 79,835 times.
Learn more...
Watching movies on a big screen is a pastime that many people enjoy. You can make your own home movie projector using a smartphone or tablet device, a shoebox, a magnifying glass, and some basic household items and tools. Impress your friends with your DIY skills by creating this easy, inexpensive projector before you invite them over for movies and popcorn.
Steps
Preparing Your Lens and Box
-
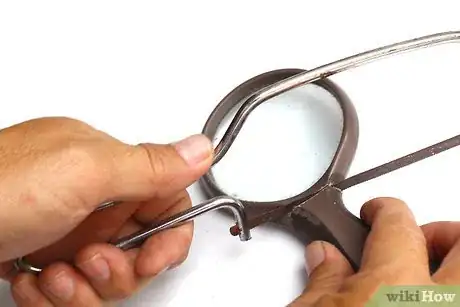
1Cut off the handle of a magnifying glass with a handsaw. Purchase a standard magnifying glass at a department, office supply, or dollar store. Position the magnifying glass at the edge of a sturdy table with the handle hanging off the table’s edge. Place a handsaw at the point where the handle meets the glass and apply pressure as you move the saw back and forth over the handle to remove it.[1]
- Alternatively, you can use an old camera lens instead of a magnifying glass. You will not need to remove a handle if you use a camera lens. Use a lens that you will not be using on a camera anymore, as you may damage it if you attempt to remove it from your movie projector later.
- Wear protective goggles and gloves when using your handsaw. Children should ask for help from an adult for this part of the project.
-
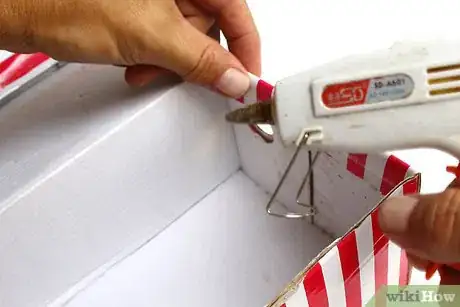
2Reinforce any loose sides on a shoebox with glue. Find an old shoebox of any size; the sturdier the box, the better. You'll want to be sure whatever device you'll be using, such as your smartphone or a tablet, fits inside of the box. If the box is made of thin cardboard and has loose sides, line the flaps with multipurpose glue and hold them down until they stick.[2]
- If you can, use a sneaker shoebox that is made from sturdy, thick cardboard and doesn’t have loose flaps that you need to reinforce.
Advertisement -
3Trace the magnifying glass on the small end of the shoebox. Stand the box up vertically so one of the small ends is laying flat on a table. Place your lens inside the box and trace around the lens with a pencil, creating a circle on your box.[3]
-
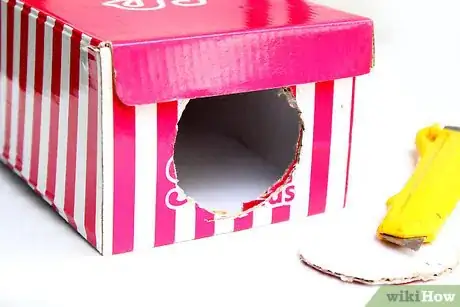
4Cut out the hole for the magnifying glass using a utility knife. Use a utility knife to carefully cut along your trace line until your lens-sized circle is completely removed from the box. If you are laying your box on a surface while cutting out the hole, be careful to use a surface that you don’t mind damaging in case the utility knife slips all the way through.[4]
- Try cutting out your hole at a workbench table or outside on the ground to avoid damaging any tables or floors with your utility knife.
-
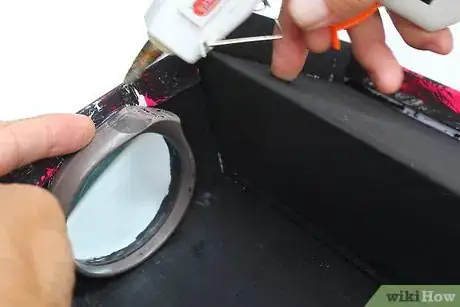
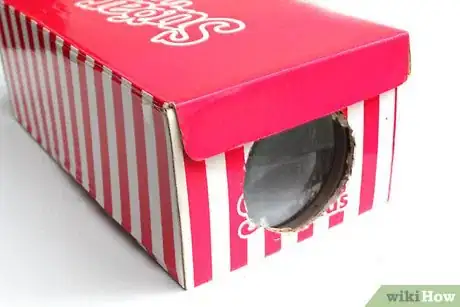
5Place the lens into the hole and reinforce it with duct tape or hot glue. Take your lens and put it into the hole so that the part you look through is partially inside the box. Place pieces of duct tape around the edges of the lens where it meets the cardboard to hold it in place. Or, plug in a full hot glue gun and line the edges with hot glue instead.[5]
- Line both the inside and outside edges where the lens meets the cardboard with tape or glue for the best results.
-
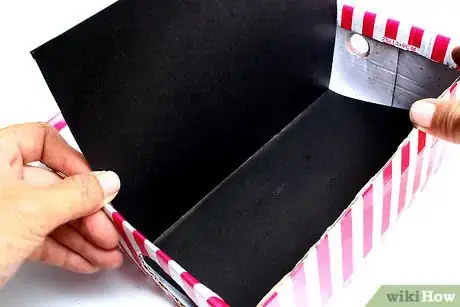
6Line the inside of the shoebox with black construction paper. Measure the length and width of the sides, bottom, and lid of your shoebox. Using scissors, cut pieces of black construction paper to fit all of the inside surfaces of your box. Line the edges of the paper with multipurpose glue, and one at a time, hold them in place inside your box until they stick.[6]
- Lining the inside of your box with black paper helps to make it darker and the image from your device will transfer better through the lens when you play your movie.
Setting up Your Device
-
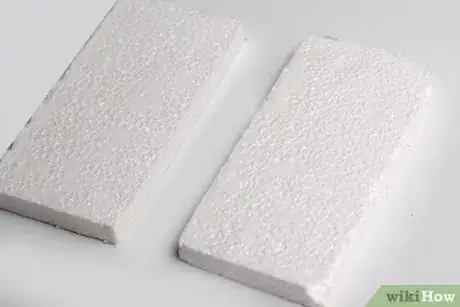
1Cut some sturdy foam board into 2 6.5 in × 4 in (17 cm × 10 cm) pieces. Purchase some thick foam board from a craft store. Using your utility knife, cut the board into pieces that will fit your smartphone. Be sure to wear goggles and protective gloves when using your utility knife.[7]
- The 6.5 in × 4 in (17 cm × 10 cm) foam pieces will allow you to make a stand large enough for most smartphones. If you’re choosing to use a tablet device instead, you’ll need to measure the device and make a larger stand for it. Be sure that your shoebox is large enough to accommodate a larger tablet device if you want to use one.
-
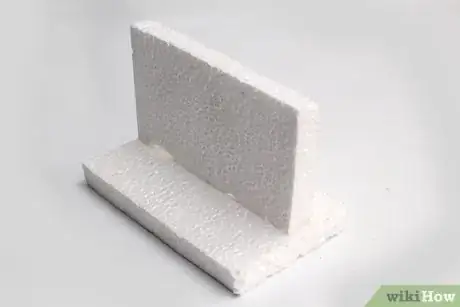
2Glue the foam boards together perpendicularly to create a stand for your device. Load a hot glue gun with glue sticks and plug it in. Arrange your foam boards to create an upside down “T” with the longer edge of the standing board running along the middle of the bottom board. When the glue is hot, apply a line of glue to the bottom edge of the standing board and press it into the bottom board until it holds.[8]
- Apply more glue to both sides of where the 2 boards meet to help your stand stay secure.
-
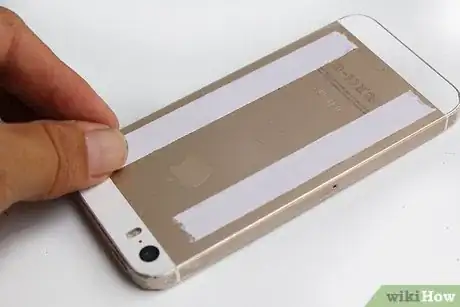
3Place 2 strips of double-sided tape onto a side of the standing part of your foam. Cut 2 strips of double-sided tape about 6 in (15 cm) in length with scissors. Stick them lengthwise along the standing piece of your foam phone stand.[9]
- Unpeel the top paper from the tape so that there is a sticky side to place your phone onto.
- To remove any tape residue from your phone case later, wipe it with a mild solvent or degreaser after you're finished watching your movie.
-
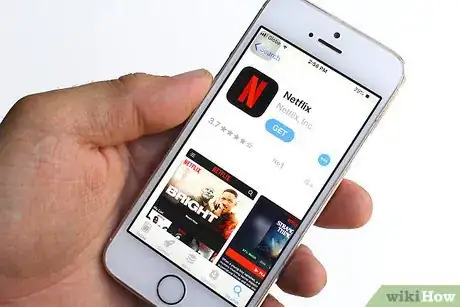
4Download a movie-playing app onto your device. If you don’t already have an app for playing movies on your smartphone or tablet device, download one by going to your app store and searching “movie apps.” Popular apps to use are Netflix, HBO Now, Hulu, IMDb, or Amazon Prime.[10]
- You will have to create an account and pay a membership for most movie apps that don’t have ads. If you don’t mind watching ads during movies, there are some other free movie apps available as well.
-
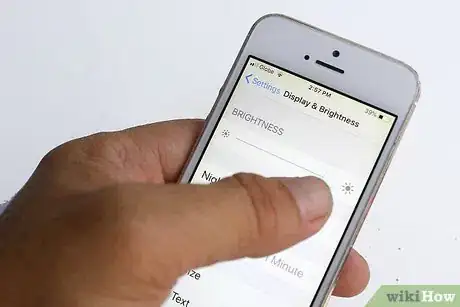
5Turn up the brightness of your device to the highest level. Go into your settings on your device. Under “Display and Brightness” there will be a bar that allows you to adjust the brightness of your device’s screen. Slide the bar down to the right to the highest end, or 100%, with your finger.[11]
- You need to have your device screen at its brightest possible setting because the lens of your projector will cause the image to darken a bit when it shines through.
Playing a Movie
-
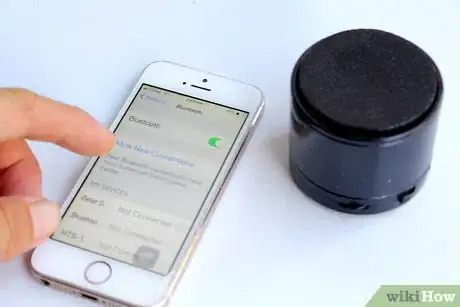
1Set your device up to play through a Bluetooth speaker. Purchase or borrow a small Bluetooth speaker so that the sound of your movie isn't muffled. Turn the speaker on, and go into your device's settings. Under "Bluetooth" click "allow new connections" and find the name of the speaker.[12]
- Click "connect device" next to the name of the speaker to connect it to your device.
-
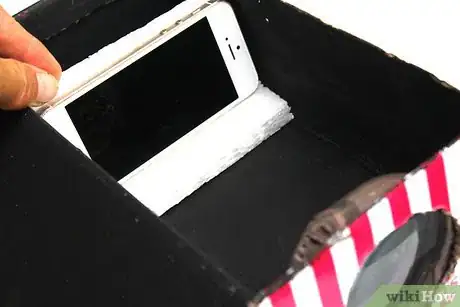
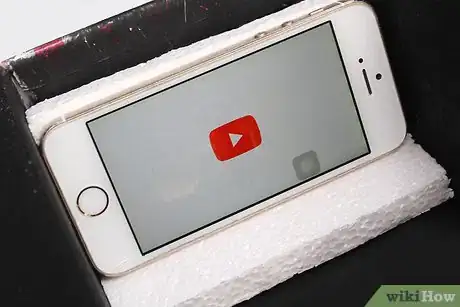
2Place the device and stand inside the shoebox at the end opposite the lens. Stick your device onto the tape of your foam stand. Place the stand with the device attached into the box at the back end away from the lens.[13]
- Leave the lid of your shoebox off the box until after you start the movie.
-
3Position the shoebox so the lens is facing a white, blank wall. You will need a blank wall to play your movie, and it should be painted white or another very light color. Remove any wall decorations that would be in the way of the image when you start the movie.[14]
- If you’d like to watch a movie outside at night, you can also use the wall or door of a garage as your movie screen, since these are usually solid walls without windows.
- If you don’t want to remove wall decorations or find a blank wall outside, you can easily attach a plain white sheet to an indoor wall with tacks or nails.
-
4Begin playing a video from your movie-playing app. Choose a movie to play on your downloaded app. Start the movie and check to see if it the picture is clear or not. If it’s not, pause the movie while you make the necessary adjustments to your projector.[15]
-
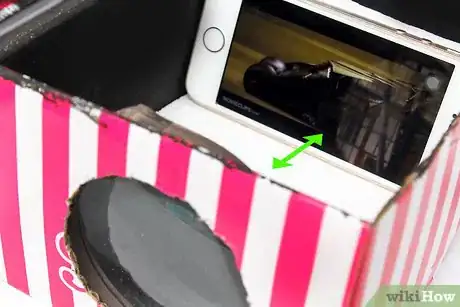
5Move the stand closer to the lens inside the box as needed. If your image is unclear, move the stand and device closer to the lens inside your projector until the image becomes clear. If you move it too close, the image may become blurry again.[16]
- Move the stand and device back and forth inside your projector box until you get a clear image. Leave the stand in the spot where the image is clearest.
-
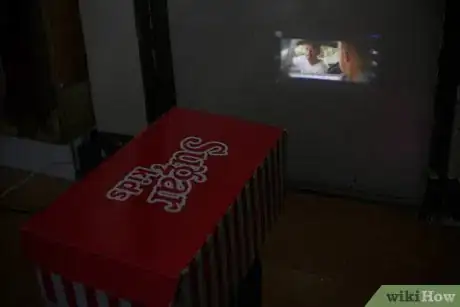
6Move the box closer to or farther from your screen to adjust the image size. If you’d like the movie image to appear larger on your wall, move the box back a few inches. If the image is too large for the wall, bring the projector closer to the wall.[17]
- Place the projector on a small table or desk in the spot where it makes the best size screen on your wall. Unpause your movie and replace the lid on your projector box while the movie plays.
Community Q&A
-
QuestionIs the projected movie going to be blurry?
 Community AnswerYes, it's going to be a little blurry, but you should still be able to see everything that's going on.
 -
QuestionHow good does this work outside?
 Victoria TsukayamaCommunity AnswerIt will probably only work at night. Make sure the shoebox is facing a wall of your house or a fence.
 -
QuestionDo you have too use a magnifying glass or can you use a camera lens?
 Victoria TsukayamaCommunity AnswerA camera lens is optional, but it is recommended that you use a magnifying glass.
Things You’ll Need
- Shoebox
- Magnifying glass
- Handsaw
- Utility knife
- Duct tape
- Hot glue
- Sturdy craft foam board
- Scissors
- Black construction paper
- A smartphone or tablet device
- Blank wall
- Small table or desk
- Bluetooth speaker
References
- ↑ https://diyprojects.com/make-smartphone-projector/
- ↑ https://diyprojects.com/make-smartphone-projector/
- ↑ https://www.gearbest.com/blog/how-to/diy-home-cinema-create-your-own-smartphone-projector-in-8-easy-steps-455
- ↑ https://www.bobvila.com/articles/diy-movie-projector-genius/
- ↑ https://www.bobvila.com/articles/diy-movie-projector-genius/
- ↑ https://www.bobvila.com/articles/diy-movie-projector-genius/
- ↑ https://diyprojects.com/make-smartphone-projector/
- ↑ https://diyprojects.com/make-smartphone-projector/
- ↑ https://diyprojects.com/make-smartphone-projector/
- ↑ https://www.gearbest.com/blog/how-to/diy-home-cinema-create-your-own-smartphone-projector-in-8-easy-steps-455
- ↑ https://www.gearbest.com/blog/how-to/diy-home-cinema-create-your-own-smartphone-projector-in-8-easy-steps-455
- ↑ https://www.bobvila.com/articles/diy-movie-projector-genius/
- ↑ https://www.bobvila.com/articles/diy-movie-projector-genius/
- ↑ https://www.bobvila.com/articles/diy-movie-projector-genius/
- ↑ https://diyprojects.com/make-smartphone-projector/
- ↑ https://diyprojects.com/make-smartphone-projector/
- ↑ https://diyprojects.com/make-smartphone-projector/
