This article was co-authored by wikiHow staff writer, Hannah Madden. Hannah Madden is a writer, editor, and artist currently living in Portland, Oregon. In 2018, she graduated from Portland State University with a B.S. in Environmental Studies. Hannah enjoys writing articles about conservation, sustainability, and eco-friendly products. When she isn’t writing, you can find Hannah working on hand embroidery projects and listening to music.
There are 21 references cited in this article, which can be found at the bottom of the page.
This article has been viewed 13,728 times.
Learn more...
Are you looking for a Pop It fidget toy to keep your hands busy? Are you also looking for a fun craft you can do at home? While typical Pop Its are usually made of silicone, we'll teach you how to make a Pop It using craft supplies you probably already have at home. Keep reading to learn 3 ways to create your very own homemade Pop It for endless hours of fun!
Steps
Construction Paper Pop It
-
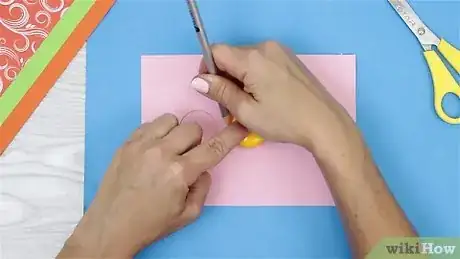
1Trace circles onto construction paper with a stencil. Choose whatever color construction paper you'd like the Pop It circles to be. Use a small object, like a penny or a roll of tape, to trace 2 circles onto your construction paper.[1]
- To make a rainbow Pop It, try tracing circles onto all different colors of construction paper.
- For a larger Pop It, you can trace as many circles as you’d like.
- If you want to add designs, like smiley faces or flowers onto your Pop It, now is the time! Draw those on before you move onto the next step.
-
2Cover the circles with clear tape on both sides. Clear packing tape will help give your construction paper circles that signature popping feel. Use clear packing tape to cover all of your circles. Flip your circles over and add more tape on the other side.[2]
- Make sure you use clear packing tape, not brown packing tape. Otherwise, your construction paper colors won’t show through!
Advertisement -
3Cut each circle out with scissors, then cut a slit into each circle. Grab a pair of scissors and carefully cut out each circle, using the stencil guideline you drew on earlier.[3] Then, pick up a circle and make a small cut across the radius of the circle, but stop once you reach the middle of the circle (don’t cut all the way through). Do this to each circle that you cut out.[4]
-
4Fold the circle into a cone shape, then tape it down again. In order for your circles to pop, you need to make them 3-dimensional. Pull one side of the slit on top of the other side to make a very shallow cone shape out of each circle. Then, use another small strip of packing tape to tape the shape into place.[5]
-
5Cut your Pop It outline out of a piece of cardstock. Once you’ve made the circular center shapes, it’s time to create the outline of your Pop It. Think about the shape you want your Pop It to be: maybe a fun fruit, or perhaps a silly character. Then, draw that shape onto a thick piece of cardstock and cut it out with scissors.[6] Other fun Pop It ideas include:
- A rainbow
- Two peas in a pod
- A chocolate bar
- A cactus
-
6Trace your circles onto your Pop It outline, then cut them out. Place your Pop It circles that you made earlier onto your Pop It outline, and position them in the spots where you’d like them to go. Use a pencil to trace around each circle, then cut the circles out of your Pop It outline.[7]
-
7Tape your circles to the holes in your Pop It shape. Grab one Pop It circle at a time and gently push it into a hole you cut out of your Pop It shape. Tape the edges of the circle to the back of your Pop It, then do the same with the rest of the circles. When you’re done, enjoy your DIY Pop It![8]
Empty Gum Package Pop It
-
1Take all the gum out of a plastic gum package. Grab a package of gum that has little plastic squares that pop in and out. Empty the package by either finishing all the gum or popping out the gum pieces and saving them for later.[9]
- If there’s any extra plastic or metal on the back of the gum package, peel it off before you start.
-
2Trace your empty gum package onto a piece of cardstock, then cut it out. Pick out a piece of cardstock that you want to use for your Pop It. Set the gum package down on the cardstock, then trace around it with a pencil and cut it out.[10]
- If you’re making a mini Pop It, cut out one small piece of the gum package and trace that instead.
-
3Draw your Pop It shape onto the cardstock, then cut it out. It’s time to get creative! Figure out what you want your Pop It to look like, then draw that shape onto your cardstock. Your Pop It can be anything you want, as long as it’s bigger than the outline of your gum package that you cut out earlier.[11] Once you draw your shape, cut it out with scissors. You could make:
- A chocolate bar
- A game controller
- A cupcake
-
4Glue the gum package to the back of the cardstock. Grab your empty package of gum and place it into the hole in your cardstock that you just cut out. Use a glue gun to glue the edges of the gum package to the edges of the cardstock so it stays in place.[12] Now you know how to make a homemade Pop It fidget toy!
- To make the signature popping sound, gently press on one of the plastic squares to pop it in and out.
-
5Decorate your Pop It with paint markers. Is your Pop It looking a little plain? Regular markers won’t stick to the plastic gum package, but paint markers will. Try adding colors to your Pop It with paint markers for a little extra pizazz.[13]
Foam Paper Pop It
-
1Cut 2 Pop It outlines out of cardstock. First, decide what you’d like your Pop It to look like: A strawberry? The sun? A cow? Then, trace that shape 2 times onto a piece of cardstock. Cut both of those outlines out and set them aside for now.[14]
- You need 2 identical outlines for either side of your Pop It. Once will be the front, and one will be the back.
- Foam paper is fun to work with, but you might need an adult’s help for this Pop It. Check in with your parent or guardian before using this method.
-
2Trace circles onto your cardstock Pop It shape, then cut them out. Use a penny as a stencil so that all of your circles are the same size. Trace 5 to 6 circles onto both of the Pop It outlines that you just cut, then cut the circles out with scissors.[15]
-
3Cut about five to six 1 in (2.5 cm) squares out of foam paper. Grab whatever color of foam paper that you’d like, then cut 5 or 6 squares out of foam.[16]
- For a rainbow Pop It, use multiple different colors of foam paper.
-
4Heat up each foam square with an iron or a straightener. In order to bend the foam into a 3D shape, you need to warm it up first. If you have an iron, turn it on to the lowest heat setting and let it heat up for a few minutes. Use tweezers to hold your foam paper up to the iron for about 10 seconds.[17]
- If you’re using a hair straightener, turn the straightener on to the lowest heat setting and let it heat up for a few minutes. Then, pinch a piece of foam paper in between the straightener and hold it for about 5 to 10 seconds.[18]
- Heating up foam paper makes it melt slightly. If your foam paper turns black or starts to smoke, take it off the heat right away and let it cool down before touching it again.
-
5Press the foam square down onto a bouncy ball, then hold it for 10 seconds. A bouncy ball will mold the foam paper into the classic Pop It shape. Once the foam paper is warm, press it down on top of a bouncy ball, and use the circle inside of a roll of tape to hold it there. Let it sit for about 10 seconds, then take the foam paper off of the bouncy ball.[19]
- Once you’ve done this to 1 square of foam paper, do it to the rest of your squares, too.
-
6Glue the foam squares into 1 Pop It shape with a glue gun. It’s time to assemble your Pop It! Grab one foam square at a time and press it through a hole in your Pop It outline. Use a glue gun to glue it down in the back, and trim away any excess foam. Add all of your foam shapes to the circles in your Pop It outline.[20]
-
7Glue the second Pop It shape to the back of the first one. Remember that other Pop It outline that you cut out? Grab that and place it onto the back of your assembled Pop It. Then, use a glue gun to glue it down. Now you’ve learned how to make your own Pop It![21]
Things You’ll Need
Construction Paper Pop It
- Construction paper
- Penny
- Pencil
- Scissors
- Clear packing tape
- Cardstock
Empty Gum Package Pop It
- Empty gum package
- Cardstock
- Scissors
- Pencil
- Glue gun
- Paint markers (optional)
Foam Paper Pop It
- Cardstock
- Scissors
- Pencil
- Foam paper
- Iron or straightener
- Bouncy ball
- Glue gun
References
- ↑ https://www.youtube.com/watch?t=396&v=8XJMnTQX-C8&feature=youtu.be
- ↑ https://www.youtube.com/watch?t=404&v=8XJMnTQX-C8&feature=youtu.be
- ↑ https://www.youtube.com/watch?t=141&v=nPf1PfksVas&feature=youtu.be
- ↑ https://www.youtube.com/watch?v=nPf1PfksVas&t=177s
- ↑ https://www.youtube.com/watch?t=418&v=8XJMnTQX-C8&feature=youtu.be
- ↑ https://www.youtube.com/watch?t=400&v=aQEFqkdbyhk&feature=youtu.be
- ↑ https://www.youtube.com/watch?t=430&v=8XJMnTQX-C8&feature=youtu.be
- ↑ https://www.youtube.com/watch?t=454&v=8XJMnTQX-C8&feature=youtu.be
- ↑ https://www.youtube.com/watch?t=77&v=_QmDLLdzAq0&feature=youtu.be
- ↑ https://www.youtube.com/watch?t=111&v=_QmDLLdzAq0&feature=youtu.be
- ↑ https://www.youtube.com/watch?t=77&v=aQEFqkdbyhk&feature=youtu.be
- ↑ https://www.youtube.com/watch?t=117&v=aQEFqkdbyhk&feature=youtu.be
- ↑ https://www.youtube.com/watch?t=47&v=aQEFqkdbyhk&feature=youtu.be
- ↑ https://www.youtube.com/watch?t=9&v=XXyDJ0hIhIE&feature=youtu.be
- ↑ https://www.youtube.com/watch?t=18&v=XXyDJ0hIhIE&feature=youtu.be
- ↑ https://www.youtube.com/watch?t=37&v=XXyDJ0hIhIE&feature=youtu.be
- ↑ https://www.youtube.com/watch?v=XXyDJ0hIhIE&t=48s
- ↑ https://www.youtube.com/watch?v=nxvnk-RR8Q0&t=61s
- ↑ https://www.youtube.com/watch?t=69&v=nxvnk-RR8Q0&feature=youtu.be
- ↑ https://www.youtube.com/watch?t=176&v=nxvnk-RR8Q0&feature=youtu.be
- ↑ https://www.youtube.com/watch?t=71&v=XXyDJ0hIhIE&feature=youtu.be
