This article was co-authored by Moushami Iyer. Moushami Iyer is a Henna Artist and the Owner of Pastel Zenna, an art store in Chicago featuring Moushami's specialty in blending Zentangles and Henna. With over five years of experience, Moushami specializes in Henna tattoos, Henna-inspired art, woodwork, and offers Henna parties.
There are 14 references cited in this article, which can be found at the bottom of the page.
This article has been viewed 138,996 times.
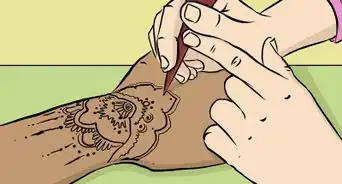
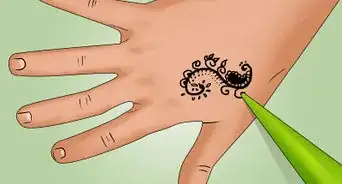
In ancient times, henna body art was typically applied using specially-shaped sticks, which required much training to use properly. Nowadays, most artists have made the switch to hand-rolled henna cones. Cones have several advantages over sticks and other traditional application methods—they’re easy to put together, produce more precise lines, and place less strain on the artist’s hands. Making your own henna cone is as simple as rolling a sheet of cellophane or a similar material to the size that suits you best, then taping it up and filling it with your henna paste.
Steps
Cutting Your Material and Rolling the Cone
-
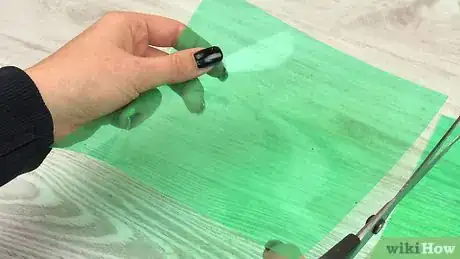
1Cut a 6–7 in (15–18 cm) square from a sheet of cellophane or Mylar. Using a pair of scissors, snip inward from the outer edge of the sheet, using one of the corners to gauge the size of the finished square. Then, turn the sheet 90 degrees and make a second cut all the way across to the edge opposite your starting point. Your sheet doesn’t need to perfectly square—just do the best you can.[1]
- You'll find rolls of cellophane and Mylar at most arts and crafts shops, as well as some office supply stores. Pre-cut sheets are also available from online retailers who specialize in henna accessories.
- The thicker the material you use, the better, as it will help the bag keep its shape once it’s been filled.[2]
- To make a larger cone, simply cut your initial square a bit bigger. You can also begin with a smaller square if you prefer a more compact cone with an ultra-fine stream of ink.
Tip: You could cut your starting square out of any kind of sturdy plastic you happen to find lying around if you don’t have any cellophane or Mylar on hand. Be aware, though, that soft, flexible plastics will be harder to shape than more rigid ones.[3]
-
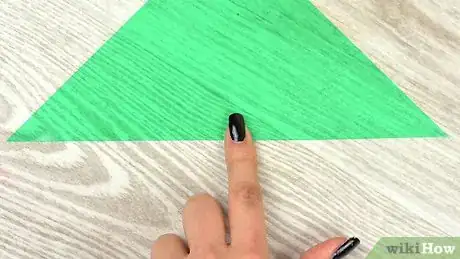
2Cut the square in half diagonally to form 2 triangles. Run your scissors along from the point of one corner to the point of the opposite corner. Picture a straight line running down the center of the square, and do your best not to deviate from your imaginary guide.[4]
- 1 triangle will make 1 cone. You can either discard the second triangle or hold onto it and use it for your next henna cone.
- Some henna artists recommend leaving your material as a square or rectangle, claiming that the extra material provides additional support and helps prevent leaks. You’re welcome to try any of these methods to see which one works best for you.[5]
Advertisement -
3Place your index finger at the appropriate point on your starter sheet. Find the midpoint of the longest side of the triangle you just cut and pin it down with the pad of your finger. If you opted to leave your sheet as a square, your finger can go at or around the center of any of the sides; for rectangular sheets, position it about 1/3 of the way from the edge of one of the longer sides. The spot where your finger is located will become the tip of the finished cone.[6]
- You can use whichever hand you prefer to pin down the soon-to-be tip of the cone while you shape the surrounding material. However, you may find it easier to do the actual rolling with your dominant hand.
- The basic rolling technique will be the same whether you’re working with a triangular, square, or rectangular sheet.
-
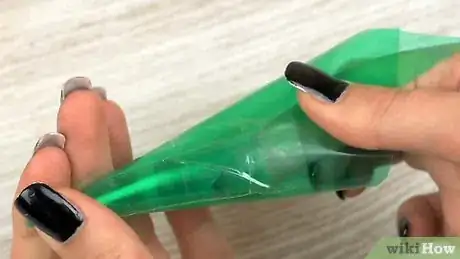
4Take hold of the corner adjacent to your anchor finger and fold it over on itself. Curl the corner up, back, and down again in a tight loop. You’ll notice that the material forms a thin cone-like shape. This will serve as the basic structure for the rest of your cone.[7]
- If you’re right-handed, start with the corner to the right of your finger. If you’re left-handed, start with the corner on the left side.
-
5Continue rolling the material without lifting your anchor finger. Pull the material inward towards your finger using a pinching, twisting motion. Don’t worry about the size of the cone too much yet—you’ll be able to adjust it later. Just focus on creating a neat roll with a consistent taper from the open end to the tip.[8]
- It may help to pick up your anchor finger after each twist just long enough to allow the material to roll without resistance.
- If your cone starts to lose its shape, calmly smooth out the square and start over. It’s more important to do it right than to do it quickly.
-
6Adjust the size of your cone by sliding the outer layer of material. Secure the tip of the cone with your non-dominant hand while you tighten or loosen the roll to your desired dimensions. Your cone can be whatever size you like, but it’s recommended that you limit the diameter of the tip opening to about the size of a pin hole to ensure maximum line precision and control.[9]
- It’s better to end up with a tip that’s a little too narrow than one that’s a little too wide.
- One strategy that may be helpful is to roll the tip of the cone as tightly as possible, then snip off the excess material little by little until it’s exactly the size you need.[10]
Taping and Filling Your Henna Cone
-
1Place a strip of tape along the seam on the outside of the cone. Tear off a strip of tape approximately 1–2 inches (2.5–5.1 cm) in length and press it into place over the line created by the overlapping material. Run your finger back and forth over the tape a few times to make sure it stays put.[11]
- Any variety of tape could work, but clear tape tends to be the most forgiving to work with, since it tears and smooths easily and can be peeled off and reapplied if you happen to make a mistake.
- If you like, you can also cover the seam on the inside of the cone with a second strip of tape to be doubly certain that it will hold.
-
2Tape around the tip of the cone to reinforce it (optional). Tear another 1–2 in (2.5–5.1 cm) piece of tape and slowly wrap it around the area where the cone comes to a point, make sure to leave the bottom 1⁄4 in (0.64 cm) of the tip exposed. Smoothe the tape carefully when you’re done to avoid crushing and deforming the tip opening.[12]
- Taping the tip separately will help ensure that it doesn’t split or come apart once you start squeezing the bag.
-
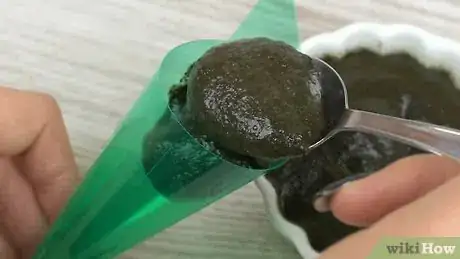
3Fill your cone about 1/2 or 2/3 of the way up with henna paste. Once you’ve mixed your henna paste, use a spoon to scoop it into the open end and shake the cone gently to help it settle. Be careful not to overfill your cone. Doing so will make it harder to seal, and could result in an unexpected mess.[13]
- Henna stains very easily, so be sure to pull on a pair of rubber gloves before you begin handling your homemade henna paste. It may also be a good idea to cover your work surface with a layer of paper towels or newsprint.
- Always use natural henna powder to make your paste, which you can find online or at an ethnic store. Be careful, as there are lots of artificial varieties out there.[14]
- Mix your henna powder with water and essential oils to form a paste.[15]
- Let your henna paste rest for 4-6 hours before you start using it.[16]
Alternative: Add your henna paste to a plastic carrot bag first, then insert the bag into the cone and pipe in the ink for a clean and effortless transfer.[17]
-
4Seal your cone with a rubber band or tape to begin designing. Grab the material around the open end and give it a twist to close it off. Then, slip a rubber band over the bunched material and cinch it down 2-3 times until it’s nice and secure. You’re all set to start creating![18]
- If you don’t have a rubber band, wrap a 2–3 in (5.1–7.6 cm) strip of tape around the top of the open end. Use additional tape as needed to cover any visible gaps or cracks.[19]
Expert Q&A
-
QuestionWhat Colour is pure henna powder?
 Moushami IyerMoushami Iyer is a Henna Artist and the Owner of Pastel Zenna, an art store in Chicago featuring Moushami's specialty in blending Zentangles and Henna. With over five years of experience, Moushami specializes in Henna tattoos, Henna-inspired art, woodwork, and offers Henna parties.
Henna Artist If you are looking for pure and natural henna powder, buy one that is greenish in color.
 -
QuestionCan I use tin foil?
 Community AnswerNo, it is not advisable to do so as it will not work well.
 -
QuestionHow do you seal the cone to make it look like the professional cones you buy from shops?
 Community AnswerJust use tape. You could glue it as well.
References
- ↑ https://stylesatlife.com/articles/how-to-make-mehndi-cone/
- ↑ https://www.youtube.com/watch?v=K6AXeZ8mAzw&feature=youtu.be&t=40
- ↑ https://www.hennaguru.com/henna-lounge/2014/1/28/how-to-make-cones-using-recycled-materials
- ↑ https://www.youtube.com/watch?v=9Hno0VdzDxQ&feature=youtu.be&t=126
- ↑ https://stylesatlife.com/articles/how-to-make-mehndi-cone/
- ↑ https://www.youtube.com/watch?v=6zynKyfwiok&feature=youtu.be&t=31
- ↑ https://vimeo.com/58518108
- ↑ https://www.youtube.com/watch?v=QrMB_QwwVa4&feature=youtu.be&t=206
- ↑ https://www.youtube.com/watch?v=6zynKyfwiok&feature=youtu.be&t=95
- ↑ https://stylesatlife.com/articles/how-to-make-mehndi-cone/
- ↑ https://www.youtube.com/watch?v=9Hno0VdzDxQ&feature=youtu.be&t=157
- ↑ https://vimeo.com/58518108
- ↑ https://www.youtube.com/watch?v=M1lvMBTfZoE&feature=youtu.be&t=217
- ↑ Moushami Iyer. Henna Artist. Expert Interview. 12 July 2021.
- ↑ Moushami Iyer. Henna Artist. Expert Interview. 12 July 2021.
- ↑ Moushami Iyer. Henna Artist. Expert Interview. 12 July 2021.
- ↑ https://www.youtube.com/watch?v=9Hno0VdzDxQ&feature=youtu.be&t=174
- ↑ https://stylesatlife.com/articles/how-to-make-mehndi-cone/
- ↑ https://www.youtube.com/watch?v=QrMB_QwwVa4&feature=youtu.be&t=608
- ↑ https://www.ancientsunrise.blog/highlights-paste-freezing-trick/
