X
wikiHow is a “wiki,” similar to Wikipedia, which means that many of our articles are co-written by multiple authors. To create this article, 15 people, some anonymous, worked to edit and improve it over time.
This article has been viewed 207,994 times.
Learn more...
OpenGL is a powerful 3D programming tool used to draw complex three-dimensional scenes from simple primitives. This article will teach you how to draw a simple cube that you can spin to view in three dimensions!
For this project you will need a code editor and some knowledge of C programming.
Steps
Part 1
Part 1 of 3:
Setting Up
-
1Install OpenGL To begin follow these steps to installing OpenGL on your system. If you already have OpenGL, as well as a compatible C compiler installed, you can skip this step and go to the next.
-
2Create the document. Create a new file in your favorite code editor and save it as mycube.cAdvertisement
-
3Add #includes. These are the basic includes you will need for your program. It is important to realize that there are actually different includes required for the different operating systems. Be sure to include all of these to ensure your program is versatile and can run for any user.
// Includes
#include <stdio.h>
#include <stdarg.h>
#include <math.h>
#define GL_GLEXT_PROTOTYPES
#ifdef __APPLE__
#include <GLUT/glut.h>
#else
#include <GL/glut.h>
#endif
-
4Add function prototypes and global variables. Your next step is to declare some function prototypes.
// Function Prototypes
void display();
void specialKeys();
// Global Variables
double rotate_y=0;
double rotate_x=0;
-
5Set up the main() function.
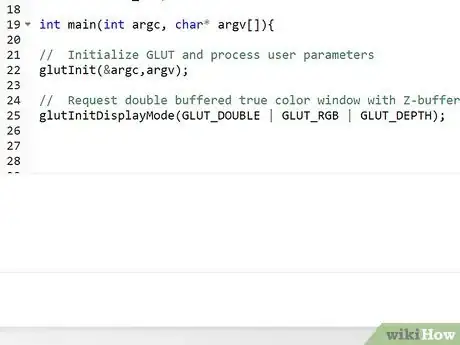
- This statement sets up your environment. A big thing to remember when writing OpenGL programs is that you must ask for everything. This requires you to have a greater understanding of how your program works and what you need to include to get the functionality that you want. In this line, you will set up the display with double buffering, RGB color, and a Z-buffer.
- Double buffering is a technique used in graphics programs to eliminate a problem that arises due to how images are drawn to the screen. Each time you redraw the scene, the display must first be erased then the new information will be drawn. Without double buffering you will observe a flickering effect as the screen is erased and redrawn repeatedly.
- This problem is fixed by adding a second buffer to draw to. With this method, an image is drawn to the first buffer and that buffer is shown to you. The next frame will be drawn to the second buffer and when that’s done, the two buffers will switch places. You will immediately see the second buffer, but, hidden from us, the first buffer is being erased and redrawn with the third frame which will be swapped in when finished.
- You also want to enable the RGB color system in your window.
- Z-buffering is how you get the 3D effects that you want. OpenGL uses a three dimensional coordinate system with x, y and z axes. To give the effect that an object is closer to you its position on the z axis is increased, however, to make it appear further away its position on the z axis is decreased.
int main(int argc, char* argv[]){

//  Initialize GLUT and process user parameters
glutInit(&argc,argv);

//  Request double buffered true color window with Z-buffer
glutInitDisplayMode(GLUT_DOUBLE | GLUT_RGB | GLUT_DEPTH);
-
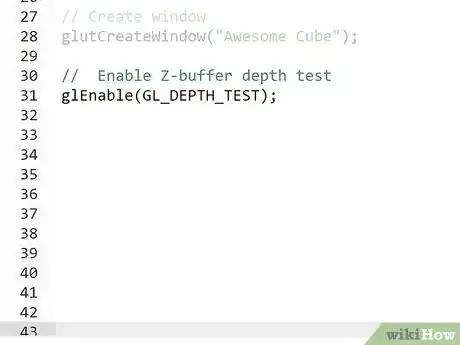
6Create the window. The next step is to create the window within which you will draw the cube. In this tutorial, the window is called "Awesome Cube".
// Create window
glutCreateWindow("Awesome Cube");
-
7Enable depth test. OpenGL is a strict language in that it does not assume any special features are enabled. For your program to properly display in 3-dimensions using the Z-buffer that you looked at earlier, you need to enable depth-test. As you continue to explore OpenGL, you will discover many features that you will need to enable including lighting, textures, cull-facing and much more.
//  Enable Z-buffer depth test
glEnable(GL_DEPTH_TEST);
-
8Add callback functions. Here are the callback functions you wrote the prototypes for earlier. Each time through the main loop, these functions will be called. The display function redraws the scene based on any changes to variables that were made since the previous call. The specialKeys function allows us to interact with the program.
// Callback functions
glutDisplayFunc(display);
glutSpecialFunc(specialKeys);
-
9Start the MainLoop. This will recall the main function until you close the program to allow for animations and user interaction.
//  Pass control to GLUT for events
glutMainLoop();

//  Return to OS
return 0;

}
Advertisement
Part 2
Part 2 of 3:
Writing the display() Function
-
1Understand the purpose of this function. All the work of drawing your cube will be done in this function. The general idea behind your cube is to draw all six sides individually and place them in the appropriate position.
- Conceptually, each side is going to be drawn by defining the four corners and letting OpenGL connect the lines and fill it in with a color that you define. Below are the steps to doing this.
-
2Add glClear(). The first step you need to take in this function is to clear the color and Z buffer. Without these steps, the old drawings may still be visible under the new drawings and objects drawn would not be in the correct location on the screen.
void display(){

//  Clear screen and Z-buffer
glClear(GL_COLOR_BUFFER_BIT|GL_DEPTH_BUFFER_BIT);
-
3Add glBegin() and glEnd(). OpenGL defines objects as combinations of different polygons. Using the glBegin() command, you effectively put down a pencil that will draw a shape. To lift up the pencil and begin a new shape, you must use the glEnd() command. In this tutorial you will be using GL_POLYGON to draw each side of the cube but it is possible to use other parameter options such as GL_LINE, GL_QUAD, or GL_TRIANGLE to create other shapes.
- Here you will be starting with the front of your cube. Later you will add color to all 6 sides.
// Multi-colored side - FRONT
glBegin(GL_POLYGON);

// Vertices will be added in the next step

glEnd();
-
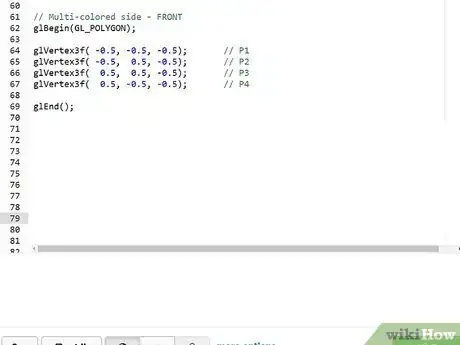
4Add glVertex3f(). Once you have stated that you want to begin your polygon, you need to define the vertices of the object. glVertex has multiple forms depending on what you want to do with your object.
- The first is how many dimensions you are working in. The 3 above in glVertex3f says you are drawing in 3 dimensions. It is also possible to work in 2 or 4 dimensions. The f above in glVertex3f says you are working with floating point numbers. You can also use shorts, integers or doubles.
- Notice that these points are defined in a counter-clockwise manner. This is not very important at the moment but when you begin to work with lighting, textures, and cull-facing, this will become incredibly important so get in the habit of defining your points counter-clockwise now.
- Add add the vertices between the glBegin() and glEnd() lines.
// Multi-colored side - FRONT
glBegin(GL_POLYGON);

glVertex3f( -0.5, -0.5, -0.5);       // P1
glVertex3f( -0.5,  0.5, -0.5);       // P2
glVertex3f(  0.5,  0.5, -0.5);       // P3
glVertex3f(  0.5, -0.5, -0.5);       // P4

glEnd();
-
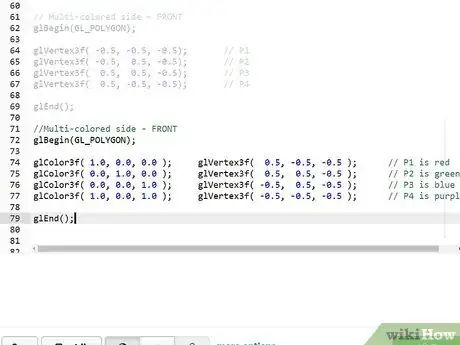
5Add glColor3f(). glColor works in a similar manner to glVertex. You can define points as shorts, integers, doubles, or floats. Each color has a value from 0 to 1. All 0's makes the point black and all 1's will make the point white. The 3 in glColor3f() refers to the RGB color system with no alpha channel. The alpha of a color defines its transparency. To change the alpha level, use glColor4f() with the last parameter being a value of 0 to 1 for opaque to transparent.
- When you call glColor3f() every vertex drawn from that point on will be of that color. Therefore, if you want all four vertices to be red, just set the color once anytime before the glVertex3f() commands and all vertices will be red.
- The Front side defined below shows how to define a new color for each vertex. When you do this, you can see an interesting property of the OpenGL colors. Since each vertex of the polygon has its own color, OpenGL will automatically blend the colors! The next step will show how to assign four vertices with the same color.
//Multi-colored side - FRONT
glBegin(GL_POLYGON);

glColor3f( 1.0, 0.0, 0.0 );     glVertex3f(  0.5, -0.5, -0.5 );      // P1 is red
glColor3f( 0.0, 1.0, 0.0 );     glVertex3f(  0.5,  0.5, -0.5 );      // P2 is green
glColor3f( 0.0, 0.0, 1.0 );     glVertex3f( -0.5,  0.5, -0.5 );      // P3 is blue
glColor3f( 1.0, 0.0, 1.0 );     glVertex3f( -0.5, -0.5, -0.5 );      // P4 is purple

glEnd();
-
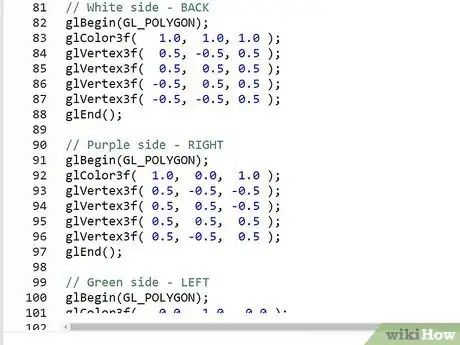
6Handle the other sides. Work out what the location of each vertex will be for the other five sides of the cube but for simplicity, these have been computed for you and are included in the final display() function below.
- We also want to add in two last lines of code for this function. These are glFlush(); and glutSwapBuffers(); which give us the double-buffering effect you learned about earlier.
// White side - BACK
glBegin(GL_POLYGON);
glColor3f(   1.0,  1.0, 1.0 );
glVertex3f(  0.5, -0.5, 0.5 );
glVertex3f(  0.5,  0.5, 0.5 );
glVertex3f( -0.5,  0.5, 0.5 );
glVertex3f( -0.5, -0.5, 0.5 );
glEnd();

// Purple side - RIGHT
glBegin(GL_POLYGON);
glColor3f(  1.0,  0.0,  1.0 );
glVertex3f( 0.5, -0.5, -0.5 );
glVertex3f( 0.5,  0.5, -0.5 );
glVertex3f( 0.5,  0.5,  0.5 );
glVertex3f( 0.5, -0.5,  0.5 );
glEnd();

// Green side - LEFT
glBegin(GL_POLYGON);
glColor3f(   0.0,  1.0,  0.0 );
glVertex3f( -0.5, -0.5,  0.5 );
glVertex3f( -0.5,  0.5,  0.5 );
glVertex3f( -0.5,  0.5, -0.5 );
glVertex3f( -0.5, -0.5, -0.5 );
glEnd();

// Blue side - TOP
glBegin(GL_POLYGON);
glColor3f(   0.0,  0.0,  1.0 );
glVertex3f(  0.5,  0.5,  0.5 );
glVertex3f(  0.5,  0.5, -0.5 );
glVertex3f( -0.5,  0.5, -0.5 );
glVertex3f( -0.5,  0.5,  0.5 );
glEnd();

// Red side - BOTTOM
glBegin(GL_POLYGON);
glColor3f(   1.0,  0.0,  0.0 );
glVertex3f(  0.5, -0.5, -0.5 );
glVertex3f(  0.5, -0.5,  0.5 );
glVertex3f( -0.5, -0.5,  0.5 );
glVertex3f( -0.5, -0.5, -0.5 );
glEnd();

glFlush();
glutSwapBuffers();

}
Advertisement
Part 3
Part 3 of 3:
Building Interactivity
-
1Add specialKeys(). You are almost done but at the moment, you can draw a cube but have no way of rotating it. To do this, you will create a specialKeys() function to allow us to press the arrow keys and rotate the cube!
- This function is why you declared the global variables rotate_x and rotate_y. When you press the right and left arrow keys, rotate_y will be incremented or decremented by 5 degrees. Similarly, when you press the up and down arrow keys, rotate_x will change accordingly.
void specialKeys( int key, int x, int y ) {

//  Right arrow - increase rotation by 5 degree
if (key == GLUT_KEY_RIGHT)
  rotate_y += 5;

//  Left arrow - decrease rotation by 5 degree
else if (key == GLUT_KEY_LEFT)
  rotate_y -= 5;

else if (key == GLUT_KEY_UP)
  rotate_x += 5;

else if (key == GLUT_KEY_DOWN)
  rotate_x -= 5;

//  Request display update
glutPostRedisplay();

}
-
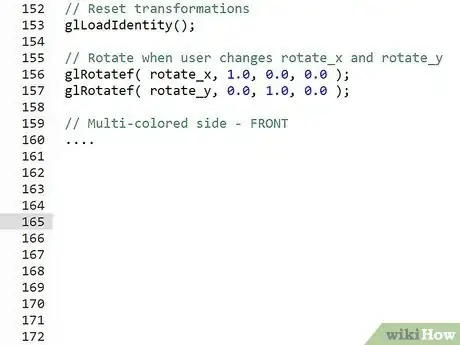
2Add glRotate(). Your last statement is to add the statement that will rotate your object. Go back to the display() function and before the FRONT side, add these lines:
- First notice that the syntax of glRotatef() is similar to that of glColor3f() and glVertex3f() but always requires 4 parameters. The first parameter is the degree of rotation to be applied. The next three parameters define which axis to rotate about with the first being the x axis, second being the y axis, and third being the z axis. Right now you only need to rotate about the x and y-axis.
- All transformations that you write in your program need lines similar to this. Conceptually, you can think of this as rotating your object about the x axis by the amount defined by rotate_x and then rotating around the y axis by rotate_y. However, OpenGL combines all these statements into one matrix transformation. Each time you call the display function, you build a transformation matrix and glLoadIdentity() assures that you will start out with a new matrix in each pass.
- The other transformation functions you could apply are glTranslatef() and glScalef(). These functions are similar to glRotatef() with the exception the they only take 3 parameters, the x, y, and z amounts to translate or scale the object.
- In order to get the correct effect when applying all three transformations to one object, you need to apply them in the correct order. Always write them in the order glTranslate, glRotate, then glScale. OpenGL essentially applies the transformations in a bottom up manner. To understand this try to imagine what a simple 1x1x1 cube would look like with the transformations if OpenGL applied them from top to bottom and if OpenGL applied them from bottom to top.
// Reset transformations
glLoadIdentity();

// Rotate when user changes rotate_x and rotate_y
glRotatef( rotate_x, 1.0, 0.0, 0.0 );
glRotatef( rotate_y, 0.0, 1.0, 0.0 );

// Multi-colored side - FRONT
....
-
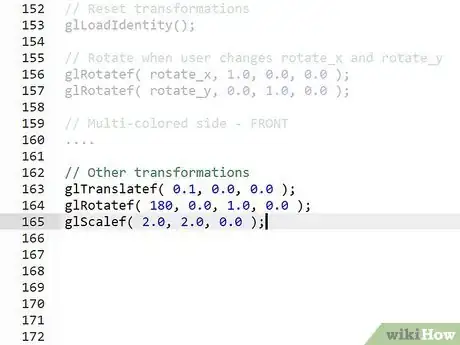
3Add the following commands to scale the cube by 2 along the x-axis, 2 along the y-axis, rotate the cube by 180 degrees about the y-axis, and translate the cube by 0.1 along the x-axis. Make sure to arrange these as well as the previous glRotate() commands in the correct order as described above. (If you are unsure, this is done this in the final code at the end of the tutorial.)
// Other transformations
glTranslatef( 0.1, 0.0, 0.0 );
glRotatef( 180, 0.0, 1.0, 0.0 );
glScalef( 2.0, 2.0, 0.0 );
-
4Compile and run your code. Assuming you are using gcc as your compiler, run these commands from your terminal to compile and test your program.
On Linux:
gcc cube.c -o cube -lglut -lGL

./ mycube

On Mac:
gcc -o foo foo.c -framework GLUT -framework OpenGL
./ mycube

On Windows:
gcc -Wall -ofoo foo.c -lglut32cu -lglu32 -lopengl32
./ mycube
-
5Check your complete code. It should be like this:
//
// File:        mycube.c
// Author:      Matt Daisley
// Created:     4/25/2012
// Project:     Source code for Make a Cube in OpenGL
// Description: Creates an OpenGL window and draws a 3D cube
//              That the user can rotate using the arrow keys
//
// Controls:    Left Arrow  - Rotate Left
//              Right Arrow - Rotate Right
//              Up Arrow    - Rotate Up
//              Down Arrow  - Rotate Down

// ----------------------------------------------------------
// Includes
// ----------------------------------------------------------
#include <stdio.h>
#include <stdarg.h>
#include <math.h>
#define GL_GLEXT_PROTOTYPES
#ifdef __APPLE__
#include <GLUT/glut.h>
#else
#include <GL/glut.h>
#endif

// ----------------------------------------------------------
// Function Prototypes
// ----------------------------------------------------------
void display();
void specialKeys();

// ----------------------------------------------------------
// Global Variables
// ----------------------------------------------------------
double rotate_y=0;
double rotate_x=0;

// ----------------------------------------------------------
// display() Callback function
// ----------------------------------------------------------
void display(){

  //  Clear screen and Z-buffer
  glClear(GL_COLOR_BUFFER_BIT|GL_DEPTH_BUFFER_BIT);

  // Reset transformations
  glLoadIdentity();

  // Other Transformations
  // glTranslatef( 0.1, 0.0, 0.0 );      // Not included
  // glRotatef( 180, 0.0, 1.0, 0.0 );    // Not included

  // Rotate when user changes rotate_x and rotate_y
  glRotatef( rotate_x, 1.0, 0.0, 0.0 );
  glRotatef( rotate_y, 0.0, 1.0, 0.0 );

  // Other Transformations
  // glScalef( 2.0, 2.0, 0.0 );          // Not included

  //Multi-colored side - FRONT
  glBegin(GL_POLYGON);

  glColor3f( 1.0, 0.0, 0.0 );     glVertex3f(  0.5, -0.5, -0.5 );      // P1 is red
  glColor3f( 0.0, 1.0, 0.0 );     glVertex3f(  0.5,  0.5, -0.5 );      // P2 is green
  glColor3f( 0.0, 0.0, 1.0 );     glVertex3f( -0.5,  0.5, -0.5 );      // P3 is blue
  glColor3f( 1.0, 0.0, 1.0 );     glVertex3f( -0.5, -0.5, -0.5 );      // P4 is purple

  glEnd();

  // White side - BACK
  glBegin(GL_POLYGON);
  glColor3f(   1.0,  1.0, 1.0 );
  glVertex3f(  0.5, -0.5, 0.5 );
  glVertex3f(  0.5,  0.5, 0.5 );
  glVertex3f( -0.5,  0.5, 0.5 );
  glVertex3f( -0.5, -0.5, 0.5 );
  glEnd();

  // Purple side - RIGHT
  glBegin(GL_POLYGON);
  glColor3f(  1.0,  0.0,  1.0 );
  glVertex3f( 0.5, -0.5, -0.5 );
  glVertex3f( 0.5,  0.5, -0.5 );
  glVertex3f( 0.5,  0.5,  0.5 );
  glVertex3f( 0.5, -0.5,  0.5 );
  glEnd();

  // Green side - LEFT
  glBegin(GL_POLYGON);
  glColor3f(   0.0,  1.0,  0.0 );
  glVertex3f( -0.5, -0.5,  0.5 );
  glVertex3f( -0.5,  0.5,  0.5 );
  glVertex3f( -0.5,  0.5, -0.5 );
  glVertex3f( -0.5, -0.5, -0.5 );
  glEnd();

  // Blue side - TOP
  glBegin(GL_POLYGON);
  glColor3f(   0.0,  0.0,  1.0 );
  glVertex3f(  0.5,  0.5,  0.5 );
  glVertex3f(  0.5,  0.5, -0.5 );
  glVertex3f( -0.5,  0.5, -0.5 );
  glVertex3f( -0.5,  0.5,  0.5 );
  glEnd();

  // Red side - BOTTOM
  glBegin(GL_POLYGON);
  glColor3f(   1.0,  0.0,  0.0 );
  glVertex3f(  0.5, -0.5, -0.5 );
  glVertex3f(  0.5, -0.5,  0.5 );
  glVertex3f( -0.5, -0.5,  0.5 );
  glVertex3f( -0.5, -0.5, -0.5 );
  glEnd();

  glFlush();
  glutSwapBuffers();

}

// ----------------------------------------------------------
// specialKeys() Callback Function
// ----------------------------------------------------------
void specialKeys( int key, int x, int y ) {

  //  Right arrow - increase rotation by 5 degree
  if (key == GLUT_KEY_RIGHT)
    rotate_y += 5;

  //  Left arrow - decrease rotation by 5 degree
  else if (key == GLUT_KEY_LEFT)
    rotate_y -= 5;

  else if (key == GLUT_KEY_UP)
    rotate_x += 5;

  else if (key == GLUT_KEY_DOWN)
    rotate_x -= 5;

  //  Request display update
  glutPostRedisplay();

}

// ----------------------------------------------------------
// main() function
// ----------------------------------------------------------
int main(int argc, char* argv[]){

  //  Initialize GLUT and process user parameters
  glutInit(&argc,argv);

  //  Request double buffered true color window with Z-buffer
  glutInitDisplayMode(GLUT_DOUBLE | GLUT_RGB | GLUT_DEPTH);

  // Create window
  glutCreateWindow("Awesome Cube");

  //  Enable Z-buffer depth test
  glEnable(GL_DEPTH_TEST);

  // Callback functions
  glutDisplayFunc(display);
  glutSpecialFunc(specialKeys);

  //  Pass control to GLUT for events
  glutMainLoop();

  //  Return to OS
  return 0;

}
Advertisement
Community Q&A
-
QuestionHow can I find the coordinates for this cube?
 Community AnswerTry finding the square's coordinates. It may help, as a square is two-dimensional while a cube is three-dimensional.
Advertisement
References
- Installing OpenGL
- Nehe Productions Tutorials in OpenGL
- OpenGL: A Primer, 3/E
- CSCI 4229 Introduction to Computer Graphics. Professor Schreüder, University of Colorado at Boulder
About This Article
Advertisement


