This article was co-authored by Claire Donovan-Blackwood. Claire Donovan-Blackwood is an Arts & Crafts Specialist and CEO of Heart Handmade UK, a site dedicated to helping people live a happy, creative life. With over 13 years of experience, Claire uses art as a form of therapy and focuses on mindfulness in the making of art. She makes crafting easy and accessible for those she works with. Claire received her B.A. in Photography & Visual Imagery from The University of Huddersfield.
There are 9 references cited in this article, which can be found at the bottom of the page.
wikiHow marks an article as reader-approved once it receives enough positive feedback. In this case, 91% of readers who voted found the article helpful, earning it our reader-approved status.
This article has been viewed 667,666 times.
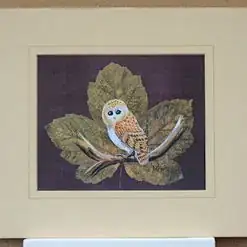
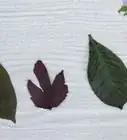
Skeleton leaves are beautiful, delicate, lacy leaves used for scrapbooking, decoupage, and other crafts. They can be used to study different parts of a leaf and can be expensive to buy, but they are surprisingly easy to make. Not only can you save lots of money by making them at home, but you can also customize them by bleaching or dyeing them. Best of all, you can choose your own leaf shape and size!
Steps
Using Washing Soda
-
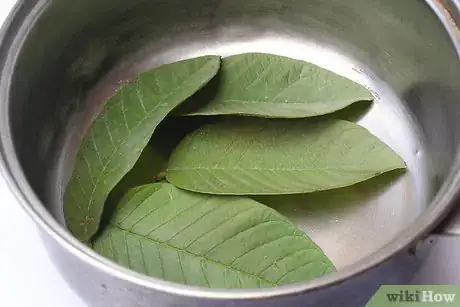
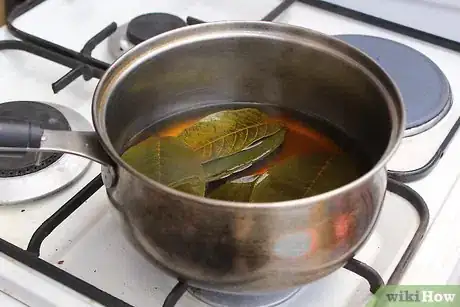
1Place the leaves you want to use into a saucepan. However many leaves you choose to use is up to you, but avoid over-crowding the pot. You want to create an even layer across the bottom of the pot, at most. The best type of leaves to work with have a waxy, glossy surface, like magnolia or gardenia leaves.[1]
-
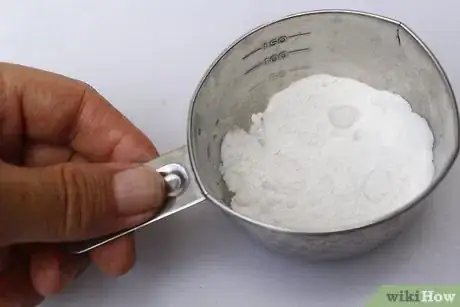
2Cover the leaves with washing soda and water. You will need ½ to ¾ cups (70 to 105 grams) of washing soda and 4 cups (950 milliliters) of water. Give the solution a gentle stir to combine it.[2]Advertisement
-
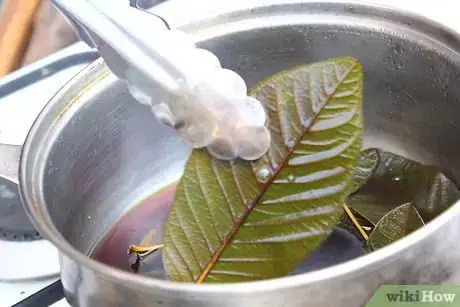
3Cook the leaves until they soften. Bring the water to a boil over medium to medium-high heat first, then reduce it to a simmer. Cook the leaves until they turn soft. This will take about 90 minutes to 2 hours, depending on the type of leaf you are using.[5]
- The water will evaporate as you simmer it. Add more water to the pot as needed so that the leaves don't dry out.[6]
-
4Remove the leaves from the water. Put on a pair of plastic or rubber gloves first. Next, use a pair of tongs or a spatula to remove the leaves from the water.[7] If the leaves are pulpy and gloopy, soak them in a tub filled with cool to room-temperature water for a few minutes; this will make cleaning them easier later on.
-
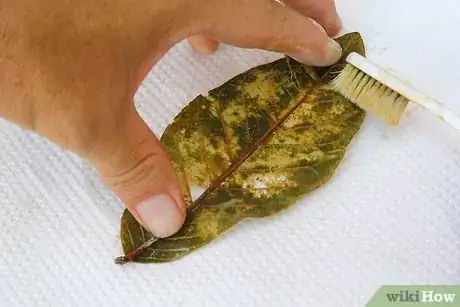
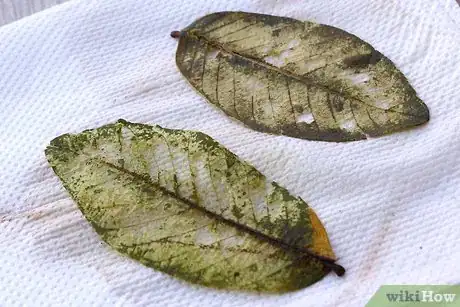
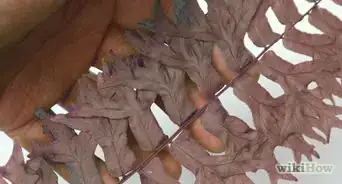
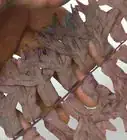
5Set the leaves onto a paper towel and gently brush the leaf pulp away. Hold the leaves by the stem with tweezers, and use a paintbrush or a soft toothbrush to gently brush the pulp away. Turn the leaf over, and scrape the other side clean too.[8]
-
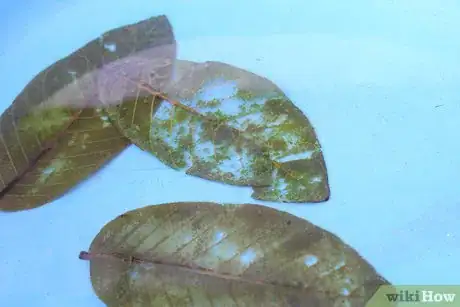
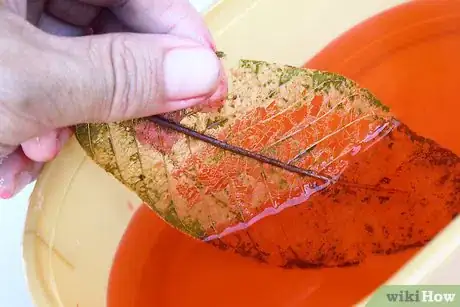
6Rinse the leaves in fresh water once more. The leaves will be very delicate at this stage, so be gentle with them. Fill a tub with cool to room-temperature water, then place the leaves in the water. Gently swish the leaves around, if needed. If the leaves still have residue clinging to them, change the water and repeat this step.
- Do not rinse the leaves under running water; the force of the stream will damage them.
-
7Allow the leaves to dry. Place the leaves between two paper towels, then stack heavy books on top. The paper towels will help absorb the excess moisture while the books will help make the leaves dry flat. If you don't do this, the leaves may warp and curl.
- If you want curled or warped (natural) leaves, allow them to dry on a sheet of paper towel without anything on top. Since they won't have anything weighing them down, the leaves will warp naturally as they dry.
Trying Other Methods
-
1Steep the leaves in water instead. Boil 2 cups (475 milliliters) of water with 3 tablespoons (26 grams) of washing soda. Remove the water from heat, add the leaves, and let them soak for 20 to 30 minutes.[11] Once they are done soaking, scrape the pulp off like your normally would.
- This process is similar to the method above, except that you are not cooking the leaves continuously.
- This method is ideal for small batches or delicate leaves.
-
2Soak the leaves in plain water if you are patient. This will take about 2 to 3 weeks; you will also need to change the water every few days to keep it from going rancid. You can add some bleach to further prevent decay.[12] Once the leaves are soaked, scrape the pulp off using a soft toothbrush.
- If you are adding bleach, plan on using a 1:30 bleach-to-water ratio.
-
3Try a biological detergent instead. Combine 2 cups (475 milliliters) of water with 4 ounces (113 grams) of a biological detergent. Add the leaves, then boil everything for 30 minutes. Rinse the leaves off, then scrape them clean with a soft toothbrush. Press the leaves between two sheets of blotting paper for 2 weeks.
Coloring or Bleaching the Leaves
-
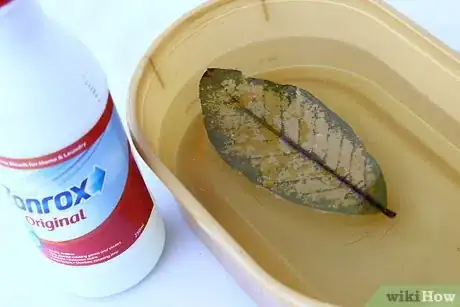
1Use bleach to turn the leaf skeletons white. Pour 1 cup (240 milliliters) water and ¼ cup (60 milliliters) bleach into a container. Add the leaves, and leave them there until they turn white. This will typically take about 20 minutes, but it may take longer for darker or thicker leaves.[13]
- If you made a lot of skeleton leaves, you may have to work in a few batches for this step. Do not overcrowd the container you are bleaching them in.
-
2Rinse the leaves in fresh water. Fill a clean container with cool to lukewarm water. Dip the leaves into the water, one by one, then set them down onto a paper towel. The water will get rid of any excess bleach and stop the bleaching process[14]
-
3Allow the leaves to dry. If you want the leaves to dry flat, place them between two sheets of paper towel, then stack some heavy books on top of them. If you want more natural-looking leaves, allow them to dry on a paper towel without anything on top. Without anything weighing them down, the leaves will curl and warp slightly as they dry.
- This process should take about 20 minutes.[15]
-
4Soak the leaves in food coloring or liquid watercolor for a dyed effect. Mix water with enough food coloring or liquid watercolor to get the shade you want. Soak the leaves in the solution for up to 20 minutes, then lift them out. Rinse them in fresh water, then left them dry using the same method as before:
- If you want flat leaves, sandwich them between paper towels, then stack books on them.
- If you want natural leaves, let them dry on a paper towel.
-
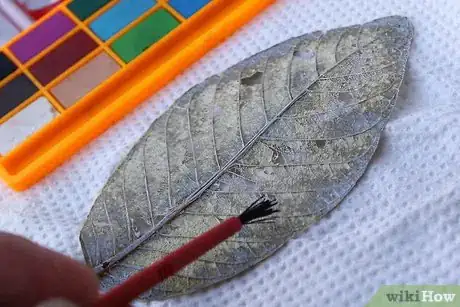
5Paint the leaves with liquid watercolor or food coloring. Pour your desired colors into small cups or caps. Use a soft, watercolor paintbrush to paint the leaves with the dye. You can paint the leaves a solid color, or you can paint bands to create an ombre effect.[16] Let the leaves dry between two books when you are done.
- Avoid using brushes with stiff bristles; they can damage the leaf skeletons.
-
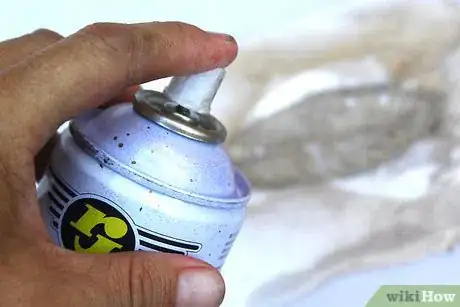
6Spray paint the leaves if you want a metallic effect. Set the leaves down onto a paper towel. Lightly spray them with metallic spray paint. Use a pair of tweezers to lift the leaves up. Transfer them to a clean paper towel, and let them dry. Repeat the process for the other side.
- Don't let the leaves dry on the spray painted paper towel, or they will stick.
- Use floral spray paint for even better results.
Decorating or Using the Leaves
-
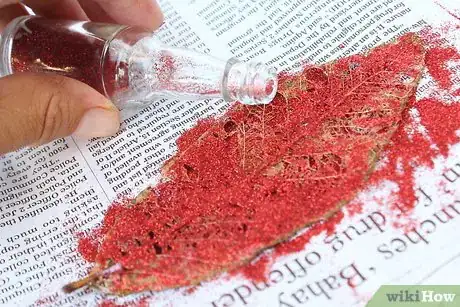
1Add some bling with seed beads, glitter, or rhinestones. Outline the leaf and/or the center stem with liquid glue, then sprinkle on extra-fine scrapbooking glitter. You can also use tiny, glass seed beads or tiny rhinestones instead. Alternatively, you can draw designs onto the leaves using glitter glue.
- School glue or craft glue with a small tip will work the best for this. You can also paint the glue on using a thin, pointed paintbrush.
- Don't use the regular kind of glitter. It will be too chunky for this project.
-
2Use dried leaves to make a bowl or box. Cover your bowl or box with plastic wrap. Mix equal amounts of school glue and warm water. Dip the leaves into the glue, then smooth them onto the bowl or box. Let them dry, then lift the leaves off; peel away any plastic wrap stuck to the leaves.[17]
- Add a sprinkle of extra-fine glitter to the glue for some sparkle.
- If you don't have school glue, you can try craft/tacky glue or decoupage glue (ie: Mod Podge).
-
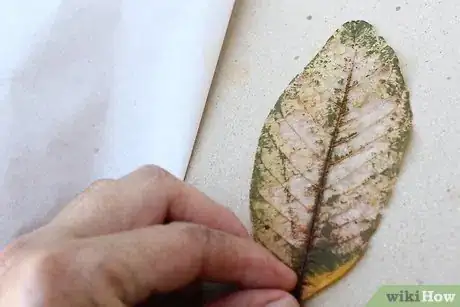
3Use the leaves in scrapbooking and card making. You can glue the leaves to cards and scrapbooking paper using a glue stick. You can also paint the back of the leaf with a thin layer of liquid glue, and stick it to the project instead.[18]
- For a fancier touch, use a shaped hole puncher or a craft blade to use an interesting shape (ie: heart, star, moon, etc) out of the middle of the leaf.[19]
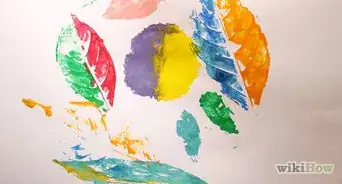
- You can also use the leaves to make prints instead. Paint the back with watercolor, press them against paper, then peel them away.
-
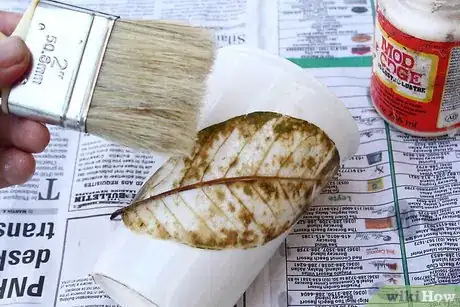
4Decoupage the leaves onto glass votives or vases. Wipe the glass object with rubbing alcohol first. Paint it with glossy decoupage glue (ie: Mod Podge). Apply a thin layer of decoupage glue onto the back of the leaf, then paint it onto the glass object. Coat the leaf with a final layer of decoupage glue.[20]
-
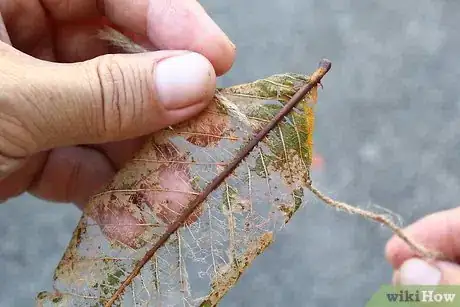
5String the leaves onto a garland. Thread the leaves right through the joint where the center stem meets the base stem. You can even make several garlands, then hang them from vertically to create a backdrop. The string needs to be thin enough to pass through the leaf skeleton. More delicate leaves may only be able to handle thick thread or baker's twine. Sturdier leaves may work well with both thick thread or baker's twine, as well as thick twine, thin yarn, or thin jute cord.
- If you want to make the leaves keep their position on the string, tie a small knot in the string to either side of the leaf.
Community Q&A
-
QuestionIs it fine if I use bleach instead of biological detergent or washing soda?
 Community AnswerIt should be fine, but test it out first with a different leaf.
 -
QuestionIs there anything I can use as a substitute for blotting paper?
 Community AnswerDiffusing paper or coffee filters. Open up the round, cup shaped filters and make them flat.
 -
QuestionWhat can you do if the chlorophyll is not extracting through this method?
 Community AnswerOnce you've removed all the pulp, simply soak the skeleton leaves in bleach until they are the desired color, then rinse with water and dry. The skeleton leaves remain green unless you bleach them. Once the skeleton leaves are bleached, you can dye them different colors.
Warnings
- Washing soda is caustic. Be sure to wear protective gloves while working with it.⧼thumbs_response⧽
- Children should not do this project without adult supervision.[24]⧼thumbs_response⧽
Things You'll Need
- Leaves (preferably waxy or glossy)
- ½ to ¾ cup (70 to 105 grams) washing soda (not baking soda)
- 4 cups (950 milliliters) water
- Saucepan
- Plastic or rubber gloves
- Tongs or spatula
- Tweezers
- Paper towels
- Paint brush or soft toothbrush
- Bleach or food coloring (optional)
References
- ↑ https://www.mnn.com/family/family-activities/blogs/how-make-leaf-skeletons
- ↑ https://www.icreativeideas.com/diy-colorful-skeleton-leaves/
- ↑ https://www.mnn.com/family/family-activities/blogs/how-make-leaf-skeletons
- ↑ https://feltmagnet.com/crafts/How-to-Make-Skeleton-Leaves
- ↑ https://www.mnn.com/family/family-activities/blogs/how-make-leaf-skeletons
- ↑ https://www.mnn.com/family/family-activities/blogs/how-make-leaf-skeletons
- ↑ https://www.mnn.com/family/family-activities/blogs/how-make-leaf-skeletons
- ↑ https://www.mnn.com/family/family-activities/blogs/how-make-leaf-skeletons
- ↑ http://blog.freepeople.com/2015/12/leaf-skeletons/
- ↑ http://blog.freepeople.com/2015/12/leaf-skeletons/
- ↑ https://feltmagnet.com/crafts/How-to-Make-Skeleton-Leaves
- ↑ https://feltmagnet.com/crafts/How-to-Make-Skeleton-Leaves
- ↑ https://www.icreativeideas.com/diy-colorful-skeleton-leaves/
- ↑ https://www.icreativeideas.com/diy-colorful-skeleton-leaves/
- ↑ https://www.mnn.com/family/family-activities/blogs/how-make-leaf-skeletons
- ↑ http://blovedblog.com/lifestyle/diy-lovely-leaf-backdrop/
- ↑ http://www.christinedebeer.ca/tutorials/barely-there-skeleton-leaf-gift-box
- ↑ https://feltmagnet.com/crafts/How-to-Make-Skeleton-Leaves
- ↑ https://feltmagnet.com/crafts/How-to-Make-Skeleton-Leaves
- ↑ http://www.theidearoom.net/how-to-make-leaf-skeletons/
- ↑ http://www.preservedgardens.com/make_skeleton_leaves.htm
- ↑ https://alidoesit.wordpress.com/tag/leaves/
- ↑ https://feltmagnet.com/crafts/How-to-Make-Skeleton-Leaves
- ↑ http://www.preservedgardens.com/make_skeleton_leaves.htm
About This Article
To make skeleton leaves, start by putting the leaves you want to use in a pot. Then, cover the leaves with 1/2-3/4 cup of washing soda and 4 cups of water. When the water boils, reduce the heat to a simmer and cook for 90 minutes to 2 hours. Next, remove the leaves from the pot using a spatula, place them in a bowl of room temperature water, and gently remove the pulp from them with a paint brush. To finish, wash the leaves in fresh water before placing them between two paper towels and leaving them to dry. For tips on how to decorate or use your new skeleton leaves, including how to turn the leaves into a garland or a bowl, keep reading!
