X
This article was co-authored by wikiHow Staff. Our trained team of editors and researchers validate articles for accuracy and comprehensiveness. wikiHow's Content Management Team carefully monitors the work from our editorial staff to ensure that each article is backed by trusted research and meets our high quality standards.
This article has been viewed 45,232 times.
Learn more...
Magnets are a great way to decorate your fridge or locker. There are all sorts of cool magnets available on the market, but photo magnets are much more personal. Because of how unique they are, you can't really get them in a store. Luckily, they are easy to make. Best of all, there are countless variations!
Steps
Method 1
Method 1 of 4:
Using Glass Cabochons
-
1Get a pack of clear glass cabochons or flat-back marbles. You can find these in the floral section of a craft store, next to all the other glass marbles and vase fillers. You may also be able to find them in the mosaic section of a craft store or online.[1]
- Pick something that is around 1⁄2 and 3⁄4 inch (1.3 and 1.9 cm). If it is too small, you'll lose too much detail in the photo. If it is too big, it will be too heavy and slide off of the fridge.
- Another alternative is to use a plastic cabochon, which you can find online or in a store that sells casting supplies.
- You may be able to find square-shaped glass gems in the mosaic section of a craft store.
-
2Print out the photo on plain printer paper. You will be gluing this to the back of a cabochon, so you really don't need fancy photo paper for this. Make sure that the print quality is high, however. If the image looks fuzzy or pixelated, the magnets won't look as nice.[2]
- The photo should be small enough so that you can see the subject through the cabochon. If it is too big, resize the photo using an image editing program, such as Photoshop.
Advertisement -
3Trace the cabochon onto the photo. Set the photo face-up on a flat surface, then place the cabochon on top. Move the cabochon around until you can see the subject through the glass. Trace around the cabochon with a pen or pencil.[3]
- It's important to trace the cabochon because they are rarely perfect circles.
-
4Cut the photos out. You can do this with a pair of scissors or with a craft blade. Make sure that you cut just inside the lines that you traces so that they won't be visible in the final product. Work your way around the edge of the circle making neat, little cuts.[4]
- Don't use a craft hole punch if you used a glass cabochon; glass cabochon are rarely perfectly round.
- If you are using a plastic cabochon, you can a craft hole punch in a matching size. This is because plastic cabochons are machine-made and perfectly round.
-
5Glue the photo to the back of the cabochon with decoupage glue. Use a foam brush or a paintbrush with synthetic taklon bristles to apply a thin coat of decoupage glue (i.e. Mod Podge) to the back of the cabochon. Press the photo face down into the glue, then smooth out any wrinkles or air bubbles.[5]
- You can also use a silicone sealer instead.[6]
- For best results, wipe the back of the cabochon with rubbing alcohol first. This will help the glue stick better.
-
6Let the photo dry. This should only take 15 to 20 minutes, depending on the type of glue you used. If you used decoupage glue instead of silicone sealer, you might want to coat the back of the photo with 1 to 2 coats of decoupage glue. This will give you a smoother finish and protect the photo.
- Let each coat of decoupage glue dry before adding the next coat.
- Extend the glue past the edges of the photo and onto the glass to help seal it in further.
-
7Glue a 1⁄2 to 3⁄4 in (1.3 to 1.9 cm) magnet to the back of the photo. You should use glue even if the magnet is self-adhesive. Hot glue will work just fine for this, but you can use tacky glue or industrial strength glue as well. Once the glue sets, the magnet is ready to use.[7]
- How long it takes for the glue to set depends on the type that you are using. Hot glue will only take a few minutes, but other types of glue will take a few hours.
- Do not use decoupage glue for this step. It is not strong enough.


Advertisement
Method 2
Method 2 of 4:
Using Ceramic Tiles
-
1Get some 2 in (5.1 cm) tiles. You can buy these individually from a hardware store or in packs from a craft store. You can also buy them in sheets from a hardware store. If you buy them in sheets, cut them apart into separate tiles with a box cutter.[8]
-
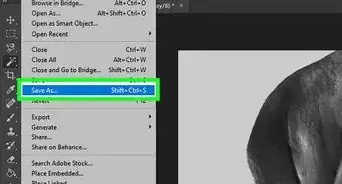
2Print the photo out on plain printer paper. The photo should be a little bigger than the tile itself so that you have room to crop it. You still want the subject to be small enough to fit on the tile, however; if the subject is too big, resize the photo using an image editing program, such as Photoshop.
- Make sure that your photo is high-quality. Don't use a fuzzy or pixelated image.
- You can use photo paper, but you will be covering the photo with decoupage glue, so it won't make too much of a different in terms of texture.
-
3Trace the tile onto your photo. Set the photo face up on a flat surface, then set the tile down onto the photo. Move the tile over the part that you want to cut out, then trace around it with a pen or pencil.[9]
-
4Cut the photo out. You can do this with a pair of scissors, but you'll get a cleaner edge if you use a paper slicer instead. If you don't have a paper slicer, you can use a metal ruler and a craft blade.[10]
- Cut just inside the lines that you traced so that they aren't visible on the photo.
- Consider cutting the photo a little smaller than the tile. This way, the tile will create a frame-like border around the photo.
-
5Glue the photo to the tile with decoupage glue, then let it dry. Use a foam brush or a paintbrush made from synthetic taklon bristles to apply a coat of decoupage glue (i.e. Mod Podge) over the tile. Press the photo down onto the tile; make sure that it is facing up. Use your finger to smooth away any wrinkles or air bubbles.[11]
- If any of the decoupage glue leaks out from under the photo, wipe it away with your finger or brush.
- It will take about 15 to 20 minutes for the glue to dry.
-
6Seal the photo with 2 coats of decoupage glue, then let it dry again. Choose a decoupage glue in a finish that you like, then brush a thin coat over the photo. Let the glue dry for 15 to 20 minutes, then apply a second coat. Let the second coat dry completely before moving on.[12]
- It can take several hours for the decoupage glue to dry completely. Some glues also have several days' curing time, so check the instruction label.
- A glossy finish will look the nicest, but you can use any finish you want.
- Extend the decoupage glue past the edges of the photo to seal it in and prevent it from peeling up.
-
7Hot glue a magnet to the back of the tile. A 1⁄2 to 3⁄4 in (1.3 to 1.9 cm) round magnet will work the best for this; avoid using a strip magnet, as it may be too weak to hold the weight of the tile. Apply a blob of hot glue to the magnet, then press the magnet onto the back of the tile. Wait a few minutes for the glue to set before using the magnet.[13]
- You can use other types of glue too, such as tacky glue or industrial strength glue. Do not use decoupage glue for this.
- If the magnet is too small, you can glue more magnets to the back of the tile. For example, you can glue 1 in each corner, or glue 3 to make a shamrock shape.


Advertisement
Method 3
Method 3 of 4:
Using Mason Jar Lids
-
1Resize your photo using an image editing program, if needed. The subject of your photo needs to be big enough to show through the outer ring of a mason jar lid. It's okay if the actual photo is bigger, because you will be trimming it down, but if the subject is too big, you'll need to shrink it.
-
2Print the photo out. Make sure that the photo quality is good. If you can, use photo paper so that you have a nice, glossy finish. If you don't have photo paper, consider using an ink jet printer instead. The print quality will be much higher than that of a laser printer, and it will have a slightly-glossy finish to it.[14]
- If you don't have an ink jet printer, take the photo file on a USB drive to a print shop, and get it printed there.
-
3Take apart a mason jar lid. Mason jar lids come in 2 parts: an outer ring part and an inner disk part. Unscrew the lid off of a mason jar, then pop the inner disk part out. Set the ring part aside for later.[15]
- Make sure that the lid is clean. If it is dirty, wash it with warm, soapy water, then pat it dry with a towel.
- You can sometimes buy mason jar lids separately in a craft store.
- For a more unique magnet, spray paint the ring portion of the lid a different color, then let it dry.
-
4Trace the photo onto the inner mason jar lid. Set your photo face-up onto a flat surface. Set the inner, disk-shaped part of the mason jar lid on top. Move the lid around until it covers the part of the photo you want to cut out. Trace around the lid with a pen or marker.[16]
- You can try using a pencil for this, but it may not show up, especially if you used photo paper.
-
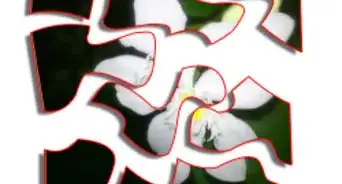
5Cut the circle out. You can do this with scissors or a craft blade. Try to cut just inside the lines that you drew. If you want the disk part of the lid to create a border around your photo, cut the photo even smaller--about 1⁄8 to 1⁄4 inch (0.32 to 0.64 cm).[17]
-
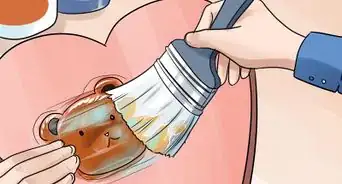
6Glue the inner disk into the outer ring. Take the disk-shaped inner part of the lid, and coat the edges with glue. Press the lid into the outer ring part of the lid, then wait for the glue to set. Hot glue will work just fine for this, but an industrial strength glue would be much better.[18]
- The ring part of the lid will create a frame. Skip this step if you don't want this frame.[19]
- For a nicer finish, glue the disk inside-out so that underside is visible on the outside of the lid.
-
7Glue the photo into the lid. Coat the inside of the mason jar lid with glue, then press the photo into it--make sure that the photo is facing up. Hot glue will work the best for this, but you can use an industrial strength glue as well.[20]
- If you want to add more depth to your magnet, glue a piece of cardboard into the lid first.
-
8Glue a magnet to the back of your lid. Flip the mason jar lid over so that you can see the top. Get a magnet, and glue it to the center of the lid. Hot glue will work just fine here, but an industrial strength glue would be much better.[21]
- Use a round magnet if you used both the inner and outer parts of the lid.
- Use a magnetic strip if you used just the inner part of the lid.
-
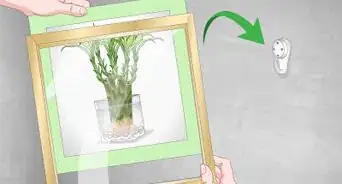
9Hot glue a decorative trim around the ring, if desired. Cut a piece of jute cord or fabric ribbon. Wrap it around the outside edge of the mason jar lid, then hot glue it down. Work 1 to 2 inches (2.5 to 5.1 cm) at a time, or the glue will set too fast.
- For a fancier magnet, use a rhinestone or pearl trim instead.


Advertisement
Method 4
Method 4 of 4:
Using Shrinky Dinks
-
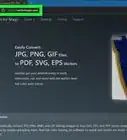
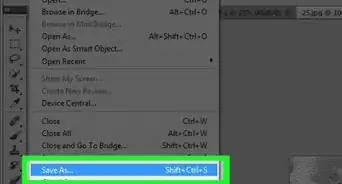
1Make your photo 3 times larger than what you want the magnet to be. Shrinky Dinks are a type of plastic that shrinks to 1/3 of its size when baked in the oven. As such, your photo needs to be 3 times the size you want it to be in the end. Open your photo using an image editing program, such as Photoshop, then resize it accordingly.[22]
- You can enlarge the photo by changing the file size, then inputting your desired dimensions.
- For a simpler program, such as Microsoft Paint, you'll need to enlarge it using the magnifier.
-
2Print the photo out on the Shrinky Dink paper. You can find this paper online and in craft stores. Each brand will be a little different, so read the instructions to find out exactly what printer setting you should use.[23]
- The ink will be wet once it prints out. Wait a few minutes for it to dry, otherwise it will smear when you touch it.
-
3Cut the image out. Chances are, the image is only on a small portion of the paper. Use scissors or a craft blade to cut the image out. You can cut it flush to the photo or leave a thin, white border.[24]
- If you are leaving a border, keep in mind that it will be 3 times narrower after you bake it.
-
4Place the photo face down on a baking sheet lined with brown paper. Get out a baking sheet and cover it with brown butcher paper. You can also cut a rectangle out of a brown paper bag, and use that instead. Place the cut Shrinky Dink photo face-down on the brown paper.[25]
-
5Bake the photo in a preheated oven at 300 °F (149 °C) for 3 to 8 minutes. Preheat your oven to 300 °F (149 °C) first. Once it reaches the correct temperature, slide the baking sheet into the oven, then close the oven. Let the Shrinky Dink bake for 3 to 8 minutes. The photo will start to curl up at first, but then it will uncurl. Once it shrinks and uncurls, it is ready.[26]
- You don't have to wait for the photo to uncurl all the way. As long as about 90% of it is flat, you are good.
- Keep an eye on the photo. The bigger your photo is, the longer it will take to bake.
-
6Place the Shrinky Dink on a counter and press it with paper as it cools. Take the baking sheet out of the oven with an oven mitt. Remove the Shrinky Dink with a spatula or fork, and set it face-down on the counter. Cover it with another sheet of brown paper, then press down on it until it cools.[27]
- You can press down on it with your hands or with a textbook. This will help flatten the plastic further.
- How long it takes for the plastic to cool depends on how big it was to begin with. The bigger it is, the longer it will take. Expect to wait only a few minutes, however.
-
7Glue a magnet to the back of the photo. Take the photo from under the paper. It should now be 1/3 of its size and a little thicker than before. Flip the photo over, then hot glue a magnet to the back.[28]
- A thin, magnetic strip will work the best for this, but you can use a round magnet too.
- Self-adhesive magnets may be strong enough to hold the Shrinky Dink up. It wouldn't be a bad idea to glue it, however.


Advertisement
Community Q&A
-
QuestionHow do I make a photo magnet using a rigid, metal fridge magnet, 3x3" size?If you are looking to change the front of the magnet into a photo version, then follow the ceramic tile method in the article. Read the Mason jar method if you need a specific-sized photo to put on the magnet.
Advertisement
Things You'll Need
Using Glass Cabochons
- 1⁄2 to 3⁄4 in (1.3 to 1.9 cm) glass cabochon
- 1⁄2 to 3⁄4 in (1.3 to 1.9 cm) magnets
- Foam brush or synthetic paintbrush
- Mod Podge
- Hot glue
- Photos
- Scissors or craft blade
Using Ceramic Tiles
- 2 in (5.1 cm) tile
- 1⁄2 to 3⁄4 in (1.3 to 1.9 cm) magnets
- Foam brush or synthetic paintbrush
- Mod Podge
- Hot glue or industrial strength glue
- Photos
- Scissors or craft blade
Using Mason Jar Lids
- 2-part mason jar lid
- Hot glue
- Magnet
- Photos
- Scissors or craft blade
Using Shrinky Dinks
- Printer
- Shrinky Dinks
- Scissors or craft blade
- Oven
- Baking sheet
- Brown butcher paper or paper bag
- Hot glue
- Magnet


References
- ↑ http://www.notmartha.org/tomake/marblemagnets/
- ↑ https://modpodgerocksblog.com/2011/01/fun-face-glass-magnets.html
- ↑ http://www.notmartha.org/tomake/marblemagnets/
- ↑ http://www.notmartha.org/tomake/marblemagnets/
- ↑ https://modpodgerocksblog.com/2011/01/fun-face-glass-magnets.html
- ↑ http://www.notmartha.org/tomake/marblemagnets/
- ↑ https://modpodgerocksblog.com/2011/01/fun-face-glass-magnets.html
- ↑ https://thefrugalgirls.com/2014/11/diy-photo-tile-magnets.html
- ↑ https://thefrugalgirls.com/2014/11/diy-photo-tile-magnets.html
- ↑ https://thefrugalgirls.com/2014/11/diy-photo-tile-magnets.html
- ↑ https://thefrugalgirls.com/2014/11/diy-photo-tile-magnets.html
- ↑ https://thefrugalgirls.com/2014/11/diy-photo-tile-magnets.html
- ↑ https://thefrugalgirls.com/2014/11/diy-photo-tile-magnets.html
- ↑ https://www.unoriginalmom.com/upcycled-mason-jar-lid-magnets/
- ↑ https://www.unoriginalmom.com/upcycled-mason-jar-lid-magnets/
- ↑ https://www.unoriginalmom.com/upcycled-mason-jar-lid-magnets/
- ↑ http://www.the36thavenue.com/jar-lid-picture-magnets/
- ↑ https://www.unoriginalmom.com/upcycled-mason-jar-lid-magnets/
- ↑ http://www.the36thavenue.com/jar-lid-picture-magnets/
- ↑ https://www.unoriginalmom.com/upcycled-mason-jar-lid-magnets/
- ↑ https://www.unoriginalmom.com/upcycled-mason-jar-lid-magnets/
- ↑ https://abeautifulmess.com/2014/09/3-step-personalized-mini-photo-magnets.html
- ↑ https://abeautifulmess.com/2014/09/3-step-personalized-mini-photo-magnets.html
- ↑ https://abeautifulmess.com/2014/09/3-step-personalized-mini-photo-magnets.html
- ↑ https://abeautifulmess.com/2014/09/3-step-personalized-mini-photo-magnets.html
- ↑ https://abeautifulmess.com/2014/09/3-step-personalized-mini-photo-magnets.html
- ↑ https://abeautifulmess.com/2014/09/3-step-personalized-mini-photo-magnets.html
- ↑ https://abeautifulmess.com/2014/09/3-step-personalized-mini-photo-magnets.html
About This Article

wikiHow Staff
wikiHow Staff Writer
This article was co-authored by wikiHow Staff. Our trained team of editors and researchers validate articles for accuracy and comprehensiveness. wikiHow's Content Management Team carefully monitors the work from our editorial staff to ensure that each article is backed by trusted research and meets our high quality standards. This article has been viewed 45,232 times.
Co-authors: 16
Updated: September 25, 2022
Views: 45,232
Categories: Plastic and Adhesive Projects | Photo Craft Projects
Advertisement