This article was co-authored by wikiHow staff writer, Finn Kobler. Finn Kobler graduated from USC in 2022 with a BFA in Writing for Screen/Television. He is a two-time California State Champion and record holder in Original Prose/Poetry, a 2018 finalist for the Los Angeles Youth Poet Laureate, and he's written micro-budget films that have been screened in over 150 theaters nationwide. Growing up, Finn spent every summer helping his family's nonprofit arts program, Showdown Stage Company, empower people through accessible media. He hopes to continue that mission with his writing at wikiHow.
This article has been viewed 9,259 times.
Learn more...
Slime is already a fascinating substance. As a non-Newtonian fluid, its consistency is constantly changing - meaning it can be a liquid or a solid. But did you know that slime can also be magnetic? With just a few household ingredients like Elmer’s glue and baking soda, you can turn slime from a fun toy into a scientific wonder. Follow this recipe to make your own magnetic slime!
Ingredients
- 1⁄2 cup (120 mL) of Elmer’s glue
- 1⁄2 cup (120 mL) of water
- ½ teaspoon (2 grams) of baking soda
- 1 tablespoon (78 grams) of iron oxide powder
- 2 tablespoons (30 mL) of contact lens solution (or other solution containing boric acid and sodium borate)
- neodymium magnet
Steps
Creating Your Magnetic Slime
-
1Work on a covered surface in a well-ventilated room. Making magnetic slime is a fun, but messy process. Make sure you’re crafting on a flat, covered table in a room with an open window or air vent to avoid inhaling the iron oxide powder or borax from your boric solution.
- Have gloves ready if you don’t want to get your hands dirty.
-
2Combine the water and glue in a mixing bowl. In your mixing bowl, add your ½ cup of water and ½ cup of glue. Stir until the solution is mixed well.[1]
- Optional: If you want your magnetic slime to have a certain color, add a drop of that specific food coloring to the mixture.
Advertisement -
3Add the baking soda. Add your ½ teaspoon of baking soda to your diluted glue and mix the solution completely.[2]
-
4Add your contact solution a little at a time until the mixture peels. Slowly, add your contact lens solution a little at a time. Start with ½ tablespoon and stir. Continue until the mixture balls together and peels away from the bowl.[3]
- If you don’t have a contact lens solution, other solutions that contain the necessary compounds boric acid and sodium borate are laundry detergents, household cleaners, and liquid starch.
- If you are using a household cleaning solution instead, stand away while pouring to avoid ingesting any fumes.
-
5Knead your slime. Use your hands to squeeze, ball, and smooth out your slime several times. Pretty soon, you should have a putty-like slime![4]
- If the slime seems sticky at first, keep kneading. It should thicken as time progresses.
- Wear gloves for this part if you don’t want to get your hands dirty.
-
6Add your iron powder. Slowly add your tablespoon of iron oxide powder to the slime.[5]
- Stand away to avoid ingesting iron dust.
- Iron oxide powder (or iron fillings) can be purchased at a nearby craft store, Walmart, or online if you don’t feel like going out!
-
7Knead the iron powder into the slime. Once you’ve added your iron fillings, knead the slime until the powder is fully mixed in and it is all one color.[6]
- Around this time, the slime should start to smooth and dry. Use a paper towel if necessary to assist with this process.
- If one tablespoon is not enough iron oxide powder, feel free to add up to two.


Playing With Your Magnetic Slime
-
1Observe the slime’s magnetism! By now, you should have fully functional magnetic slime. Place your neodymium magnet close to the putty and watch their attraction![7]
- Make sure you’re using neodymium magnets for this process. Neodymium magnets are a form of rare-Earth magnets with a super-strong magnetic pull and boron as a key element, making them extra reactive to the borax in the slime.[8]
- Avoid slamming magnets together so your fingers don’t get hurt.
- Keep your slime and magnet away from cell phones, credit cards and other devices with magnetic sensors that can be stripped away.
- Neodymium magnets can be found online or at your local hardware store.
- For fun, place your magnet on top of the slime and watch the slime swallow it whole!
-
2Create magnetic field lines in your slime. To fully observe its scientific value, flatten your slime into a small rectangle and cover it in plastic wrap. Place your magnet on top of the slime for two minutes, then show it to the light. Look at the marks![9]
- These field lines are a great example of your slime’s magnetic force.
-
3Clean your materials. When finished, clean your bowl, spatula and mixing materials to avoid the glue and baking soda sticking to them or, worse, the iron fillings causing damage.
-
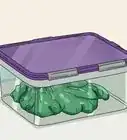
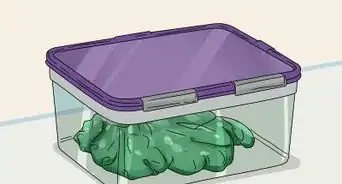
4Be careful of rust! Because of its metallic properties, your slime has a short shelf life. In roughly 48 hours, it will turn into a brown goo. Don’t contaminate your containers by attempting to store it. Appreciate your day of fun and then dispose of it promptly.[10]


Community Q&A
-
QuestionWill the magnets cut my hands?
 Community AnswerFingers can quickly become caught between magnets causing, which has the potential to cause cuts or blisters, but it's unlikely.
Things You’ll Need
- Measuring cup
- Measuring spoons
- Mixing bowl
- Spatula
- Soap
- Paper towels
- Plastic wrap
- Food coloring (optional)
- Gloves (optional)
References
- ↑ https://sciencedipity.co.uk/magnetic-slime/
- ↑ https://www.sciencebuddies.org/stem-activities/magnetic-slime-recipe
- ↑ https://www.iheartartsncrafts.com/how-to-make-magnetic-slime-with-saline-solution/
- ↑ https://www.sciencebuddies.org/stem-activities/magnetic-slime-recipe
- ↑ https://www.sciencebuddies.org/stem-activities/magnetic-slime-recipe
- ↑ https://www.sciencebuddies.org/stem-activities/magnetic-slime-recipe
- ↑ https://babbledabbledo.com/the-creepiest-slime-ever-how-to-make-magnetic-slime/
- ↑ https://www.differencebetween.com/difference-between-neodymium-magnet-and-regular-magnet/
- ↑ https://rosieresearch.com/magnetic-slime-recipe/
About This Article