X
wikiHow is a “wiki,” similar to Wikipedia, which means that many of our articles are co-written by multiple authors. To create this article, 18 people, some anonymous, worked to edit and improve it over time.
The wikiHow Video Team also followed the article's instructions and verified that they work.
This article has been viewed 82,064 times.
Learn more...
If you are crafty or you just want something worthwhile to do, try making a flower pen! Flower pens can be used at the baby and bridal showers, birthday parties or just to give your regular writing implements a little pizzazz. Whether using fake flowers or duct tape, flower pens are a great way to let your creativity blossom.
Steps
Method 1
Method 1 of 3:
Using Fake Flowers
-
1Gather your materials. You'll need some fake flowers from the craft store, green floral tape, wire cutters, and a pen (or however many you're looking to make!). If you’re looking to make a bouquet or give a variety to different people, it’s best to buy a bulk pack of cheap pens at your local dollar store.[1]
-
2Cut the flower stems to 1.5 inches. If your fake flower has a wire in it, use a wire cutter to clip it or it may be brittle enough to just wiggle back and forth and break.[2]
- If there are leaves attached to the stem of your fake flower, you can cut them off with scissors or keep some for your desired effect. Leaves can easily be pulled off the main stem or cut off but be sure to leave a bit of a stem at the end of the leaves if you plan on wrapping them back up into a bouquet.[3]
Advertisement -
3Take out the ink cartridge. Before cutting the ink cartridge, measure how deep you want to place your flower stem and leaves. Using your wire cutters or sharp scissors, cut off about 1 inch from the ink cartridge (long enough for the flower stem to fit after it in the pen).
-
4Wrap any extra leaves with the stem of your fake flower. Using green floral tape, make sure you wrap any leaves with your fake flower stem as tightly as possible to ensure that they will fit down the shaft of the pen.[4]
- If you want to include a lot of leaves or the shaft of the pen is too small to fit the wrapped flower stem, you can also use green floral tape to tape the flower stems outside the shaft of the pen. The green floral tape will be wrapped along the entire shaft regardless of where you place the flower stems.[5]
-
5Put the ink cartridge back and stick the flower stem in after it. Use scissors or the wire cutter to adjust the length of either the ink cartridge or flower stem. You may also place the tape flush against the pen as you wrap tape to bind them together. Hold the bottom of the pen to make sure your wrap is as snug as possible.[6]
-
6Starting at the top, near the flower, wrap the green tape around until you hit the tip of the pen. Tape slowly and make sure to tape over the drop of the stem to create the illusion of a single stem. Keep a consistent wrap pattern as you make your way downward. Also, be sure to keep your wrap as tight as possible as you cover any sign of the pen shaft.
- If you have the time and skill, you may also attempt a pattern with your stem wrap. For example, you can create a zig-zag or layers of parallel lines.
- Use double-sided tape if you find that your floral tape is not sticky enough.
- You may leave space for your grip if you intend to use the pen for writing rather than display.
Advertisement
Method 2
Method 2 of 3:
Using Duct Tape
-
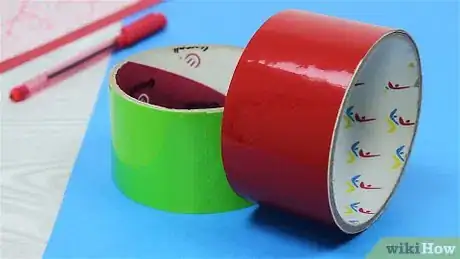
1Get 2 or more rolls of duct tape. You'll want one green roll of duct tape for the stem and another color of your choice for the petals. Duct tape comes in a variety of colors so you can get as creative as you want when making your flower.
-
2Cut a piece of green or dark duct tape that is about 3 inches (7.6 cm) long and fold to cover the pen shaft. You can use your pen to measure the length of the duct tape that you will be using. Use a sharpie to mark the edge of your pen cap to ensure your pen can still close. Place your pen vertically against a piece of duct tape and line up the edge of the tape with the line you just marked. Cut the tape so it measures from the top of your pen to the line you marked with your sharpie. Roll the tape on the pen.[7]
- You may also wrap around the pen to create a pattern to the top.
-
3Choose the color for your petals. Whether you want all pink or an assortment of petals, design your finished flower to ensure you keep the pattern you want. You can find a larger variety of duct tape colors at an art supply store relative to a hardware store.
-
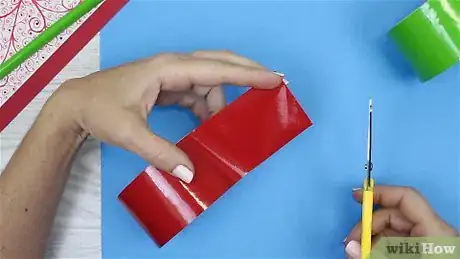
4Fold the sides of a single piece of duct tape to create a single petal. Cut a piece of duct tape so its length is about a third or less of the length of your pen. Fold the top of the piece of duct tape so that it makes a triangle. Roll your pen with the extra tape at the bottom of the triangle so that the petal sticks to your pen with the top pointing out.[8]
- You may also cut the top of the duct tape into a triangle rather than fold it in.
-
5Continue to add petals until you’ve created your desired look. Continue to cut or fold small triangle shapes with a little extra tape at the bottom, and stick them onto the top of the pen. Make sure that all the petals are pointing out to the top and you’re following the design you have laid out. Build up your flower buds petal by petal until your pen looks like a real flower![9]
Advertisement
Method 3
Method 3 of 3:
Using Paper Towels
-
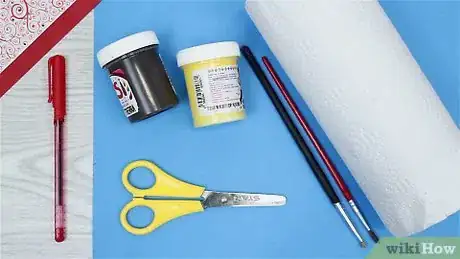
1Gather your supplies. You'll need a pen, paper towels, and tape. You may also use food coloring or watercolor paint to color the petals of your flower. However, remember that less can be more as too many decorations may become distracting or gaudy.
-
2Cut your paper towels. You will need standard-size paper towels. You will need about 10 standard sheets stacked on top of one another. This will create a rather larger flower for your pen so you can cut to your desired size.[10]
-
3Cut scallop edges. Using regular scissors or special scalloping scissors, create smooth and rounded edges along the entire border of your paper towels. Remember to keep the paper towels stacked as you cut them.[11]
- The scallop design does not have to be perfect but it does have to be consistent around the edges.
-
4Make a colorful design. You may dip the scalloped borders into some water with food coloring or watercolor paint. You can get as creative as you want and try to use a lot of different colors on different parts of the paper towel. You may also leave the paper towel white for an elegant look.
- Be careful with your design because the color will spread and can ruin an otherwise appealing effect.
- Put the paper towel somewhere for it to dry. Then, repeat this process 3-5 times with other paper towels.
-
5Fold the paper towel stack like an accordion. Fold the paper towel stack as if you were making a paper fan. Make sure to keep the creases smooth as you fold them. Do not fold the paper towel stack unless all paper towels are dry.[12]
-
6Pinch and secure with tape. Pinch the accordion-like stack of paper towels at the middle and secure this shape with clear tape. Squeeze down firmly and make sure the tape is wrapped tightly at this point as the entire flower will become undone if not securely wrapped.[13]
-
7Separate and fluff the petals. Whether you used 2-ply or single, fluff both sides of the paper towel to make your flower bloom. Careful not to rip the towel as you fluff each petal. Make sure the petals are dry if you have chosen to add color.[14]
-
8Cut the tape in the center. Each end of the fluffed paper towel stack is its flower. Make sure to tape as many layers as you need in the center of the stack to ensure that both flowers will not come undone once separated. Cut at the center of the stack and reinforce each stem with more tape if needed.[15]
- The amount of tape needed at the neck of each flower depends on the fluffiness of the petals.
-
9Glue leaves to the stem. You may glue real or fake leaves together with your freshly made flower. You may either add the leaves to the neck of the flower or directly to the pen.[16]
-
10Tape the flower onto your pen. Place the neck of the flower firmly against the shaft of the top of your pen. Use green tape to wrap your flower tightly. The flower will be fairly fluffy relative to the size of your pen so be sure to wrap the tape around as many times as needed to secure your flower in place.
Advertisement
Things You'll Need
Using Fake Flowers
- Fake flowers (available at craft and gardening stores)
- Wire cutters
- Pens (the cheap, plastic kind)
- Floral tape, ideally in green (available at craft stores)
Using Duct Tape
- Duct tape in 2 colors
- Pens
- Scissors
Using Paper Towels
- Pens
- Paper towels
- Food coloring/watercolor paint
- Tape
- Scissors
References
- ↑ https://snapguide.com/guides/make-flower-pens/
- ↑ https://snapguide.com/guides/make-flower-pens/
- ↑ https://snapguide.com/guides/make-flower-pens/
- ↑ https://snapguide.com/guides/make-flower-pens/
- ↑ https://snapguide.com/guides/make-flower-pens/
- ↑ https://snapguide.com/guides/make-flower-pens/
- ↑ https://snapguide.com/guides/make-a-duct-tape-flower-pen-2/
- ↑ https://snapguide.com/guides/make-a-duct-tape-flower-pen-2/
- ↑ https://snapguide.com/guides/make-a-duct-tape-flower-pen-2/
- ↑ http://www.homestoriesatoz.com/crafts/how-to-make-paper-towel-flowers.html
- ↑ http://www.homestoriesatoz.com/crafts/how-to-make-paper-towel-flowers.html
- ↑ http://www.homestoriesatoz.com/crafts/how-to-make-paper-towel-flowers.html
- ↑ http://www.homestoriesatoz.com/crafts/how-to-make-paper-towel-flowers.html
- ↑ http://www.homestoriesatoz.com/crafts/how-to-make-paper-towel-flowers.html
- ↑ http://www.homestoriesatoz.com/crafts/how-to-make-paper-towel-flowers.html
- ↑ http://www.homestoriesatoz.com/crafts/how-to-make-paper-towel-flowers.html
About This Article
Advertisement

