This article was co-authored by wikiHow staff writer, Hunter Rising. Hunter Rising is a wikiHow Staff Writer based in Los Angeles. He has more than three years of experience writing for and working with wikiHow. Hunter holds a BFA in Entertainment Design from the University of Wisconsin - Stout and a Minor in English Writing.
There are 14 references cited in this article, which can be found at the bottom of the page.
This article has been viewed 277,543 times.
Learn more...
A volt gauge shows how much power your vehicle’s battery provides while the amp reading will tell you if the battery gets enough current to charge the system. While these gauges may not be included in the dashboard, you can always add the gauges on your own with some wire and tools. Start by finding a hole in your vehicle’s firewall where you can feed the wires from inside your vehicle so they come out under the hood. Connect the amp gauge to your vehicle’s battery and the alternator so you can see how well it charges the system. Then you can attach the volt gauge to the battery and a ground so you can easily measure the voltage.
Steps
Feeding the Wires
-
1Mount the gauges in a gauge pod on top of your dashboard. The main panel for your dashboard normally doesn’t have room to install additional meters, so it’s easier to use a gauge pod, which is a standalone mount that rests on top of your dashboard. Position the gauges so they line up with the holes on the gauge pod and push them in to secure them in place. Keep the gauge pod somewhere on top of your dashboard where you can easily check the readouts.[1]
- You can buy gauge pods online or from automotive stores.
- Volt gauges and amp gauges are typically separate devices.
- You may also find gauge pods that attach to the A-pillar, which is the panel that runs up the side of the windshield toward the driver’s side door.
-
2Find a hole and grommet with wires through it in your vehicle’s firewall. Your vehicle’s firewall is the metal panel that creates a barrier between the engine and the interior of your car. Look in the footwell of the driver’s seat or under the hood on the driver’s side to see if there is a round rubber grommet that has cords or wires feeding through it. Push down on the rings of the grommet to feel if there’s still space inside for wires to feed through. If there is, then you can use the hole. If not, look for another hole and grommet nearby.[2]
- If you aren’t able to use any of the holes under your vehicle, then contact a professional mechanic so they can make a hole through the firewall for you.
Advertisement -
3Poke a wire insertion tool through the outer ring of the grommet. A wire insertion tool looks like a hollow screwdriver that has a hole running through the middle of the handle. Pop open your vehicle’s hood to locate where the wires enter, and place the point of the insertion tool in an open spot on the grommet. Push the insertion tool hard enough so it punctures the grommet and pops out from the interior of your car.[3]
- You can buy wire insertion tools from your local hardware store.
- Be careful not to poke or damage any of the wires in the grommet since the end of the insertion tool can be sharp.
-
4Feed 2 red, 1 black, and 1 green 10-gauge wire through the tool. Cut the wires so they’re about 15–20 feet (4.6–6.1 m) long so you can maneuver them around your vehicle. Place the wires into the hole at the end of the insertion tool’s handle and push them through completely. Go inside your vehicle and pull the ends of the wires so you have 6–7 feet (1.8–2.1 m) to work with.[4]
- When you connect to the amp gauge, you’ll use 1 red wire and 1 black wire that will both carry a current.
- The volt gauge will use 1 hot red wire and 1 green grounding wire.
- Leave the wires loose inside your vehicle while you’re working so you don’t break or damage them before you finish your installation.
Warning: Don’t use anything smaller than 12-gauge wires since they could overheat and cause a fire hazard.
-
5Pull the insertion tool out from the grommet so the wires stay in place. Lightly tug on the insertion tool’s handle to remove the end from the grommet. Hold the wires in place with your nondominant hand and continue pulling the tool backward so the wires slide through the middle. Make sure you don’t cut or damage the wires as you remove the tool completely.[5]
- If you weren’t able to fit all of the wires through the tool at the same time, poke another hole through the grommet and feed any other wires through the new hole.
-
6Crimp ring terminals on the ends of the wires inside your vehicle. Ring terminals have a circular port so wires can easily slide over bolts or terminals. Strip the interior ends of each wire to remove 1⁄2 inch (1.3 cm) of insulation from each one. Slide 10-gauge ring terminals over the ends of the wire so they cover the uninsulated portions. Grip the center of the ring terminal’s coating with wire crimpers and squeeze the handles together to make your connection.[6]
- You can buy ring terminals from your local hardware store.
- Don’t try to attach your gauges without using ring terminals since you won’t have as secure of a connection.


Wiring the Amp Gauge
-
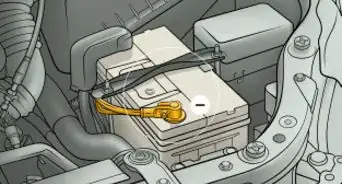
1Disconnect the negative terminal from your vehicle’s battery. Your battery will usually be near the front of your vehicle on the driver’s side. Look for the terminal on your battery that has a black cover or a negative symbol (-) next to it. Use an insulated wrench to loosen the nut holding the wire to the terminal until you can easily pull the wire off. Set the wire aside while you’re working so it doesn’t touch anything else.[7]
- You do not need to remove the positive terminal from the battery.
Warning: Never touch the positive and negative leads from the battery together since you could cause the battery to discharge, which could shock or electrocute you.
-
2Secure 1 red and 1 black wire to the S and I terminals on the gauge respectively. Look at the back or bottom of the amp gauge inside your vehicle so you can find the terminals labeled with an S and an I. Loosen the nuts on the terminals and remove them completely. Take the red wire and feed the S terminal through the ring before screwing the nut back on. Attach the black wire to the I terminal on the gauge the same way.[8]
- Both of the wires connecting to the gauge will carry a current, so it doesn’t matter as much which wire you connect to which port.
- Leave the other red wire and the green wire alone for now since you’ll use them to hook up the volt gauge.
-
3Attach in-line fuses to the ends of the wires in the engine bay with butt connectors. In-line fuses are built into wires to prevent shorts and protect wires from getting too hot. Strip the last 1⁄2 inch (1.3 cm) of insulation off the wires and 1 end off of each in-line fuse. Place the end of the red wire and 1 end of a 30-amp in-line fuse into opposite ends of a butt connector, which looks like a small tube, and crimp it in the middle. Repeat the process with the black wire and a second in-line fuse.[9]
- Don’t use wires without in-line fuses since they could create a fire hazard.
- Make sure the fuses can handle at least 30 amps, or else they won’t work with your amp gauge.
- Lightly tug on the wires from outside of your vehicle to see which ones are connected to the gauge if you aren’t sure.
-
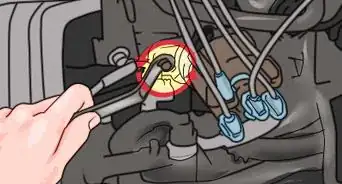
4Connect the red wire to the positive output on your vehicle’s alternator. The alternator is a silver, barrel-shaped device that has a fan inside attached to the front or side of the engine. Locate the bolt on the back side of the alternator that’s labeled with a positive sign (+) and loosen the nut screwed onto it. Guide the ring terminal from the in-line fuse attached to the red wire over the bolt and slide it down. Retighten the nut so the wire has a firm connection with the alternator.[10]
- Some alternators are located at the bottom of the engine and may be difficult to access. If you aren’t able to reach the alternator, then take your vehicle to a mechanic to help you.
-
5Run the black wire to the positive terminal on your vehicle’s battery. Look at the battery’s positive terminal and locate the smaller wire leading toward your vehicle’s fuse box. Loosen the nut on the terminal holding the smaller wire against the battery and pull it off. Slide the ring terminal of the in-line fuse attached to the black wire over the bolt with the small wire before tightening the nut again.[11]
- Don’t work on your vehicle’s battery if you have the negative terminal still attached.
-
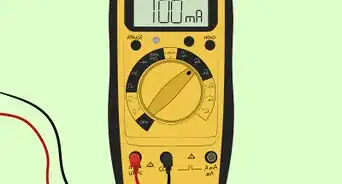
6Check that the gauge dips negative when you turn on just the headlights. Reconnect the negative terminal on the battery and tighten the nut so it’s secure. Without turning the key in the ignition, switch on your vehicle’s headlights manually. Check the gauge to see if it drops into the negative side, which means the lights are drawing power from the battery. Turn off the lights and watch the gauge to see if moves back to 0, which means there’s no current running through the battery.[12]
- If the gauge doesn’t dip when you turn the lights on, disconnect the battery again and check the wires to make sure they’re attached correctly.
- When you start your engine, you should also see the gauge spike up into the positive range, which shows a positive current charging the battery.


Hooking up the Volt Gauge
-
1Remove the negative terminal from the vehicle’s battery. Loosen the nut holding the negative terminal of the battery with an insulated wrench until you’re able to move the wire. Take the wire off of the battery and set it aside so it isn’t touching any other wires inside your vehicle. Keep the negative terminal disconnected throughout the entirety of your installation so you don’t get shocked.[13]
- You do not need to remove the positive terminal from your battery.
-
2Secure the red and green wires to the positive and negative gauge terminals. Remove any nuts from the terminals on the back or side of the volt gauge. Take the remaining red wire and slide the ring terminal over the positive side of the gauge. Put the green wire on the negative terminal of the gauge to use as your grounding wire. Retighten the nuts so they hold the wires firmly against the back of the gauge.[14]
-
3Attach ring terminals onto the ends of the wires in the engine bay. Strip the last 1⁄2 inch (1.3 cm) off of the ends of the red and green wires outside your vehicle with a pair of wire strippers. Slide 10-gauge ring terminals over the ends of the wires so they cover the uninsulated portions. Grip the ring terminal in the middle with a pair of crimpers and squeeze the handles together so the pieces are firmly attached. Repeat the process with the other wire so you can easily attach them to bolts.[15]
- Don’t use ring terminals for differently sized wires since they won’t fit as well.
Variation: You can also use spade-shaped terminals, which have 2 prongs instead of a full ring. That way, you can slide it underneath a loose nut rather than taking the nut off of the bolt completely when you install it.
-
4Connect the red wire to the positive terminal of your vehicle’s battery. Use the same bolt on the positive battery terminal that you used for your amp gauge. Loosen the nut with a wrench and remove it completely from the bolt. Slide the ring terminal for the red wire onto the bolt and secure the nut again so it has a firm connection with the battery.[16]
- Leave a little bit of slack in your wires so they’re less likely to snap or break inside your vehicle.
-
5Secure the green wire to a bare bolt on the vehicle’s frame. Look for an empty unpainted nut and bolt somewhere underneath your hood along the outer edges. Loosen the nut with a wrench and slide it off of the bolt completely. Guide the ring terminal of the green wire onto the bolt and press it down against the metal. Tighten the nut as far as you can so the wire doesn’t move or slip around.[17]
- If you can’t find a bolt that’s empty under your hood, make sure to hold whatever was attached to the bolt steady as you loosen it for the wire.
- Don’t connect the grounding wire to the negative terminal on your battery or any other wiring since you could cause it to short.
- The volt gauge will not work if you attach the grounding wire to a painted bolt.
-
6Check that the volt gauge reads between 12–14 V while your vehicle is running. Reattach the negative terminal back onto your battery and tighten the nut that held it in place. Turn the key in the ignition to start your vehicle’s engine. Check the volt gauge reading to see if it’s pointing between 12–14 V. Try turning on multiple lights and your heating/cooling system to see if the volt gauge drops below 12. Turn your vehicle off when you’re finished checking the gauge.[18]
- If the gauge reading doesn’t change, then disconnect the battery and check the wiring to make sure they’re attached correctly.


Community Q&A
-
QuestionCan I just use the two wires from my amp gauge to hook up to my new volt meter gauge?
 Community AnswerThe voltmeter will cause a slight draw on the battery so I would recommend using a wire that is hot with the key in the "on" position.
 -
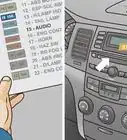
QuestionWhere can I find the 12 volt ignition tie in point?
 Mike LenciCommunity AnswerMost cars and trucks have a 12 volt "ignition on" access terminal at the fuse box. Look for an unused male or female terminal and test it with a test light when the ignition is turned on.
 -
QuestionWhy do the wires spark when I hook them up?
 Community AnswerBecause you're putting the wrong wires on first or you didn't disconnect the battery.
Warnings
- Make sure you disconnect the vehicle’s battery before you start working on the wiring so you don’t get shocked or electrocuted.⧼thumbs_response⧽
- Don’t use wires smaller than 10-gauge since they could short and create a fire hazard.⧼thumbs_response⧽
Things You’ll Need
- Volt gauge
- Amp gauge
- Gauge pod
- Wire insertion tool
- 10-gauge braided wire in black, red, and green
- 10-gauge ring terminals
- Wire crimpers
- Wrench
- 30-amp in-line fuses
- Butt connectors


References
- ↑ https://manuals.harborfreight.com/manuals/41000-41999/41017.pdf
- ↑ https://youtu.be/8FjMFXXToRM?t=84
- ↑ https://youtu.be/8FjMFXXToRM?t=100
- ↑ https://youtu.be/SqZ9ZYYjKyM?t=55
- ↑ https://youtu.be/8FjMFXXToRM?t=157
- ↑ https://youtu.be/MhEjz32aEdE?t=69
- ↑ https://www.classicinstruments.com/userfiles/files/Manuals/Amp%20Gauge%20Installation%20012313.pdf
- ↑ https://www.autometer.com/media/manual/2650-1079.pdf
- ↑ https://www.allpar.com/fix/alternator.html
- ↑ https://www.classicinstruments.com/userfiles/files/Manuals/Amp%20Gauge%20Installation%20012313.pdf
- ↑ https://www.classicinstruments.com/userfiles/files/Manuals/Amp%20Gauge%20Installation%20012313.pdf
- ↑ https://manuals.harborfreight.com/manuals/41000-41999/41017.pdf
- ↑ https://www.autometer.com/media/manual/2650-1079.pdf
- ↑ https://www.autometer.com/media/manual/2650-1079.pdf
- ↑ https://elecdirect.com/media/wysiwyg/Tip-Sheet-Crimp-Terminals-Become-A-Pro.pdf
- ↑ https://youtu.be/506C0qc5W6E?t=875
- ↑ https://www.autometer.com/media/manual/2650-1079.pdf
- ↑ https://youtu.be/506C0qc5W6E?t=918
About This Article

A car volt amp gauge shows you how much power your vehicle’s battery provides and if the battery gets enough current to charge the system. If these gauges aren’t included on your dashboard, you can add them with some wires and tools. Start by finding a hole in your car’s firewall where you can feed the wires from inside your car so they come out under the hood. You can then connect the amp gauge to your battery and alternator so you can see how well it’s charging the system. If you also want to measure voltage, you can attach the volt gauge to the battery and ground. To learn how to test your vehicle’s output while it’s connected to the volt gauge, keep reading!