This article was co-authored by wikiHow Staff. Our trained team of editors and researchers validate articles for accuracy and comprehensiveness. wikiHow's Content Management Team carefully monitors the work from our editorial staff to ensure that each article is backed by trusted research and meets our high quality standards.
There are 13 references cited in this article, which can be found at the bottom of the page.
This article has been viewed 51,513 times.
Learn more...
Grow tents are amazing tools that give you total control over a plant’s environment. They are useful for growing plants inside your home, but the humidity level can be difficult to manage. Many plants, particularly seedlings and cuttings, need a very high humidity level. Relative humidity is a measurement of the amount of water in the air, and there are many simple ways you can increase it. Maintaining the relative humidity level ensures your plants stay healthy and live longer.[1]
Steps
Adding More Evaporated Water
-
1Put wet sponges in the tent to more quickly raise the humidity. Soak the sponges in water, then set them near any fans or air vents inside your tent. The heat and air flow will cause the water to evaporate over time, increasing the humidity level. When the sponges dry out, you can reuse them to maintain the humidity or take them out to let it drop again.[2]
- Sponges dry out faster than bowls of water, leading to more moisture in the air. They can also be positioned closer to your plants and lightbulbs to spread moisture more quickly.
- Another option is to put sponges inside of water-filled bowls or trays. It will cause the water to evaporate at a faster rate.
- Sponges work well in small, vertically-oriented tents with shelves. These tents don’t have much space, but you can usually fit the sponges around the plants on the shelves.
-
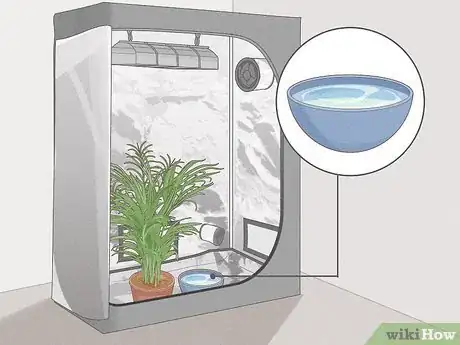
2Place water bowls in the tent for a more gradual boost. Fill bowls or trays in your sink, then scatter them around the grow tent. Many tents have a big intake fan near the ground on one side. Place one of the containers there, then place additional ones near other air vents. As the water evaporates, the humidity level will rise.[3]
- Water bowls are great since you can refill them or take them out as needed. They are better than towels for consistently increasing the tent’s humidity.
- Use bowls in wide tents with plenty of floor space and air vents. They are most effective in tents with an interior ventilation fan at ground level.
Advertisement -
3Hang wet towels for a temporary way to raise the humidity level. Soak the towels in water, then spread them around the grow tent. Place them near any air vents along your tent’s sides. As air flows into the tent, it will hit the towels. The moisture evaporating off of the towels increases the humidity level.[4]
- Be sure to keep the towels away from grow lamps and other heat sources so they don’t burn.
- Towels aren’t meant to be a long-term fix, but you can use them to quickly boost the humidity level.
- Towels can work in any sort of tent as long as you have somewhere to hang them. The best choice is in tall tents that have an interior fan blowing air in near the ceiling. You could also hang them close to air vents near the ground.
Adjusting the Heat Flow
-
1Use a humidifier to control the humidity level automatically. You can get a household humidifier and set it inside your grow tent. Many grow tents also have ceiling supports you can hang a humidifier from to save floor space. Try choosing a humidifier with automated controls so you don’t have to monitor the water supply and temperature in your home. The humidifier will release water into the air to keep the humidity level steady.[5]
- If you’re using a regular household humidifier, you will have to refill it with fresh water each day. Check it at the same time each day, such as every morning, to keep it working.
- Make sure you’re using a humidifier instead of a dehumidifier. A dehumidifier will pull moisture out of the air, lowering the relative humidity.
-
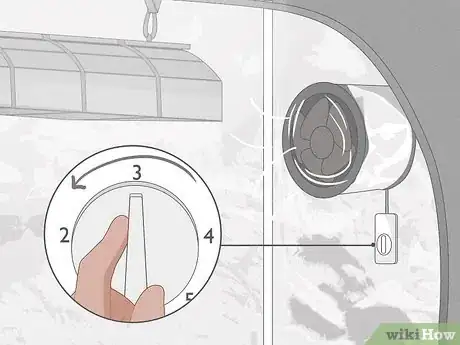
2Lower the extractor fan’s speed to prevent air from drying out as quickly. Check near the tent's ceiling for a ventilation fan that draws stale air out. It also pulls a lot of humidity out of the tent, so set it a low speed. If you have other fans you use to keep fresh air flowing between plants, turn them down to a low setting as well. You could even shut off the ventilation system temporarily, such as for about 1 hour a day, to raise the humidity level more rapidly.[6]
- Air circulation is an important part of keeping the entire tent at a consistent temperature, so don’t leave the fans off permanently.
- This works for larger tents that have a ventilation fan with adjustable speed settings. Some larger tents have wall-mounted fans you can turn down as well.
-
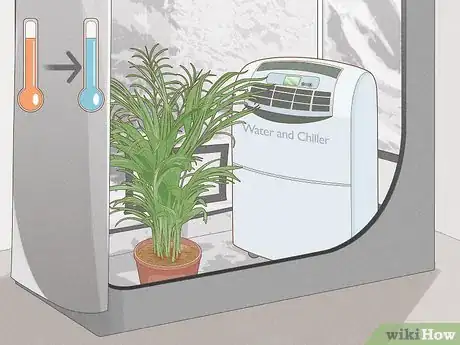
3Decrease the temperature for an easy way to increase humidity. If your plants can handle a lower temperature, take advantage of it to easily increase the humidity. Adjust the temperature control setting if your tent has one. Alternatively, place an air conditioner or water chiller inside the tent. You could also install fans or shut off lighting in order to keep the temperature lower than normal.[7]
- When you lower the temperature, colder air sinks to the bottom of the tent. Warm, moist air will rise to top, increasing the humidity level.
- Make sure your tent has a thermometer so you can monitor the temperature. Also, keep the tent insulated and sealed so the temperature stays constant.
- Higher-end hydroponic tents usually have customizable temperature settings. If you have a smaller tent with lots of shelving, you might not have room for an air conditioner or water chiller.
-
4Remove half of the lights to raise humidity if you have younger plants. Turn the lights off and wait about 5 minutes for them to cool down. Many grow tents have several tube lights hanging along the top. Pull the bulbs out of their sockets and set them aside. With fewer lights, the temperature inside the tent will be lower, so the humidity level will rise.[8]
- If your grow tent has multiple light sources, removing some of the bulbs is a very simple way to increase relative humidity. However, you can’t do this with some smaller tents.
- This works best with young plants. Seedlings are less sensitive to light than grown plants. They need humidity more than they need the additional light.
- Most tents have removable bulb lights. Some budget tents may not have multiple light sources, particularly the tall, thin models.
Watering and Covering Plants
-
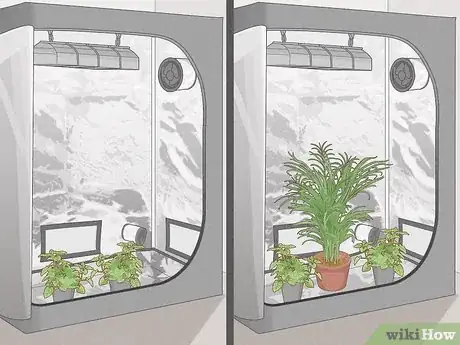
1Place larger plants into the tent if you have extra space available. If you’re growing seedlings, you might put some fully-grown plants in too. If you’re growing small herb plants, you could mix in some taller vegetables or flowering plants. Keep the plants spaced out enough so they aren’t overshadowing one another. Make sure each one is able to get enough light and water.[9]
- Large plants need to be watered more than smaller plants, but they also release more moisture. The released moisture ends up in the air, increasing the relative humidity.
- Mature plants are able to take in more water through their roots, so they don’t have to take it out of the air like younger plants do.
- This will only work with bigger tents that have lots of floor space. If your tent is tall or has an adjustable height, then you might be able to fit bigger plants in it. Hydroponic tents with shelves don’t often have enough room.
-
2Group plants close together if they are spread out. Place them right next to one another without the leaves touching. They will still need enough space to grow. Each plant will release water that the other ones can use, so the humidity level will go up over time.[10]
- Keep in mind that this won’t completely fix a low humidity level, so you will still have to do something like water and mist the plants. They will retain more moisture afterward to keep the humidity level higher than normal.
- Since plants put in a grow tent are potted, you won’t have to worry about any roots getting tangled up. Just make sure the leaves have plenty of room to get light and moisture.
-
3Mist plants with a spray bottle if your plants need a small boost. Coat both sides of the leaves lightly with water. The additional water will cause the humidity level to go up, and your plants will also get some fresh water right away. It works best on seedlings and cuttings that won’t be able to absorb water through roots. To keep the humidity level up long-term, you will have to check back each morning and mist all of the plants again in case the humidity level has fallen.[11]
- Misting doesn't increase the humidity very much, and you have to do it consistently to maintain the relative humidity level.
- It’s best to mist plants in the morning so the leaves dry out throughout the day. That way, they don’t get too damp.
- Plants absorb water through holes on the leaves. Most of the holes are on the bottom, so make sure you mist under each leaf.
-
4Set bell cloches over plants if you can’t raise the humidity enough. Cloches are domes that help regulate the temperature and humidity levels around different plants. You will have to get a separate cloche for each plant. Move the plants under the domes, then pull open the ventilation holes on each one. Even when they are open, cloches help retain more moisture.[12]
- Even something as simple as a plastic bag can be used to lock in more humidity. Place them over seedlings, for instance.
- If your grow tent is set up properly, you won’t need cloches at all. They are best for emergencies or times when you need to raise the humidity quickly.
- Some plants grow very well underneath cloches, including carrots, radishes, peas, and parsley.
Warnings
- Grow tents have a lot of electrical components that can be damaged by water. Be sure to keep towels, sponges, and any other damp objects away from the lights and heating elements.⧼thumbs_response⧽
Things You’ll Need
Adding More Evaporated Water
- Towels
- Bowls
- Sponges
Adjusting the Heat Flow
- Humidifier
- Fan
- Temperature control
- Air conditioner or water chiller (optional)
Watering and Covering Plants
- Large plants
- Misting bottles
- Bell cloches
References
- ↑ https://ag.umass.edu/greenhouse-floriculture/fact-sheets/reducing-humidity-in-greenhouse
- ↑ https://extension.uga.edu/publications/detail.html?number=B1318&title=Growing%20Indoor%20Plants%20with%20Success
- ↑ https://extension2.missouri.edu/g6570
- ↑ https://www.youtube.com/watch?v=Vm1g1djWQl8&feature=youtu.be&t=88
- ↑ https://extension2.missouri.edu/g6570
- ↑ https://ag.umass.edu/greenhouse-floriculture/fact-sheets/fan-pad-evaporative-cooling-systems
- ↑ https://www.cannabissciencetech.com/growers-and-growing/understanding-vpd-and-transpiration-rates-cannabis-cultivation-operations
- ↑ https://www.youtube.com/watch?v=Vm1g1djWQl8&feature=youtu.be&t=110
- ↑ https://planttalk.colostate.edu/topics/houseplants/1317-houseplants-temperature-humidity/
- ↑ https://aggie-horticulture.tamu.edu/ornamental/a-reference-guide-to-plant-care-handling-and-merchandising/light-temperature-and-humidity/
- ↑ https://extension.uga.edu/publications/detail.html?number=B1318&title=Growing%20Indoor%20Plants%20with%20Success#humidity
- ↑ https://extension.umd.edu/hgic/topics/starting-seeds-indoors
- ↑ http://www.fsec.ucf.edu/en/consumer/buildings/basics/humidity.htm
- ↑ https://extension.uga.edu/publications/detail.html?number=B1318&title=Growing%20Indoor%20Plants%20with%20Success
- ↑ https://planttalk.colostate.edu/topics/houseplants/1317-houseplants-temperature-humidity/
- ↑ https://climate.ncsu.edu/edu/Humidity

