This article was co-authored by wikiHow Staff. Our trained team of editors and researchers validate articles for accuracy and comprehensiveness. wikiHow's Content Management Team carefully monitors the work from our editorial staff to ensure that each article is backed by trusted research and meets our high quality standards.
wikiHow marks an article as reader-approved once it receives enough positive feedback. In this case, 100% of readers who voted found the article helpful, earning it our reader-approved status.
This article has been viewed 143,196 times.
Learn more...
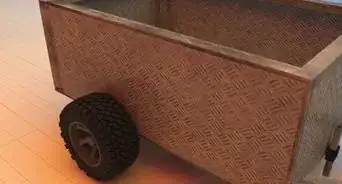
Wheel bearings, whether they’re on an RV or a trailer of some sort, are essential in helping the wheels spin easily and freely. They need to be lubricated regularly so that they operate at their best capacity. Greasing, or repacking, trailer bearings is an important part of trailer maintenance, and thankfully it doesn’t take long to do! Remove the wheel and take apart the hub until you can access the bearings. From there, you’ll clean them and repack them with new grease. Reassemble the hub and replace the wheel before moving on to the next one.
Steps
Accessing the Trailer Bearings
-
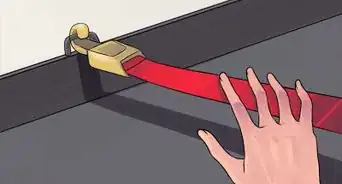
1Lift the trailer with a car jack so you can safely access the wheels. Chock the wheels first by setting heavy wedge-shaped blocks in front of each one to keep the trailer from rolling while you’re working on it. Place a jack stand on either side of the wheel and crank them up until the wheel is no longer touching the ground.
- For this project, you should not need to ever be underneath of the trailer itself.
Tip: Before removing the tire, test the sturdiness of the jacks. After the jacks have been engaged, wiggle the trailer with your bodyweight to see if the jacks stay in place. Make sure that the jacks aren’t at risk of slipping out of place before you begin the rest of your task.
-
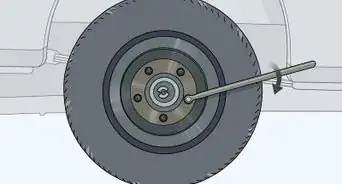
2Loosen the lug nuts and remove the wheel from the trailer. Use a wrench or a tire iron to remove the lug nuts and set them off to the side somewhere safe. Pull the wheel off of the rod toward your body and put it off to the side, too.[1]
- If the lug nuts are rusted and hard to remove, spray them with a thread loosener, let them sit for 2-3 minutes, and then try again to remove them.
- If the tire is stuck on the rod, bang a mallet along the edge where the rim and tire come together until the tire comes loose.
Advertisement -
3Loosen and remove the dust cap with a screwdriver. The dust cap just pops into place, so you don’t need to worry about unscrewing it. Wriggle the tip of a screwdriver between the hub and the lip of the dust cap and work it around the edge until the cap pops loose.[2]
- To get to the bearings, there are about 7 pieces that need to be removed. Some of these you may be able to remove by hand, but others you’ll need to use screwdrivers, hammers, pliers, or wrenches.
-
4Take out the cotter pin and remove the spindle nut. With the dust cap out of the way, you will see the spindle nut and the cotter pin, which looks similar to a bobby pin. The cotter pin will be bent at an angle, so take a pair of needle-nose pliers, straighten out the pin, and pull it out. Take out the spindle nut with your fingers or use a screwdriver to pop it out.[3]
- The spindle nut is also sometimes called a castle nut.
- If the cotter pin is rusty or seems fragile, replace it.
-
5Loosen the nut and washer and remove the hub from the spindle. Not all models of trailers have the nut and washer, so don’t panic if you don’t see them. Once the nut and washer are off, you should be able to just jiggle the hub off with your hands. Set everything off to the side on clean rags or newspaper.[4]
- The trailer bearings are inside of the hub and, depending on their state, may come loose on their own at this point.
-
6Remove the inner bearing and grease seal from the hub. Use a wooden dowel and a hammer to tap the bearing and grease seal out from the front of the hub (the front is the side where you can see the threads of the screws; the back is the side where you can see the tops of the screws). Set the bearing and grease seal to the side.[5]
- If the bearing isn’t too dry, you may be able to push it out by hand or use a screwdriver to pry it out.
- If the seal is rusty, use something like WD-40 to loosen it up.
Cleaning and Greasing the Bearings
-
1Soak the bearings and spindle nut in kerosene. Use a small pan and fill the bottom with 2 to 3 inches (5.1 to 7.6 cm) of kerosene. Set the greasy bearings and spindle nut into the kerosene and let them soak for about 10 minutes.[6]
- If you notice any damage in the bearings, like scratches, pitting, or discoloration, you’ll need to buy replacements.
- If you don’t want to use kerosene, you could also use acetone or mineral spirits.
Warning: Kerosene is flammable, so don’t use it around open flames and don’t smoke or operate a lighter while you’re using it.
-
2Clean the inner and outer races while the bearings are soaking. Wipe away any visible grease with a clean rag and visually examine them out to see if they are damaged at all. If you need to, dip an edge of a rag into kerosene and use it to clean off any stubborn grease.[7]
- Damage to a race might look like pits, dents, or scratches.
- Just like there are inner and outer bearings, there are also inner and outer races. Thankfully, they are the same shapes and sizes, so you don’t need to worry about getting them mixed up.
-
3Replace the grease seal every time you grease the trailer bearings. Even if the grease seal still appears to be in good condition, it’s recommended that it be replaced every time you perform maintenance on the trailer bearings. Keep in mind that you’ll need 4-8 grease seals, just depending on how many wheels your RV or trailer has.[8]
- You can buy new grease seals online or at your local auto parts or trailer supply store.
-
4Wipe down the clean bearings and spindle nut with brake cleaner. Take the bearings and spindle nut out of the kerosene and set them on a clean rag or newspaper. Spray them with brake cleaner and either dry them off with another clean rag or let them air dry.[9]
- This step just helps get the bearings and spindle nut extra clean. If you feel satisfied with how the bearings look after soaking in the kerosene, you can skip this step.
- You can buy break cleaner online or at an auto parts store.
-
5Repack the bearings with new grease. If you don’t want to get grease all over your hands, wear a pair of rubber gloves during this process because it can get messy. Scoop up about 1 tablespoon (15 grams) of grease with your fingers and manually push it into the bearings. Rotate the rollers as you go, making sure all of them are thoroughly covered. Coat the inside of the bearings, too.[10]
- Lucas Oil 10320 Multipurpose Marine Grease, Sta-Lube SL3121 Wheel Bearing Grease, and Star Brite Wheel Bearing Grease are 3 of the top-rated bearing greases. Even if your trailer doesn’t go near water, you can still use marine grease—it actually is more durable and heat-resistant than many other products.
-
6Replace the bearings, hub, spindle nut, cotter pin, and dust cap. Use the wooden dowel and hammer to tap the bearings back into place in the hub. Then reassemble the rest of the parts until the dust cap is popped back into place. Tap it with the hammer as well to make sure it is in there as securely as possible.[11]
- If your model of trailer also had a nut and washer, don’t forget to replace those between the outer bearing and the spindle nut.
-
7Put the tire and lug nuts back into place. Settle the wheel back onto the rod and screw the lug nuts back on with a wrench or tire iron. Once it is secured, you can lower the car jacks and move on to the next tire.[12]
- In all, this project may take you 1-3 hours, just depending on how easy it is to take apart all the pieces and how many tires you need to do.
Community Q&A
-
QuestionWhat is the best grease for car dolly hubs?
 p38arover RoverCommunity AnswerHTB - High Temperature Bearing grease. Most oil companies will have it, e.g., Castrol HTB, Shell RetinaX HTB.
 -
QuestionCan you tighten the spindle nut too tight?
 TrickynikiCommunity AnswerIt is easily possible. Try to find out the correct torque and use a torque wrench.
Warnings
- Always follow the instructions for your carjack so your trailer doesn’t fall while you’re working.⧼thumbs_response⧽
- Never use kerosene near open flames.⧼thumbs_response⧽
Things You’ll Need
- Adjustable wrench
- Carjack and stands
- Flat-head screwdriver
- Wooden dowel
- Hammer
- Needle-nose pliers
- Bearing grease
- Brake cleaner
- Clean rags
- Rubber gloves
- Kerosene
- Small pan
- Newspaper
References
- ↑ https://youtu.be/314HE4aMG-g?t=444
- ↑ https://www.familyhandyman.com/automotive/utility-trailer/repacking-trailer-wheel-bearings/
- ↑ https://www.thepopupprincess.com/pop-up-camper-maintenance/how-to-grease-and-repack-your-trailer-bearings/
- ↑ https://www.familyhandyman.com/automotive/utility-trailer/repacking-trailer-wheel-bearings/
- ↑ https://www.thepopupprincess.com/pop-up-camper-maintenance/how-to-grease-and-repack-your-trailer-bearings/
- ↑ https://www.familyhandyman.com/automotive/utility-trailer/repacking-trailer-wheel-bearings/
- ↑ https://www.thepopupprincess.com/pop-up-camper-maintenance/how-to-grease-and-repack-your-trailer-bearings/
- ↑ https://www.thepopupprincess.com/pop-up-camper-maintenance/how-to-grease-and-repack-your-trailer-bearings/
- ↑ https://www.familyhandyman.com/automotive/utility-trailer/repacking-trailer-wheel-bearings/


