wikiHow is a “wiki,” similar to Wikipedia, which means that many of our articles are co-written by multiple authors. To create this article, 13 people, some anonymous, worked to edit and improve it over time.
There are 7 references cited in this article, which can be found at the bottom of the page.
This article has been viewed 511,402 times.
Learn more...
Utility trailers are handy for a variety of applications, from hauling your tools to the job, or your gear to the gig. Whether you're planning on building a trailer for your business, or just need one occasionally for the family camping trips, this article will give you the information you need to build your own!
Steps
Before You Begin
-
1Determine the type of trailer you'll need. A utility trailer should be customized to your specifications. You will need to decide on the length, the weight capacity, and whether or not it will be enclosed. For example:[1]
- If the utility trailer will be used for lumber or building materials, it may need stronger suspension and larger wheels. For ease of loading and unloading—especially lumber—you would probably not want it enclosed. You would also want to make it long enough to hold lumber and sheeting.
- For machinery and valuable tools, you would not only want it sturdy, but also enclosed and secure to prevent theft.
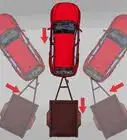
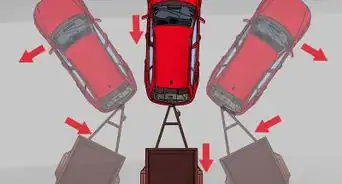
- The vehicle that you will use to pull the utility trailer will also help determine the dimensions. For example, a utility trailer to haul groceries behind a bicycle will necessarily be much smaller than a utility trailer for a Suburban, built to haul a table saw.
-
2Decide the method of construction. You may choose to build a utility trailer from scratch or assemble a kit. Either way, the right tools and materials are essential. Search online websites for utility trailer kit plans or visit a home improvement store, or tractor supply dealer for ideas.Advertisement
-
3Confirm your level of ability. In the planning stages, it's important to be aware of your construction and mechanical expertise and capabilities. Building a utility trailer from scratch will require welding skills, an aptitude for carpentry, and electrical knowledge to install taillights. It also helps if you're comfortable with heavy lifting.[2]


Assembling the Utility Trailer
-
1Gather the materials and tools. Working according to a utility trailer plan will help you gather the right components. Once you have located a source for the materials, check with the customer service representative to arrange delivery. If you are a skilled welder and have the equipment you'll need, follow the manufacturer's recommended safety and procedural instructions.
- Most designs consist of a bed, a hitch, a "tongue" (the wedge shape that extends from the front), an axle with wheels, taillights, and a license plate frame.
- Many of the components for utility trailers (tongue, hitch, axle, jack, and taillight assembly) can be purchased fully assembled, allowing for easier construction.
-
2Construct the trailer frame. The frame will consist of 4 steel angle iron rods, 2 for the sides, and 2 for the front and back. Depending on the established length of the trailer, the sides might be longer than the front and back.[3]
- Weld the angle iron rods together for the bed frame. Assure the corners are squared.
- Weld support beams made of flat iron across from side to side.
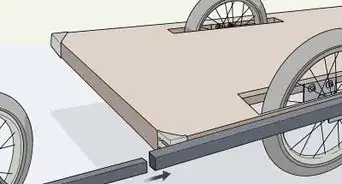
- Bolt pressure-treated 2x6 inch (5.1 X 15.2 cm) boards to the frame, parallel with the sides inside the lip of the angle iron.
- Cut lumber with a circular saw. Drill holes in the angle iron with a variable speed drill and drill-bit designed for metal.
- Attach boards to frame bed.
-
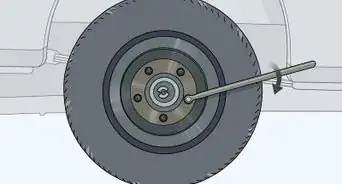
3Attach the axle and tires. Use a hydraulic jack to raise up the frame. Block all 4 corners to keep it elevated. Weld the axle under the framing. On a rectangular frame, the axle should be attached with 60 percent of the frame in front and 40 percent in back to distribute the weight of the bed.
- Using the lug bolts and nuts included with the axle kit, install the predetermined sized tires on the axle.
-
4Finish out the other parts. Weld the hitch to the tongue and attach the assembly to the front of the frame. Attach the jack behind the hitch on the tongue. Route electrical wires from the front to the rear for the taillights. Assure the taillight connector is in front.
- The taillight assembly will consist of a combination of park, brake, and signal lights. The wiring harness should be secured under the trailer and the lights attached to rear with bolts on either side.


Community Q&A
-
QuestionOn step 3, the instruction mentions a weight distribution of 40% in the back and 60% in front of the center of the axle. Is this meant for the empty load of the trailer or a fully loaded trailer?
 Community AnswerEmpty. You want to put the Axle near-center of the actual cargo box. If the axle is too far forward, you will have more weight at the back which can cause the trailer to be unstable at speed. If you put the axle too far back you will have a more stable trailer, but it will increase the load on your hitch.
 -
QuestionWhy does the build not include adding springs to the frame?Community AnswerA trailer can be built with or without springs. Using a square tube axle makes it easier to weld the axle directly to the frame. But an axle without springs produces a harsher ride. Springs can be added to provide a softer ride for your cargo, but the center line of the axle should still remain in about the same location specified in the article. The spring mounts should be located in order to place the axle in the proper position.The fixed end of the spring should be toward the front of the trailer, and the part that is allowed to move should be toward the rear of the trailer.
-
QuestionWhat type and size of steel tube is used for a trailer?
 Community AnswerRHS (rectangular hollow section) is used for the frame, drawbar, etc. The size of each section varies according to the size of the trailer.
Things You'll Need
- Welding equipment (if applicable)
- Circular saw
- Variable speed drill with metal drill-bit
- Spray paint


References
- ↑ https://www.streetdirectory.com/travel_guide/213896/cars/the_top_10_uses_of_utility_trailers.html
- ↑ https://mechanicalelements.com/how-to-setup-a-trailer-frame/
- ↑ https://mechanicalelements.com/how-to-setup-a-trailer-frame/
- ↑ https://dor.georgia.gov/homemade-trailer-registration
- https://www.youtube.com/watch?v=9oNaoI5MuhU
- https://www.youtube.com/watch?v=_I0GOAVnz_8
- http://www.etrailer.com/faq-wiring.aspx
About This Article
To build a utility trailer, start by welding together 4 steel angle iron rods into a square or rectangle, depending on the size of your trailer. Then, add support beams to strengthen the trailer by welding more iron rods inside the rectangle. Next, cut pressure-treated 2 by 6 inch boards to the length of the frame and attach them to the frame using a metal drill bit. Finally, jack up the frame to attach the axle and tires and weld on the hitch and tail lights. For tips on how to design a utility trailer to meet your specific needs, read on!