This article was co-authored by Ashley Mak, DPT. Ashley Mak is a Physical Therapist and the Owner of Ashley Mak Performance and Rehabilitation, his physical therapy business based in Hoboken, New Jersey. He is also the CEO of Hudson River Fitness and an Adjunct Professor at Kean University. With over seven years of physical therapy experience, Ashley specializes in both pain management and maximizing physical performance. He received his BA in Biology from Villanova University in 2010 and his Doctorate in Physical Therapy (DPT) from Thomas Jefferson University in 2012.
There are 27 references cited in this article, which can be found at the bottom of the page.
wikiHow marks an article as reader-approved once it receives enough positive feedback. This article received 19 testimonials and 86% of readers who voted found it helpful, earning it our reader-approved status.
This article has been viewed 2,702,727 times.
Whether you lift weights for a living or you sit at your computer for eight hours a day, you're susceptible to getting those pesky knots in your back. These knots, also known as “trigger points,” occur when your muscle fibers cannot relax. They’re commonly found in the trapezius muscle, a large muscle that extends from the base of your skull down your back and out to your shoulders.[1] [2] You can try some techniques on your own to get rid of knots, or seek professional treatment.
Things You Should Know
- Apply pressure to knots with your hands, tennis balls, foam rollers, or long objects that can reach your back.
- Use stretching exercises, good posture, and heating or ice packs to reduce pain and prevent future knots.
- Talk to a doctor if your knot pain is chronic, severe, or a week of taking OTC pain relievers has not helped.
Steps
Massaging the Knot Away
-
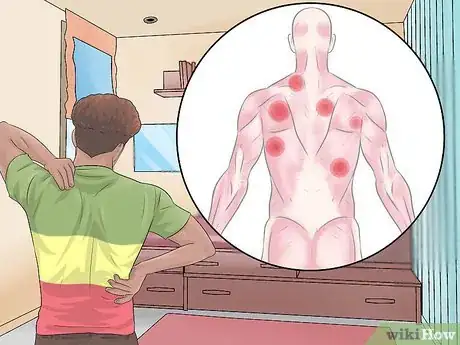
1Find your knots. Most knots occur in your upper back and shoulder area.[3] They tend to feel tighter and denser than the surrounding muscles, much like a knot in a rope (hence the name).[4] Although knots can feel tight and denser, there are times that the most painful knots don't feel tight at all. Focus more on the fact that pressing into a knot produces pain, rather than looking for a "tight" muscle.
- If you press on a knot, it may cause pain to radiate outward. This suggests that it is a trigger point. “Tender spots” do not usually cause pain in other areas of your body.[5]
- Knots are usually your body's way of preventing you from moving in a specific way. For example, if you have a joint problem and it hurts to move, you may feel a knot there.[6]
EXPERT TIPAshley Mak is a Physical Therapist and the Owner of Ashley Mak Performance and Rehabilitation, his physical therapy business based in Hoboken, New Jersey. He is also the CEO of Hudson River Fitness and an Adjunct Professor at Kean University. With over seven years of physical therapy experience, Ashley specializes in both pain management and maximizing physical performance. He received his BA in Biology from Villanova University in 2010 and his Doctorate in Physical Therapy (DPT) from Thomas Jefferson University in 2012.Physical Therapist
 Ashley Mak, DPT
Physical TherapistOur Expert Agrees: A knot is typically a muscle contraction that's caused because your body is trying to create stability in the area. For instance, it could indicate that there's a problem with one of your joints, and the knot is your body's way of trying to ensure you don't move in that direction anymore.
-
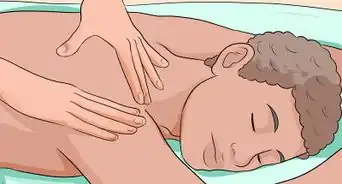
2Massage the knot by applying pressure along the knot. Gently rub the knot in a circular motion using your fingertips. Apply light pressure, but not so much that it hurts. This may help release tense muscle fibers.[7]
- You may also find that simply pressing on the knot helps relieve the pain. Apply firm pressure to the knot and hold it for about a minute.[8]
- If it is difficult or impossible for you to massage the knot yourself, ask a friend to help you.
Advertisement -
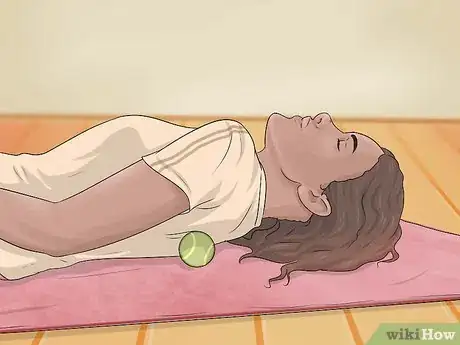
3Enlist the help of a tennis ball. You can do this either leaning against the wall or lying down. Either way, put the tennis ball between you and the hard surface. Line it up on top of the point where you feel the most pressure. You may feel discomfort at first, but it should subside as you continue to apply pressure.[9]
- Pin the tennis ball between the knot and the hard surface until the pain ceases. Take breaks as necessary. At the beginning, you may find that you can only hold it there for a few seconds. As you continue this exercise, that time will increase.
- You can use other types of balls, but firmer balls such as racquetballs may apply too much pressure, at least at first.
-
4Get a foam roller. Foam rollers operate on the same principle as the tennis ball across a wider area. They can help release tense and tight muscles. They’re usually a couple of feet long and look like thick pool noodles.[10]
- Go slowly at first. Spending too much time on a sore spot can actually cause increased damage to your muscles, especially if you’re unfamiliar with foam rolling techniques. Spend 15–30 seconds on a knot before moving on.[11]
- Place the foam roller on the ground horizontally. Lie on it perpendicular to the roller. Find your sore areas and roll yourself slowly across them. Don’t use a foam roller for more than three minutes at a time.[12]
- Do not use a foam roller on your lower back, as you could cause nerve damage.[13]
- Above all, never use a foam roller while lying flat on your back. This can hyperextend the low back and cause joint damage and pain.
-
5Extend your reach. Using an umbrella with a curved handle or a specially designed massage implement such as the “Body Back Buddy” can help you massage harder-to-reach areas.
- If you have a knot on top of your shoulder, simply place the end of the handle on top of the knot. Then press down, holding it down. Just as with the tennis ball, hold it there until the knot seems to dissipate.
- To target these trigger points hands-free and to avoid tension in the arms, you can use hands-free products such as the "Muscle Wizard."
Stretching the Knot Out
-
1Do stretching exercises to lengthen the muscles. While stretching won't remove the knots, it can reduce your pain and definitely keeps future knots at bay.[14] The following are exercises that you can try.
-
2Perform shoulder rolls. These exercises, also known as shrugs, can help release tension in your neck and shoulder area, a common place for knots in your back to form.[15]
- Sit upright in a chair, preferably one with a straight back. You can also sit on the floor or stand, but make sure to maintain good posture.
- Bring your shoulders up to your ears. Roll them forward and then down in a clockwise motion.
- Repeat this exercise in the opposite direction: up, backward, down (counter-clockwise).
- Do two to four reps several times a day.
-
3Stretch your shoulders by moving your elbows. This stretch will help blood flow into your shoulder blade area, which is a common site for knots.[16]
- Begin by placing your hands palms-down on your shoulders. The right hand goes on the right shoulder and the left hand on the left shoulder.
- Bring your elbows together, keeping your hands on your shoulder. You should feel a good stretch in your shoulder and upper back area.
- Hold this position for three to five seconds and take deep, even breaths as you hold. Then relax. Repeat this exercise several times throughout the day.
-
4Squeeze your shoulders together. This exercise can help release tense and tight muscles in your upper back and shoulder area.[17]
- Sit or stand with your arms at your sides. Squeeze your shoulder blades together. Hold this tension for a few seconds and then relax. Repeat several times throughout the day.
- Imagine a string pulling your shoulder blades back and down. Do not just extend your chest forward.
-
5Stretch your shoulder with your other arm. This exercise will help stretch and release tension in your shoulders.
- Bring your left arm across your chest. Reach as far across your chest as you can.[18]
- Hold your left arm in place at the elbow with your right arm.
- Hold the stretch for 30 seconds, then relax.
- Repeat the stretch with your other arm.
-
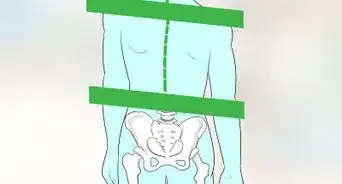
6Try "tuck and rolls." These exercises can help stretch the muscles in your lower back, although they aren’t as effective for the upper back or shoulders.
- Sit on the floor with your legs tucked into your chest.
- Hold on to your legs and roll back and forth to stretch the lower back.
-
7Do the knee-to-chest stretch. This stretch will help release tension in your lower back. If it causes additional back pain, do not do this exercise.[19]
- Lie on your back on the floor. You can use a yoga mat for cushioning.
- Bend your knees, keeping your feet flat on the floor.
- Place both hands behind one knee and bring it up to your chest. Keep your lower back pressed to the floor during this stretch. Hold the position for 15–30 seconds, then relax.
- Repeat the motion with the other leg. Do two to four reps for each leg.
-
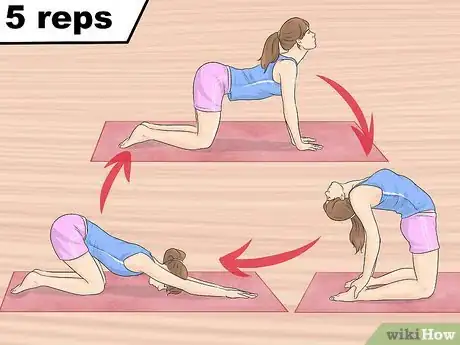
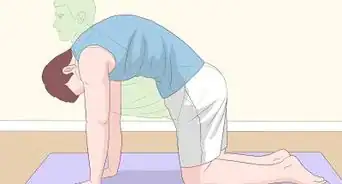
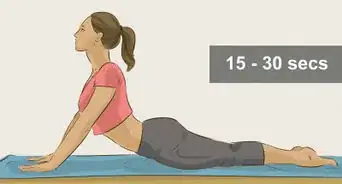
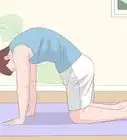
8Use some movements from pilates.[20] Pilates movements can help you stretch out the tense muscles in your back that are causing knots. One particular combination of movements goes from Prayer to Cat to Camel, and is very good at releasing tense muscles.[21]
- Begin on all fours. Inhale, and lean back on your heels as you exhale. Extend your arms in front of you and lower your head to the ground. This is Prayer pose. You should feel a stretch in your lower back.
- Move from Prayer back to all fours, inhaling as you go. Arch your back upward toward the ceiling. Tuck your head and abdominal muscles in. This is Cat pose. You should feel a stretch across your back muscles.
- Exhale and arch your back toward the floor, lifting your hips and chin toward the ceiling. This is Camel Pose. You should feel a stretch in your upper back.
- Return to Prayer pose. Repeat this movement sequence for five reps.
-
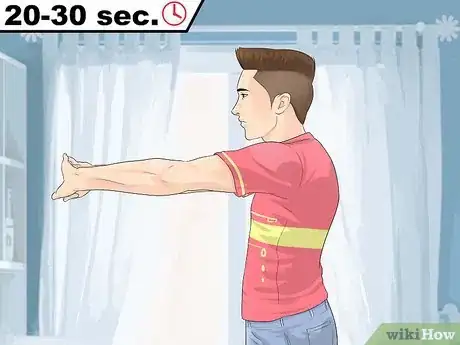
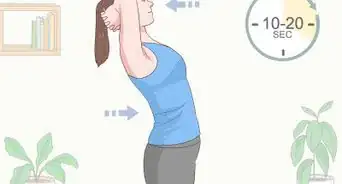
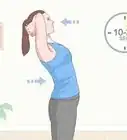
9Interlock your hands and stretch them in front of you. Keep your elbows straight and arch your back. Place your palms outward and then turn them inward, facing you. Hold for 20–30 seconds.
-
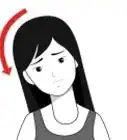
10Stretch your neck. Bring your ear to your shoulder. Gently hold your head down with the hand on the same side. You should feel a light stretch, but not pain. Hold for 30 seconds, then relax.Repeat for the other side.[22]
- Bring your chin to your chest. Hold where you feel a stretch for 20–30 seconds.
Keeping Good Habits
-
1Apply cold to the area. If the knot is a result of an injury, cold should be applied first. Wrap the cold pack in a towel or cloth and apply it to the knot for 15–20 minutes at least three times a day. Do this for the first two or three days after the injury.[23]
- You can make a cold pack with 3 cups water and 1 cup of rubbing alcohol. Mix and pour into a resealable bag. Make sure to squeeze all the air out before you freeze it.
- You can also use a bag of frozen vegetables. Choose ones that are small and uniform in size, such as peas or corn. Note that once you've used these veggies as a cold pack, you won't want to eat them (it's not a good idea to allow frozen food to defrost and then re-freeze it).
-
2Apply heat to the area to loosen the muscles. For frequent or chronic pain, heat works better than ice.[24] Use a heating pad, a hot bath or a shower to do this.
- Apply heat for no more than 15–20 minutes at a time, up to three times a day.
- If moist heat is preferred, you can warm a damp towel for thirty seconds in the microwave. Do not heat the towel too much, or you could burn yourself. Be careful of steam in particular, as steam can cause severe burns.
-
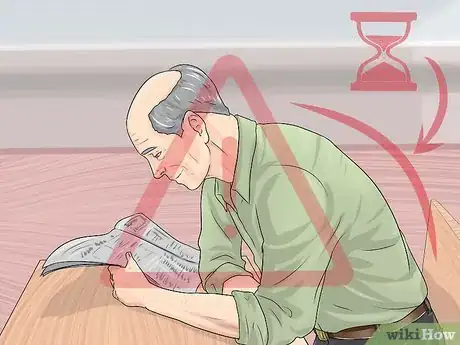
3Monitor your posture.[25] Poor posture, especially while sitting for long periods of time, can cause back pain and knots.[26] Try to be conscious of slouching — that's putting constant pressure on the same muscles.
- If you work at a desk, take time to get up and walk around (and stretch) every hour or so.
- Keep your head from slumping forward when you stand or sit. Slumping can put strain on your shoulders and back and contribute to knots.[27]
- If you lift weights, monitor your form. Putting weights down too quickly causes the muscles to forcibly contract, jarring them.
-
4Take up yoga.[28] When it comes to exercises that can strengthen your back, yoga is certainly up there. It can relieve back soreness in addition to strengthening your muscles and increasing your flexibility. Here are a few positions to try:[29]
- The downward-facing dog will help your lower back. It targets your back extensors — those muscles that help you stand and lift objects. Start on all fours. Make sure your knees are directly below your hips and your hands are just slightly in front of your shoulders. As you exhale, press your knees up toward the ceiling, stretching out your legs. Stretch your heels toward the floor. Straighten your legs, but do not lock your knees. Your body will form a sort of arch.[30]
- The child's pose will elongate your back muscles. Begin on all fours. Sit back until your buttocks touch your heels. Stretch your arms forward and lower your head to the ground.[31]
- The pigeon pose stretches your hip rotators and flexors. Sometimes we forget that our whole body is connected — poor hip alignment can totally ruin an otherwise healthy back. Lie on your back with your knees bent. Cross your left ankle onto your right thigh. Place your hands around the back of your right thigh and pull your right knee toward your chest. Keep your upper body relaxed as you hold this position. Repeat on the other side.[32]
- The triangle pose will strengthen your back and legs and stretch the sides of your torso and hip muscles. Stand on a yoga mat with your feet about 4 feet apart. Turn your right foot outward so it is parallel with the long edge of the mat. Align your heels so they form a straight line. Bring your arms out to your sides so that your body forms a “t” shape. Fold down and bend to the right, stretching your right arm down to your right foot. Hold the pose as long as is comfortable. Repeat on the other side.[33]
-
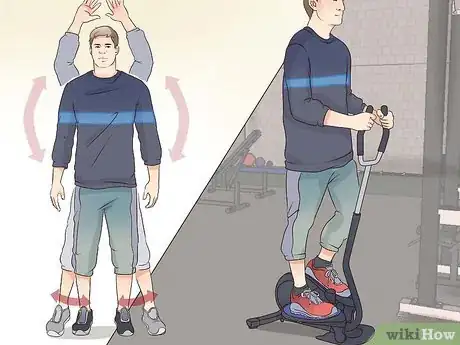
5Get aerobic exercise. Getting regular, moderate aerobic exercise will help keep knots at bay. Try an exercise, such as swimming, elliptical machines, or even jumping jacks, that engages your arms as well as your legs.[34]
- Aim for about 30 minutes of moderate aerobic activity a day.
-
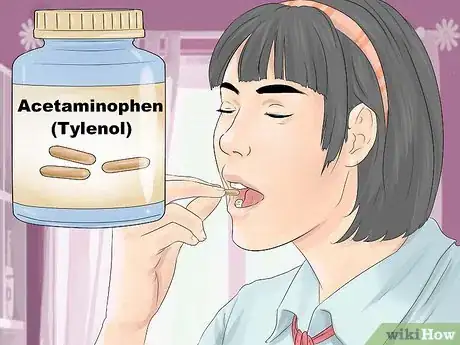
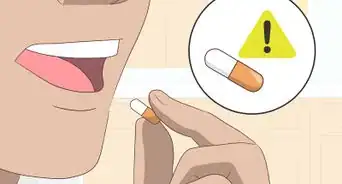
6Try an over-the-counter (OTC) pain reliever. Acetaminophen (Tylenol) is the best to start with, as it tends to cause fewer side effects than other pain relievers. If this does not work, try an NSAID (nonsteroidal anti-inflammatory drug). Common NSAIDs include ibuprofen (Advil), naproxen (Aleve), or aspirin.[35]
- Never exceed the recommended dosage on the packaging. NSAIDs and acetaminophen can both cause serious side effects when used improperly.
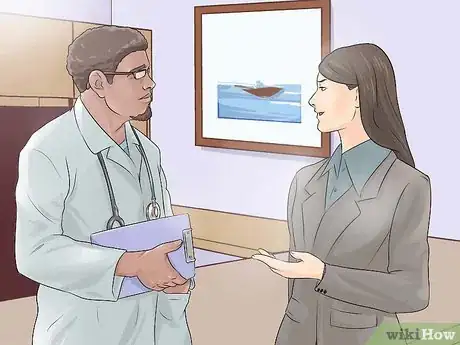
- If your back pain continues for more than a week when you use OTC pain relievers, see your doctor. It is not safe to use most OTC pain relievers long-term. Your doctor may need to prescribe a stronger medication.
-
7Talk to your doctor about chronic back pain. If your back pain lasts more than a few weeks, or if back pain has been a staple of everyday life since you can remember, talk to your doctor. You may require stronger treatment or medication.
- Physical therapy will most likely be recommended first. Physical therapists can recommend exercises and techniques to relieve pain and promote better back health. Some are also trained in techniques such as dry needling, which can relieve back pain by stimulating trigger points.[36] [37]
- Your doctor may prescribe muscle relaxants if your back pain continues or does not improve. These can be addictive, so use them only as prescribed by your doctor.[38]
- Injections are used as last resorts and only when pain is radiating through different parts of your body. Your doctor may inject cortisone into your epidural space (around your spinal cord). The relief from this injection usually only lasts a few months.
- If your back pain is not due to knots but in fact connected to a more serious condition, your doctor may consider surgery.
-
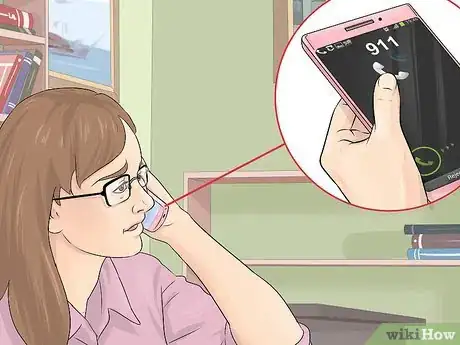
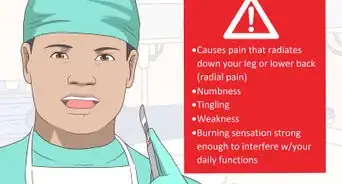
8Seek emergency medical attention when necessary. Sometimes, back pain is the sign of another medical condition that requires emergency care. Call 911 or get to your emergency room if you experience any of the following:[39]
- Back pain accompanied by other symptoms, such as chest discomfort, shortness of breath, or sweating. These may be signs of a heart attack.[40]
- Back pain after a trauma, such as a car crash, fall, or athletic injury
- Back pain accompanied by difficulties with your bowels or bladder
- Back pain accompanied by fever and/or night sweats
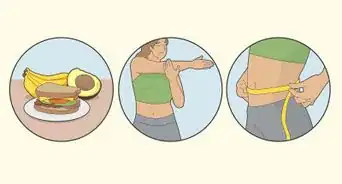
Sample Stretches and Ways to Prevent Knots
Warnings
- Do not apply pressure directly to the spine!⧼thumbs_response⧽
- Do not move in any direction that causes a sharp pain. Stretching is good; pain is bad.⧼thumbs_response⧽
References
- ↑ http://health.clevelandclinic.org/2014/05/knot-in-your-neck-4-ways-to-relieve-trigger-point-pain/
- ↑ http://www.aafp.org/afp/2002/0215/p653.html
- ↑ http://www.aafp.org/afp/2002/0215/p653.html
- ↑ http://health.clevelandclinic.org/2014/05/knot-in-your-neck-4-ways-to-relieve-trigger-point-pain/
- ↑ http://www.aafp.org/afp/2002/0215/p653.html
- ↑ Ashley Mak, DPT. Physical Therapist. Expert Interview. 3 March 2020.
- ↑ http://health.clevelandclinic.org/2014/05/knot-in-your-neck-4-ways-to-relieve-trigger-point-pain/
- ↑ https://www.painscience.com/articles/self-massage.php
- ↑ https://myhealth.alberta.ca/health/pages/conditions.aspx?hwid=abo3435
- ↑ http://www.webmd.com/fitness-exercise/at-home-workouts-5-essential-items-for-a-home-gym?page=3
- ↑ http://michaelgleibermd.com/news/dos-donts-foam-rolling-back-pain/
- ↑ http://newsinfo.iu.edu/tips/page/normal/17854.html
- ↑ http://michaelgleibermd.com/news/dos-donts-foam-rolling-back-pain/
- ↑ https://myhealth.alberta.ca/health/pages/conditions.aspx?hwid=tr5948&#tr5949
- ↑ http://www.healthcenter.vt.edu/assets/docs/MCOrthoRehab-UpperBack.pdf
- ↑ http://www.healthcenter.vt.edu/assets/docs/MCOrthoRehab-UpperBack.pdf
- ↑ http://www.mayoclinic.org/healthy-lifestyle/adult-health/multimedia/back-pain/sls-20076265?s=8
- ↑ http://www.mayoclinic.org/healthy-lifestyle/fitness/multimedia/stretching/sls-20076840?s=8
- ↑ https://myhealth.alberta.ca/health/pages/conditions.aspx?hwid=tr5948&#tr5949
- ↑ Ashley Mak, DPT. Physical Therapist. Expert Interview. 3 March 2020.
- ↑ http://uhs.princeton.edu/sites/uhs/files/documents/Pilates-Flex-Stretch.pdf
- ↑ http://www.mayoclinic.org/healthy-lifestyle/fitness/multimedia/stretching/sls-20076840?s=10
- ↑ http://www.healthline.com/health/chronic-pain/treating-pain-with-heat-and-cold#Heatvs.Cold1
- ↑ http://www.healthline.com/health/chronic-pain/treating-pain-with-heat-and-cold#Heatvs.Cold1
- ↑ Ashley Mak, DPT. Physical Therapist. Expert Interview. 3 March 2020.
- ↑ http://www.mayoclinic.org/diseases-conditions/back-pain/basics/prevention/con-20020797
- ↑ http://nof.org/articles/549
- ↑ Ashley Mak, DPT. Physical Therapist. Expert Interview. 3 March 2020.
- ↑ http://www.everydayhealth.com/back-pain-pictures/best-yoga-poses-to-soothe-back-pain.aspx#/slide-5
- ↑ http://www.yogajournal.com/pose/downward-facing-dog/
- ↑ http://www.yogajournal.com/pose/child-s-pose/
- ↑ http://www.yogajournal.com/article/beginners/pigeon-pose/
- ↑ http://www.yogajournal.com/article/beginners/triangle-pose/
- ↑ http://health.clevelandclinic.org/2014/05/knot-in-your-neck-4-ways-to-relieve-trigger-point-pain/
- ↑ http://www.nlm.nih.gov/medlineplus/ency/article/007486.htm
- ↑ http://my.clevelandclinic.org/health/diseases_conditions/hic_your_back_and_neck/hic_What_Can_Physical_Therapy_Do_For_Your_Back_and_Neck_Pain
- ↑ http://www.ncbi.nlm.nih.gov/pmc/articles/PMC2246010/
- ↑ http://www.nlm.nih.gov/medlineplus/ency/article/007486.htm
- ↑ http://www.mayoclinic.org/symptoms/back-pain/basics/when-to-see-doctor/sym-20050878
- ↑ http://www.heart.org/HEARTORG/Conditions/HeartAttack/WarningSignsofaHeartAttack/Warning-Signs-of-a-Heart-Attack_UCM_002039_Article.jsp
About This Article
To get rid of knots in your back, apply light pressure to the knot with your fingertips and massage it out in a circular motion. If you can’t reach the knot yourself, ask a friend to help you. Alternatively, lie on the floor with a tennis ball under the knot to apply pressure to it, or roll back and forth with a foam roller under your back. You can also relieve tension in your back and neck by performing exercises, such as shoulder rolls or squeezing your shoulders together. For tips on how to treat knots with a heating pad or ice, keep reading!
