This article was co-authored by Mitchell Newman. Mitchell Newman is the Principal at Habitar Design and its sister company Stratagem Construction in Chicago, Illinois. He has 20 years of experience in construction, interior design and real estate development.
There are 18 references cited in this article, which can be found at the bottom of the page.
wikiHow marks an article as reader-approved once it receives enough positive feedback. In this case, 100% of readers who voted found the article helpful, earning it our reader-approved status.
This article has been viewed 212,254 times.
The floors of most modern structures are built by arranging individual pieces of dimensional lumber in a consistent, repeating pattern. This process, commonly known as "stick framing," results in a structure that’s lightweight and economical, yet built to last. Once you’ve confirmed the basic layout of your new structure and cut your lumber to the correct dimensions, completing the floor is as simple as constructing a frame of the right shape and size and reinforcing it with joists running in both directions.
Steps
Planning Your Project
-
1Research the building codes for your area. Most states or territories have building codes, or basic requirements that new homes and other structures are required to meet during construction. It’s important to familiarize yourself with the unique building codes for your area before you get started, as they can dictate everything from your basic materials to the type of measurements you use.[1]
- You can find a copy of your local building codes by running a quick search for “residential building codes” plus the name of your city, state, or municipality.
- In some areas, you may even need a permit to install a floor yourself for it to be considered up to code.
- If your floor isn't up to code, it’s possible that you could be fined or even forced to pull up the entire structure and start over.[2]
-
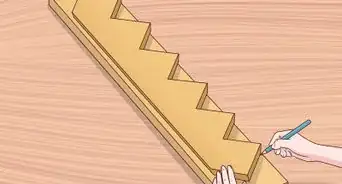
2Draw up a basic floor framing plan. Before you begin cutting or measuring, grab a pencil and paper and sketch an outline of your floor. Your sketch should depict the floor's basic shape and layout, complete with any additional features like alcoves, nooks, and staircases.[3]
- Extremely long spans, staircases, or interior walls typically require additional support, which can complicate your framing plan. In this case, your floor framing project will be best handled by a licensed contractor.
Advertisement -
3Label the dimensions of your floor framing plan. Fill in your outline with specific measurements for each area where you’ll be installing a separate piece of lumber. If your floor is going to be 12 feet (3.7 m) x 18 feet (5.5 m), for instance, note that you'll need a total of 4 12 ft (3.7 m) boards and 4 18 ft (5.5 m) boards for the outer frame, as well as multiple 18 ft (5.5 m) boards cut to size to serve as the main floor joists.[4]
- Stick-framed floors typically consist of 3 main components—the sill plate, which goes on top of the concrete foundation, the rim joists, which box in the edges of the sill plate, and the floor joists, which run parallel to one another to provide internal support.
- The exact number of floor joists you'll need will depend on the size of the floor. As a general rule, floor joists should be spaced 16 inches (41 cm) apart for maximum stability.
- Draw and label your framing plan to scale and double-check each of your measurements to make sure they suit the structure’s size and support requirements.
-
4Add up each part of the framing plan to calculate your materials. Once you’ve drafted your framing plan, review it carefully to determine exactly how much lumber you’ll need. The simplest way to do this is to add together the length of each individual section in feet. For example, 4 12 ft (3.7 m) boards + 4 18 ft (5.5 m) boards + 9 18 ft (5.5 m) joists = 282 feet (86 m) of lumber.[5]
- Remember, your calculations should reflect the combined length of the outer frame (multiplied by 2 to account for both the sill plate and rim joists), as well as each of the joists.
- It’s a good idea to order 15% more lumber than you think you’ll need so you’ll have enough in case of waste.
-
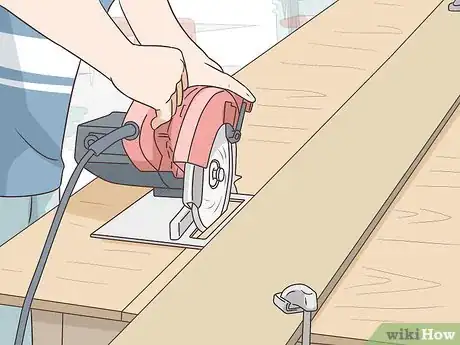
5Cut your boards to size. After you’ve ordered the lumber you need, use a circular saw to cut each piece to the dimensions you listed in your framing plan. To frame a floor that's 12 feet (3.7 m) x 18 feet (5.5 m), you would need 4 12 ft (3.7 m) sill plate boards, 4 18 ft (5.5 m) rim joist boards, and 9 18 ft (5.5 m) main floor joists.
- At most home improvement centers, you can also have your lumber cut to the desired specifications when you order it.
- Label each piece of lumber with a pencil after you cut it (for example, “sill plate” or “main floor joist”). This will make it easier to keep track of where it goes later on.
Assembling the Frame
-
1Put the sill plate in place. The sill plate (also known as the “sill” or “mud sill”) is comprised of lengths of dimensional lumber laid directly on top of the foundation wall, and is the first part of the frame you’ll put down. Position one of the matching sets of the boards you cut for the perimeter of the floor horizontally (flat) over the foundation, making sure the outer edge is flush with the exterior of the concrete.[6]
- Residential building codes typically specify slightly wider lumber for the sill plate—typically either 2 in (5.1 cm) x 6 in (15 cm) or 2 in (5.1 cm) x 2 in (5.1 cm) boards.[7]
- Because the sill plate will be in direct contact with the concrete foundation, it’s recommended that you go with pressure-treated wood.
-
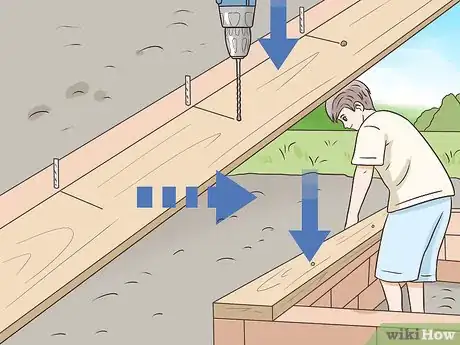
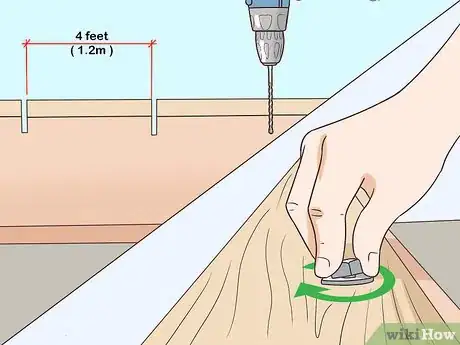
2Fasten the sill plate to the concrete foundation with anchor bolts. Use a hammer drill to open holes in the foundation large enough to accommodate the anchors. Insert the anchors into the holes, then lower the boards for the sill plate down over the top. Slip a washer and nut on each anchor and use an adjustable wrench to tighten them down until they’re secure.[8]
- Space your anchor bolts roughly 4 feet (1.2 m) apart along the foundation to ensure the sill plate boards are stable.[9]
- Make sure there’s an anchor at least 5 anchor-widths from any unsupported edge, and always leave a minimum of 10 anchor-widths between any 2 anchors.
-
3Set and fasten the rim joists. Stand each of the remaining perimeter boards upright on top of the sill plate so that they're flush with the outer edge. Then, drive framing nails down through the lower part of the boards into the sill plate at roughly a 30-degree angle to secure them. The rim joist sits vertically on top of the sill plate along the outside of the frame to create a lip for the main floor joists.[10]
- You’ll use the same size lumber to assemble the rim joists as you will for the main floor joists. For most jobs, 2 in (5.1 cm) x 10 in (25 cm) boards are an ideal size.
- If you like, you can also use metal braces make sure the connection between the sill plate and band joist is extra secure. Screw the braces into the wood at one end and the foundation at the other to clamp the 2 materials together.
-
4Mark the position of each floor joist along the sill plate. Floor joists should be spaced no more than 16 inches (41 cm) apart from center-to-center to provide adequate stability. Use a tape measure to measure 16 inches (41 cm) in from the edge of the rim joist and draw a small notch. Make another notch every 16 inches (41 cm) to confirm the distance between each next joist.[11]
- The length of your joists will vary depending on the size of the room and the exact materials you’re using.
- Be sure to consult your local building codes before marking the position of your joists. They may specify different spacings to suit different building materials.[12]
-
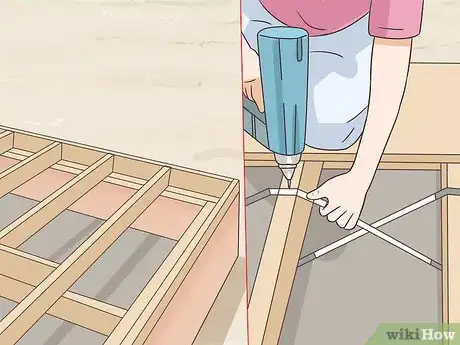
5Set the floor joists. Set each of the boards you cut for the main floor joists in place along the lip of the sill plate, making sure they're properly aligned with the markings you made. When measured, cut, and placed correctly, the main floor joists should fit flush against the rim joists. Fasten them to both the sill plate and the rim joist by driving framing nails through the outer edge of the frame.[13]
- Use 2-3 nails for each joist and drive them at a slight downward angle to make sure boards don’t budge.
- Joist hangers can help you work more quickly and efficiently if you’re installing multiple joists at once. Simply fit a hanger over each of the spacing marks you drew, nail them to the rim joist, and slide the end of the joist down into the slot.[14]
-
6Add bridging between the joists if they’re longer than 9 feet (2.7 m). Bridging involves placing short sections of material perpendicularly between the joists to stabilize them. To install standard metal bridging, brace the pointed ends of the bars against the joists, then nail down the open ends.[15]
- Install bridging on either end of the joists at a distance of ⅓ of their total span. If your floors are 15 feet (4.6 m) long, for example, you would position a brace 5 feet (1.5 m) from either end.[16]
- Alternatively, you can fashion your own block supports by cutting 4 in (10 cm) x 4 in (10 cm) boards into 16 in (41 cm) sections to fit in between the joists. Line the blocks up in a row perpendicularly with the joists, then nail them into place through the face of the next joist.[17]
- Bridging cuts down on the flexion of the lumber, reducing the stress put on it and extending its lifespan.
-
7Install the subfloor. Lay down 3⁄4 in (1.9 cm) tongue-and-groove plywood panels over the joists, then use wood glue or panel adhesive and galvanized flooring nails to secure each panel around its edges. Work in small sections until the entire floor is covered. When you’re done, your floor will be framed and ready for the next phase of construction.[18]
- Apply the glue a single section at a time. You don’t want it to dry out before you have the chance to lay down the subfloor.[19]
- Using both nails and glue (instead of just one or the other) will help ensure a perfectly flat, stable surface and prevent squeaking underfoot.
Expert Q&A
-
QuestionHow far apart should floor joists be?
 Mitchell NewmanMitchell Newman is the Principal at Habitar Design and its sister company Stratagem Construction in Chicago, Illinois. He has 20 years of experience in construction, interior design and real estate development.
Construction Professional Usually in new construction, we would put floor joists 16 in (40.6 cm) on center. The wider you get, the more bouncy your floor gets.
Warnings
- Always pull on a pair of thick work gloves and wear protective safety glasses when operating a circular saw.⧼thumbs_response⧽
Things You'll Need
- Dimensional lumber
- Tape measure
- Circular saw
- Hammer drill
- Hammer
- Framing nails
- Galvanized flooring nails
- Anchor bolts
- Nuts
- Washers
- 3⁄4 in (1.9 cm) tongue-and-groove plywood subfloor panels
- Pen or pencil
- Paper
- Work gloves
- Safety glasses
- Joist hangers (optional)
- Metal or wooden bracing materials (optional)
References
- ↑ https://codes.iccsafe.org/public/document/IRC2015/chapter-5-floors
- ↑ https://realestate.usnews.com/real-estate/articles/5-must-ask-questions-about-code-violations-in-your-home
- ↑ http://engineeringtraining.tpub.com/14069/css/Framing-Plan-342.htm
- ↑ https://www.finehomebuilding.com/2016/07/25/floor-framing-design
- ↑ https://www.thebalancesmb.com/how-to-estimate-framing-materials-takeoff-and-costs-844380
- ↑ https://www.carpentry-pro-framer.com/sill-plates.html
- ↑ http://www.hometime.com/Howto/projects/framing/frame_2.htm
- ↑ https://www.forconstructionpros.com/concrete/equipment-products/concrete-anchoring/article/20982843/tips-on-attaching-sill-plates-to-concrete-foundations
- ↑ https://www.youtube.com/watch?v=3YDJdkU7ris&feature=youtu.be&t=8
- ↑ http://www.pfsteco.com/techtips/pdf/rimboarddiguide_us
- ↑ https://www.carpentry-pro-framer.com/floor-framing.html
- ↑ https://www.todayshomeowner.com/floor-joist-spans-for-home-building-projects/
- ↑ http://www.hometime.com/Howto/projects/framing/frame_2.htm
- ↑ https://www.familyhandyman.com/decks/building-a-deck/how-to-install-joist-hangers/view-all/
- ↑ https://www.youtube.com/watch?v=bmeZcNn-1zU
- ↑ https://www.familyhandyman.com/floor/floor-repair/how-to-stiffen-a-floor-with-bridging/view-all/
- ↑ https://www.finehomebuilding.com/pdf/021184090.pdf
- ↑ http://www.thisoldhouse.com/toh/article/0,,203103,00.html
- ↑ https://www.weyerhaeuser.com/blog/9-common-subfloor-mistakes-avoid/
About This Article
To frame a floor, start by measuring the area and designing your floor framing layout. Then, cut your lumber to size according to your measurements. Next, lay down the sill plate and fasten it to the concrete foundation with anchor bolts. Once the sill plate is secure, set and fasten the rim joists before setting the floor joists along the lip of the sill plate. Finally, add bridging between the joists if they're longer than 9 feet and install the subfloor. To learn how to draw up a floor framing plan, keep reading!


