This article was co-authored by Patrick Johns. Patrick Johns is a Home Improvement Specialist and the Owner of CatchAll Handyman Services. With more than 28 years of experience, he has worked on a variety of home improvement projects, such as carpentry, plumbing, and door and window installations in both commercial and residential properties.
There are 15 references cited in this article, which can be found at the bottom of the page.
This article has been viewed 34,170 times.
Toilet leaks can be a hassle. Not only do unchecked leaks make your water bill go up, but they waste clean water, which is bad for the environment. Household leaks around the United States can waste up to 1 trillion gallons of water every year.[1] A leaky toilet supply line may seem alarming, but don’t call a plumber just yet. Toilet supply lines are relatively easy to fix. In this article, we’ll help you find the source of the leak if you haven’t already, and then show you how to fix the supply line (or replace it completely) to stop the leak.
Steps
Finding the Source of the Leak
-
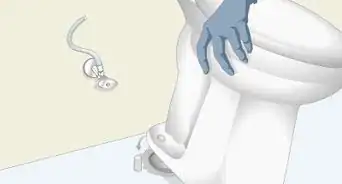
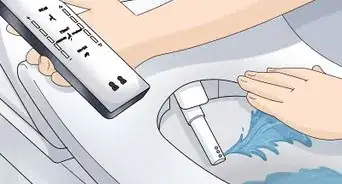
1Examine the supply line to see where the leak is coming from. Look to see if the water is coming from the fittings of the supply line, or a hole in the supply line. Try to find a place where water is dripping or spilling out.[2]
-
2Run your hand along the supply line if you can’t see the leak. If you can’t tell where the leak is just by looking, try running your hand along the supply line to feel for leaks. Try to find areas either on the supply line or on the fittings on either end for areas where water is pushing or dripping out.[5]Advertisement
-
3Put towels down once you’ve found the source of the leak. This will help absorb leaking water while you work on fixing the leak. On the off chance that you end up with more water leaking out, you will definitely want to clean that up before the floor gets slippery.
- Consider drying the supply line, walls, and other wet areas.
- If you leave water sitting on the floor, it could also cause mold to grow in your bathroom over time. Mold can cause health risks.[6]


Fixing the Supply Line
-
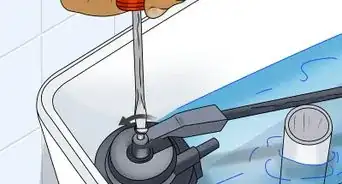
1Tighten the fitting connecting the supply line to the toilet. Screw in the nut between the supply line and the toilet by hand, then use a wrench to do an additional quarter of a turn.[7]
- You do not want to tighten the nuts too much, or you might strip their threads and damage them.
- Be sure to turn it to the left. Remember: Righty tighty, lefty loosey!
-
2Tighten the other fitting, connected to the supply valve. This is the part that connects to the wall. There should be a nut just above the valve that connects the supply line to the wall. Just like with the other fitting, tighten it by hand, then use a wrench to do an additional quarter of a turn.[8]
-
3Patch holes with plumber’s tape. Plumber’s tape is a sturdy, water-resistant kind of tape made specifically to fix plumbing. You can find it at your local hardware store. If the leak is coming from the ends of the supply line, turn the water supply valve on the wall off, flush the toilet to empty it out, then carefully unscrew the supply line and wrap some plumber’s tape firmly around the threads of the fittings on each end. Press the ends of the tape into the threads so that they don’t stick out.[9]


Replacing the Supply Line
-
1Shut off the toilet water supply.[12] Turn the water supply valve, which is where the water supply line connects to the wall, all the way to the right (clockwise). Flush the toilet to empty out the tank.[13]
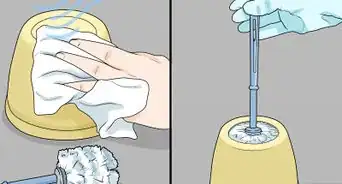
- You can also use a cup to empty out smaller amounts of water left in the tank, and a sponge to soak up residual amounts of water.[14]
-
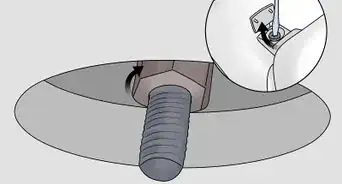
2Unscrew the supply line. Use a crescent wrench to unscrew the nuts connecting the supply line to the toilet and the supply valve and check the ring and the seal.[15] Remove the supply line from its place.
- Warning: Be a little careful when lifting the supply line out of place, as you don’t want to damage the places where it screws onto the supply valve and the toilet.[16]
-
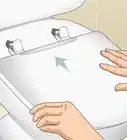
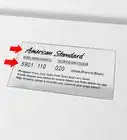
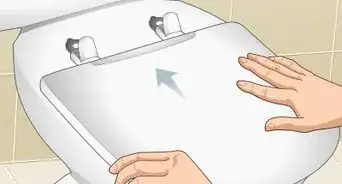
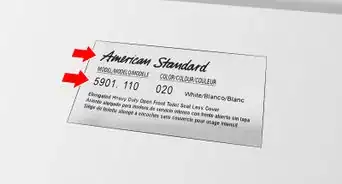
3Purchase a new supply line. Check the plumbing section of your local hardware store for replacement toilet supply lines. Purchase one that matches your old one in length and size.[17]
- Tip: Bring the old supply line with you to easily compare it to the new ones. If you aren’t sure which supply line matches your old one, ask an employee for help.
-
4Screw the new supply line into place. Screw one fitting of the new supply line into the screw on the toilet, and the other one into the screw above the water supply valve.[18] You can screw the fittings on by hand, or with a wrench if necessary. Just don’t screw them in too tight. Once again, you don’t want to strip the threads.[19]
- Tip: If your new supply line came with a tag displaying the dimensions of the supply line, consider leaving the tag on. This will make it easier to find the right supply line the next time you need to replace it.
-
5Turn on the water supply. Turn the water supply valve all the way to the left (counterclockwise) to get the water running again. Make sure that the new supply line is not leaking. If not, you’re done! Toilet supply lines usually last for about 10 years.[20]
- If the new supply line leaks, you might not have tightened it enough, the new supply line may be defective, or there may be a problem with another component of the toilet. Call a professional for help.


Expert Q&A
-
QuestionWhat kind of shut-off valve do I need for a toilet?
 Patrick JohnsPatrick Johns is a Home Improvement Specialist and the Owner of CatchAll Handyman Services. With more than 28 years of experience, he has worked on a variety of home improvement projects, such as carpentry, plumbing, and door and window installations in both commercial and residential properties.
Home Improvement SpecialistA quarter turn shut-off valve is the best option. A lot of times, contractors will use a pop click shut-off valve when building new homes. Unfortunately, pop click-style valves aren't available to regular plumbers, since they're only sold to contractors who do build-outs. Plus, the supply lines are affixed to pop click shut-off valves; so, if you have to replace the supply line, you have to replace the valve as well.


References
- ↑ https://www.epa.gov/watersense/fix-leak-week
- ↑ Patrick Johns. Home Improvement Specialist. Expert Interview. 5 April 2022.
- ↑ https://www.bobvila.com/articles/how-to-find-a-water-leak/
- ↑ https://youtu.be/6cx8y9D0t-U?t=25
- ↑ https://youtu.be/3SH1TYsASJg?t=21
- ↑ https://www.cdc.gov/mold/faqs.htm
- ↑ http://pdf.lowes.com/installationguides/721015352808_install.pdf
- ↑ http://pdf.lowes.com/installationguides/721015352808_install.pdf
- ↑ https://orangecoastplumbing.net/2015/09/teflon-tape-to-repair-toilet-leakage/
- ↑ https://www.youtube.com/watch?v=MNn7ce1sKJc
- ↑ https://www.latimes.com/archives/la-xpm-1997-nov-23-re-56797-story.html
- ↑ Patrick Johns. Home Improvement Specialist. Expert Interview. 5 April 2022.
- ↑ https://greenlivingideas.com/2014/12/19/how-to-replace-leaky-supply-line-toilet/
- ↑ https://www.rotorooter.com/blog/toilet/how-to-change-a-toilets-water-supply-line/
- ↑ Patrick Johns. Home Improvement Specialist. Expert Interview. 5 April 2022.
- ↑ https://www.plumbingsupply.com/how-to-replace-a-toilet-supply-line.html
- ↑ https://www.youtube.com/watch?v=6N6PCZQJi-Y
- ↑ Patrick Johns. Home Improvement Specialist. Expert Interview. 5 April 2022.
- ↑ https://greenlivingideas.com/2014/12/19/how-to-replace-leaky-supply-line-toilet/
- ↑ https://todayshomeowner.com/toilet-parts-you-should-regularly-replace-for-optimal-performance/
About This Article