This article was co-authored by wikiHow Staff. Our trained team of editors and researchers validate articles for accuracy and comprehensiveness. wikiHow's Content Management Team carefully monitors the work from our editorial staff to ensure that each article is backed by trusted research and meets our high quality standards.
There are 9 references cited in this article, which can be found at the bottom of the page.
This article has been viewed 19,753 times.
Learn more...
Mini trunking is a system of plastic tubing that you can use to hide cables neatly along walls. Installing straight lengths of mini trunking is relatively simple. However, if you want to wrap the cables around corners, you’ll probably want to fit mini trunking corners in place to keep the cables hidden in the corners. Purchase the appropriate number of inside and outside corner pieces that clip into place to make this task quick and easy. Measure and cut your straight lengths precisely so that the corners fit correctly, and soon enough your cables will be all tidied up and out of the way.
Steps
Measuring and Cutting the Straight Lengths
-
1Measure the walls where you want to install straight lengths. Use a tape measure to measure the length of each wall against which you want to hide cables inside lengths of mini trunking. Write down each measurement as you go.[1]
- If you plan to install mini trunking on many different walls, it can help to draw a rough sketch of the room or rooms and write the measurements down next to each wall to keep it all straight.
- You can buy straight pieces of mini trunking at a home improvement center or online. There are different brands with slight variations in style and appearance, but they all work in essentially the same way.
-
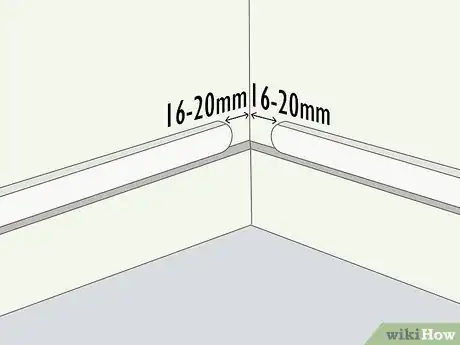
2Subtract 16-20 mm from the measurement of any wall with an inside corner. An inside corner is where 2 walls meet and form an internal angle. Subtract 16-20 mm from the measurements you got for any such walls to allow room for the internal corner pieces to fit into place.[2]
- Make sure you write down the new measurements for these walls and cross out the old ones.
Advertisement -
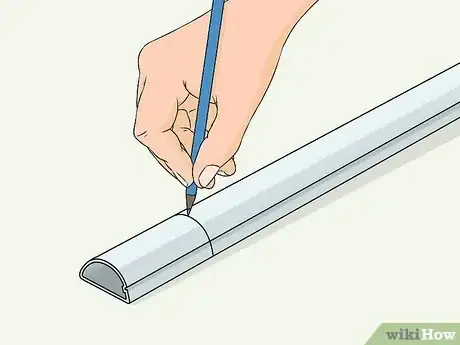
3Measure and mark the straight lengths of mini trunking you need to cut. Use your tape measure to measure a piece of mini trunking to the correct length for each wall. Make a straight line using a pencil where you will cut the pieces to length.[3]
- Mini trunking typically comes in sections of 2–3 m (6.6–9.8 ft).
-
4Use a mini hacksaw and a miter box to cut the mini trunking pieces to length. Place a section of mini trunking in a miter box so that the cut line you marked is lined up with the straight saw slot in the box. Cut straight through the piece of mini trunking along the cut line using a miniature hacksaw.[4]
- A miniature hacksaw is also known as a junior hacksaw. These have very small blades and thus can be used to make precise cuts in things like plastic or metal tubing.
Warning: Be careful whenever you use a saw to cut things. Keep your fingers and other body parts well out of the way.
Installing the Straight Pieces
-
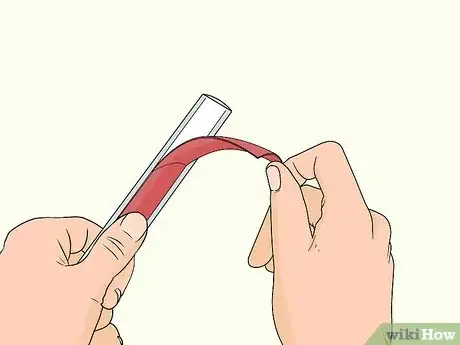
1Peel off the film that covers the adhesive on the back pieces of the lengths. Use your fingers to carefully peel off the blue protective backing off from a length of mini trunking. Do this for 1 length at a time when you are ready to stick that piece on the wall.[5]
- There might also be a clear protective film on the top of the mini trunking. Remove this as well if this is the case.
-
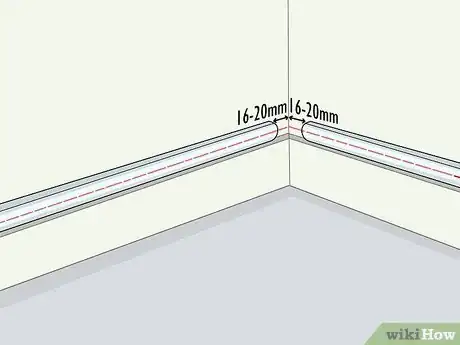
2Line up the straight pieces on your wall with appropriate spacing. Carefully position a length of mini trunking where you want to put it on your wall with the adhesive side facing the wall. Leave 16-20 mm of space between the ends of the mini trunking and the opposite wall in any inside corners.[6]
- The lengths can touch on the outside corners, which are the corners where 2 walls meet and form an external angle.
Tip: If your mini trunking has a hinge on 1 side, position it so this side faces downwards so you can easily flip the pieces open to put your cables inside.
-
3Stick the straight pieces of mini trunking to the wall using the adhesive. Press the adhesive side of each length of mini trunking firmly against the wall to stick it in place. Make sure the pieces are straight and correctly spaced before you stick them to the wall because the adhesive is strong.[7]
- For particularly long pieces, start sticking the piece to the wall at 1 end, then work your way down to the other end, pressing it against the wall as you go.
-
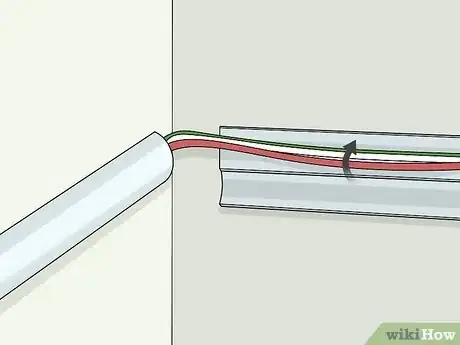
4Position the cables you want to hide inside the lengths of mini trunking. Unclip the top pieces from the lengths of mini trunking. Tuck the cables neatly inside the lengths and pull them taut so they lie flat inside the mini trunking and don’t bulge out in the corners.[8]
- You can leave the top pieces unclipped for now in case you have the type of mini trunking corners that fit underneath them.
Clipping the Corners into Place
-
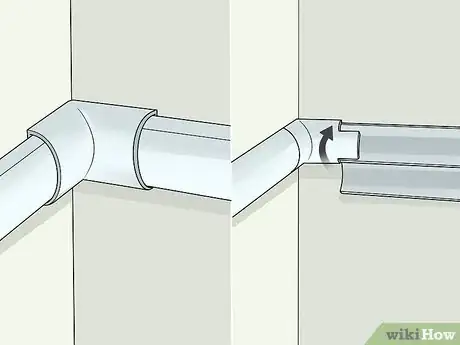
1Check if your mini trunking corners fit over or inside straight lengths. Look at the packaging for your mini trunking corner pieces to see if they are clip-over or clip-under. Clip-over corner pieces go on top of closed straight lengths and hold themselves in place, while clip-under corner pieces go inside the straight lengths and are held in place by the top pieces of the lengths.[9]
- If you don’t have any packaging or instructions for your mini trunking corners, you can compare them to the straight lengths to figure out how they fit. If the diameter is smaller, they go inside the straight lengths. If the diameter is bigger, they go on top of the straight pieces.
- You can purchase mini trunking corner pieces at a home improvement center or online. If you’re looking online, you can search for “mini trunking finishing accessories.”
Tip: Clip-under type mini trunking corners are also sometimes called smooth-fit internal bends or external bends.[10]
-
2Clip the top pieces of straight lengths in place if your corner pieces go on top. Position the top pieces over the cables and push them onto the back pieces until they lock into place. Don’t put them in place yet if your mini trunking corners go inside the straight lengths.[11]
- If your straight sections of mini trunking open with a hinge, just flip the top pieces up over the cables and press along the edge without the hinge to lock them in place.
-
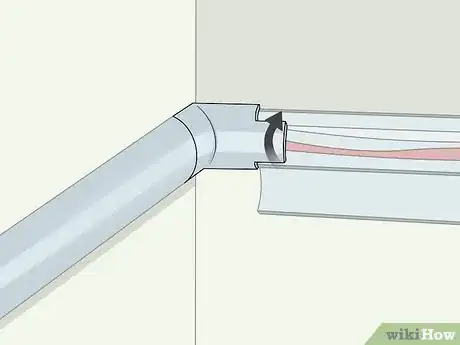
3Snap external corner pieces into place on each outside corner. Position the external mini trunking corner pieces over the cables on the outside corners. Clip them into place on top of the closed straight lengths if they are the clip-over variety or position them underneath the top pieces of the straight lengths if they are the clip-under variety.[12]
- Some varieties of clip-over mini trunking corners have adhesive on the back. Make sure to remove the backing from the adhesive before you press the corner pieces into place if this is the case.
- If you have clip-under mini trunking corners, start pressing the top pieces of the straight lengths into place over them to keep them from falling out. Just snap the top pieces into place right over the corners and leave the rest of the length unattached until all the corner pieces are in place.
-
4Clip internal corner pieces into all inside corners. Position the internal mini corner trunking pieces over the cables in the inside corners. Put them underneath the top pieces of the straight lengths if they are the clip-under style or clip them on top of the closed straight lengths if they are the clip-over type.[13]
- If you’re having difficulty fitting inside corner pieces in place because there are imperfections in the wall, you can use a file to shape the pieces so they fit better. For example, if an inside corner is somewhat rounded, you can file the mini trunking corner to round the sharp edges so it sits flush in the corner.
-
5Attach the top pieces of straight lengths if you didn’t already do so. This only applies if you used the clip-under style of mini trunking corners. Press the top pieces against the bottom pieces until they snap into place over the cables.[14]
- This will already be done if you installed the clip-over type of mini trunking corners.
Warnings
- Exercise caution whenever you are using a saw.⧼thumbs_response⧽
- Make sure you align lengths of mini trunking perfectly before you stick them to the wall.⧼thumbs_response⧽
Things You’ll Need
- Tape measure
- Pencil
- Mini hacksaw
- Miter box
- Mini trunking straight lengths
- Mini trunking corners
References
- ↑ https://www.d-line-it.com/pdf/uk/D-Line_accessories_guide_web.pdf
- ↑ https://www.d-line-it.com/pdf/uk/D-Line_accessories_guide_web.pdf
- ↑ https://www.d-line-it.com/pdf/uk/D-Line_accessories_guide_web.pdf
- ↑ https://www.youtube.com/watch?v=z1Q_-CY2NJk&feature=youtu.be&t=40
- ↑ https://www.youtube.com/watch?v=z1Q_-CY2NJk&feature=youtu.be&t=55
- ↑ https://www.youtube.com/watch?v=z1Q_-CY2NJk&feature=youtu.be&t=60
- ↑ https://www.youtube.com/watch?v=z1Q_-CY2NJk&feature=youtu.be&t=65
- ↑ https://www.youtube.com/watch?v=z1Q_-CY2NJk&feature=youtu.be&t=70
- ↑ https://www.d-line-it.com/pdf/uk/D-Line_accessories_guide_web.pdf
- ↑ https://www.tlc-direct.co.uk/Technical/DataSheets/DLine/Brochure_2015%20v4%20email.pdf
- ↑ https://www.d-line-it.com/pdf/uk/D-Line_accessories_guide_web.pdf
- ↑ https://www.youtube.com/watch?v=z1Q_-CY2NJk&feature=youtu.be&t=90
- ↑ https://www.youtube.com/watch?v=z1Q_-CY2NJk&feature=youtu.be&t=100
- ↑ https://www.tlc-direct.co.uk/Technical/DataSheets/DLine/Brochure_2015%20v4%20email.pdf

