This article was co-authored by Mark Spelman. Mark Spelman is a General Contractor based in Austin, Texas. With over 30 years of construction experience, Mark specializes in constructing interiors, project management, and project estimation. He has been a construction professional since 1987.
This article has been viewed 291,409 times.
Have you ever awakened to find that your driveway is covered with snow? Although it seems pretty straightforward, there's a subtle art to this task. Choose the right equipment, take steps to reduce the risk of injury, and use appropriate techniques to clear away snow effectively.
Steps
Choosing the Right Equipment
-
1
-
2Use an ergonomically correct snow shovel. Ergonomic shovels have a bend in the handle and help you to keep your back straighter while shoveling snow, reducing the risk of back injury.
- Your shovel should have a long enough handle so that you can keep bending to a minimum while using it. Select a shovel that is right for your height.
- You may wish to choose a plastic shovel as opposed to a heavier metal one.
- There are two basic types of shovel: digging and pushing. It is far easier to push snow than it is to lift it, so if the snow is not too heavy try to push the snow rather than lift it.
- Consider a shovel with a smaller blade to lighten the load and reduce the risk of spinal injury. The blade is the part that actually shovels the snow.
Advertisement -
3Use a shovel with a non-stick surface. This will help to make shoveling less tiring by allowing the snow to slide off easily.
- Spraying a silicon lubricant on the shovel before using it will prevent snow from sticking to the surface.
- Alternatively, a non-stick surface can be produced at home by coating the blade of the snow shovel with shortening or vegetable oil.[1]


Reducing the Risk of Injury
-
1Consider any health risks. If you are out of shape, have back problems, or heart conditions, it may actually be dangerous for you to shovel snow. After a snowfall, hospitals are sometimes inundated with heart attack victims and patients with wrenched backs. Hire a local teen, borrow a snow blower from a neighbor, or contact a professional snow and ice removal service instead.
-
2Dress appropriately. You need to dress warmly, but not so warmly that you are sweating heavily after several minutes of work. Dress in light layers that are easy to remove and which do not restrict your movement. Thermal underwear is a great option for keeping you warm while you work in the snow.
- Be sure to remove clothing as you heat up, as sweat can become clammy on your skin and actually make you colder. Your skin should remain warm (not hot) and dry.
- Wear gloves that will prevent blisters and keep your hands warm and dry.
- You can also wear hand and foot warmers (like Hot Hands or Yaktrax Handwarmers/Footwarmers) in your gloves and shoes to prevent your hands and feet from getting too cold.
- You lose a large amount of body heat through your head. Wear a hat and earmuffs to retain that body heat and keep yourself warm.
- If it is very cold you may consider breathing through a scarf but be careful that it does not obstruct your view.[1] A cold-weather face mask is also a good option.
-
3Stretch. Warm muscles are more efficient and less likely to get injured. Focus on stretching your extremities (arms and legs) and back in particular.
-
4Spread sand or salt on slippery ground. Before shoveling snow, spread sand or salt on any particularly slippery locations where you might have to stand while shoveling snow. This will create foot traction and reduce the risk of injury.
- Be aware of areas which are uneven and could cause you to trip, slip or fall, causing injury.
-
5Maintain good posture. Remind yourself to keep good posture and maintain the natural curve of your spine. Keep your back straight as you change between the squatting and upright positions.[1]
-
6Lift correctly. Stand with your feet shoulder-width apart for balance and bend at the knees rather than at the waist or back. Keep the shovel close to your body rather than extending your arms all the way. Tighten your stomach muscles and then lift with your legs as if you are doing a squat.
- Use your shoulder muscles as much as possible.
- Scoop small amounts of snow at a time so that they will not be too heavy.[1]
-
7Find the right place to put the snow. Minimize twisting your body when lifting snow as this can injure your back. Face the pile of snow front on, keeping your body as straight as possible. Make sure you have a place in front of you to dump your shovel loads. If you have to dump the load on the side, then move your feet rather than twisting your body.
- Choose a close location to dump loads so that you do not have to carry the snow far.
- If clearing a certain area then dump the first loads farthest away from you so that the last shovel loads will have to travel the shortest distance to be dumped.
- Do not throw snow over your shoulder! If you must lift snow then move it forward rather than throwing it backwards.[1]
-
8Complete areas with deep snow in stages. Never try to remove deep snow all at once. Rather, remove one or two inches (2.5-5cm) at a time, resting in between. This will reduce the weight of the loads and reduce the risk of injury.[1]
-
9Take frequent breaks and drink plenty of water. Shoveling can be extremely hard physical work and you need to pace yourself to avoid ill effects. In the cold, you're not as likely to feel thirsty, but dehydration can set in quickly while completing so much physical work. Take your time.
- Stretch while taking breaks to keep your muscles loose. Especially focus on your extremities (arms and legs) and back.[1]
-
10If you feel any pain of any kind, stop immediately and seek medical attention or assistance. Pain can mean a heart attack or injured back, which can occur during snow shoveling activities.[1]
-
11Have a cup of hot chocolate. Although optional, it's traditional in most snowy locations, and helps replenish your fluids. If you do not like hot cocoa, help yourself to some tea, broth, or even just water.
-
12Stretch again. Stretch when you are finished to prevent your muscles from tightening up and causing you pain. You can also relax your muscles by taking a hot shower.


Removing Snow Effectively
-
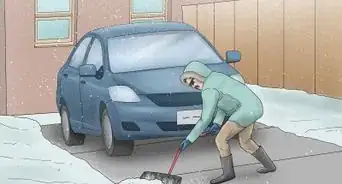
1Start early in the day. Fresh snow is less dense than older snow so you should clear snow as soon as it has fallen. As snow sits on the ground it compacts and becomes wet, making it heavier. It can also then turn into ice and become very difficult to remove.
- Wait until the snowplow has come by before finishing the driveway. A snowplow will usually "plow in" the driveway at least a bit, pushing more snow onto the part of your driveway adjoining the road. It can be more efficient to suit up, stretch, and clear the driveway all at once.
- Use extra care when shoveling snow that is pushed onto your driveway by the plow. Plows pack the snow, making it much heavier than undisturbed, freshly fallen snow.
- One shovelful of snow can weigh 20 pounds (9kg) or more![1]
-
2Have a plan. You will need to consider what is the most efficient snow removal plan. You will also have to avoid piling snow where you'll have to just remove it again, so do not block access to snow that still needs to be cleared.[3]
-
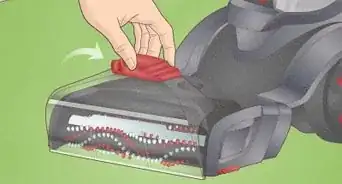
3Clear cars first. Use a brush to get snow off cars before clearing around the car to minimize extra work.
-
4Avoid lifting snow by pushing it instead. Pushing snow can be much easier than lifting and can reduce the risk of injury. If you begin early and if the snow is not too deep, then it is better to simply push it off driveways and sidewalks. This is a good way to clear away snow while it is still falling and, thereby, reduce accumulation.
-
5Place your hands in the correct positions on the shovel. Spread your hands far apart on the handle, with one hand close to the blade. This will provide more leverage while lifting snow.
-
6Begin shoveling. If you need to dig (to get to your car, for instance), dig using a steady, easy motion. If you are "pushing" (as you might when clearing a driveway), hold your shovel at a slight angle and begin making passes back and forth width-wise along your driveway. You should rarely need to move your shovel above waist height.
-
7Don't forget your mail carrier. Make sure you clear around your mailbox every time it snows. If your mail carrier cannot easily reach your mailbox, then they cannot deliver your mail!
-
8Salt and sand as needed. Be careful with salt, as it can hurt your lawn, landscaping, and your watershed. It can also damage driveways and other paved areas. Use salt only if the temperature is warm enough (above 0℉/-17C).
- Sand provides traction, but if more snow falls on top, it will become useless.
- Salting the ground before or during a storm can actually increase the amount of snow on your sidewalks and driveways because dry snow sticks to a salted paved area but does not stick to an unsalted paved area.


Expert Q&A
-
QuestionHow much should I charge for shovelling a driveway?
 Mark SpelmanMark Spelman is a General Contractor based in Austin, Texas. With over 30 years of construction experience, Mark specializes in constructing interiors, project management, and project estimation. He has been a construction professional since 1987.
Construction ProfessionalWork out an hourly rate with the person you hire to shovel your driveway. You can begin to charge more after you have done a successful job.
Warnings
- When lifting, do not strain your back. If it's too heavy for you to lift the shovel off of the ground, hire someone to help or use a snow blower instead.⧼thumbs_response⧽
- Do not eat, smoke or consume caffeinated beverages before shoveling snow.⧼thumbs_response⧽
- Avoid overexertion which can lead to exhaustion or heart attack.⧼thumbs_response⧽
- Don't procrastinate! Snow that is left on walks and driveways will tend to compact over time, creating a layer very difficult to remove. The snow may also melt during midday and refreeze at night, creating a layer of slippery ice.⧼thumbs_response⧽
Things You'll Need
- Snow shovel
- Warm clothing
- Snow boots


References
- ↑ 1.01.11.21.31.41.51.61.71.81.9http://www.spineuniverse.com/wellness/ergonomics/tips-snow-shoveling-how-avoid-back-pain
- ↑ http://www.businessinsider.com/why-you-should-wear-wool-socks-2015-1
- ↑ https://www.bobvila.com/slideshow/7-snow-shoveling-lessons-no-one-ever-taught-you-51700#clean-car-from-snow
- ↑ https://www.bobvila.com/slideshow/7-snow-shoveling-lessons-no-one-ever-taught-you-51700
- ↑ 5.05.1http://www.popularmechanics.com/home/improvement/outdoor-projects/16-cardinal-rules-for-snow-shovelling
About This Article

The easiest way to shovel snow is to start early in the day since fresh snow weighs less than older snow. Also, if you start before the snow accumulates, you can push it off the driveways and sidewalks without having to lift it, which is much harder. To push snow, hold your shovel at a slight angle and make passes back and forth width-wise. Deposit the snow to the sides of the walkways and driveways. If you need to dig, do so with a steady, easy motion. Continue reading our General Contractor’s article to learn how to avoid injury while shoveling!


