This article was co-authored by Gavin Anstey. Gavin Anstey is the COO at Cinebody. Cinebody is User-Directed Content software that empowers brands to create instant, authentic, and engaging video content with anyone on earth. Gavin studied Journalism at the University of Colorado Boulder, before launching a career in video production and software.
There are 7 references cited in this article, which can be found at the bottom of the page.
wikiHow marks an article as reader-approved once it receives enough positive feedback. In this case, 82% of readers who voted found the article helpful, earning it our reader-approved status.
This article has been viewed 41,893 times.
Making your own movie is an incredible, but difficult, undertaking. Movies are one of the most collaborative art forms in the world, requiring many diverse skills and talents. That said, filming a movie is very doable if you take the time to prepare, find a few dedicated hands, and learn to roll with the punches.
This article assumes the movie has already been written and now needs to be filmed. If you want a more general overview from start to finish, click here.
Steps
Planning Ahead (Pre-Production)
-
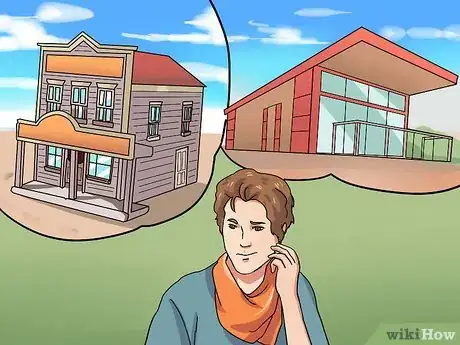
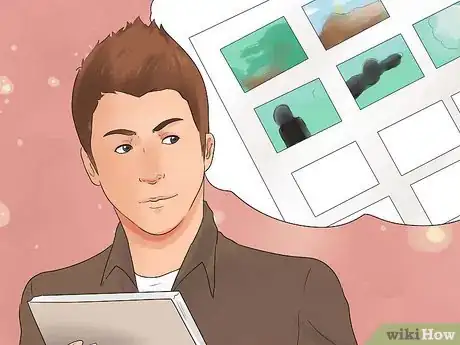
1Read the script 4-5 times and decide the tone and mood of your movie. What is the general "feel" of the script? Dark and Moody? Comical and upbeat? Is it gritty and realistic, or more playful and imaginative? Maybe it falls in the dead center. Many scripts can be approached any number of ways, but you need to know the script inside and out before continuing.
- When you read the script, think of the "movie" that plays in your head. What does it look like? What kinds of colors and images to you see
- Take notes as you read the script -- this will help you communicate your vision to the crew.
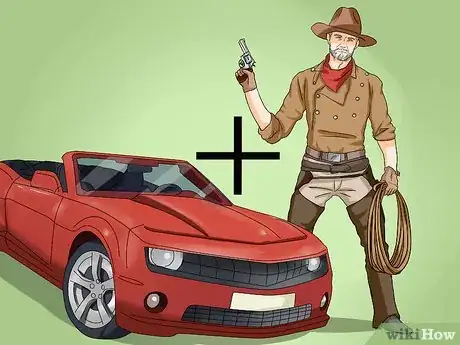
- Have you seen other movies with similar ideas or styles as yours? Martin Scorsese famously sits his actors down to watch tons of old movies before shooting as inspiration.[1]
-
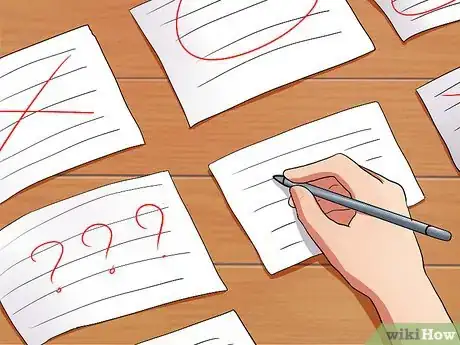
2Make a storyboard, or visual breakdown, of each scene. A storyboard is simply a comic book (of sorts) for your movie. While many beginners skip the storyboard phase, thinking they'll work it out on set, this is the most surefire way to turn simple scenes into 2-day shoots. A storyboard works out the basics of the scene, but most importantly it accounts for all the essential shots before you even arrive. You can find free storyboard templates and software online.
- On each day of shooting, print out the relevant storyboards and use them to check off each needed shot.
- Use these storyboards to prioritize shooting schedules. If there is a complex but essential scene, consider shooting it first to ensure you get it just how you want.
Advertisement -
3Go location scouting for each scene. Separately from the script, write down each unique location in the movie, creating a master list of locations. Next to each location, note the rough time of day in the scene, if the set needs to change from scene to scene, and any essential considerations or elements. Then hit the road and start scouting, crossing off scenes as you find locations for them or build a set.
- Check with friends and family about using houses, yards, and businesses. Remember that you can redesign a set, or only shoot a small area of a house, and no one will be none-the-wiser that you're at your grandmother's house.
- Public locations often require permits, and can be difficult to work without distractions or intrusions.
-
4Create a "shopping list" of essential props, broken down by those you make and those you buy. There are going to be some props -- fake knives, costumes, etc. -- that you can buy easily. Others, like special effects or character specific props (like the briefcase in Pulp Fiction), you're going to have to get creative with. Check out DIY film sites like NoFilmSchool or IndieWire for help crafting effects and finding good deals.
- Making your own effects and props is almost always cheaper, and YouTube is filled with thousands of tutorials for just about any design.[2]
-
5Take stock of your current equipment, aiming for 2-3 cameras and at least 1 good microphone. Equipment costs are one of the biggest expenses you'll encounter when shooting, as you need a lot of gear to make movie magic happen:
-
Cameras: You need at least 2, though 3 is far more standard, as it allows you to get two people talking as well as a master shot (which covers the whole scene). Your cameras must be able to shoot in the same format (1080p, 4K, etc.), otherwise, they can't be edited together smoothly. On a budget? Check out the Sundance-screened Tangerine, which was shot entirely on iPhone 6s.
- Don't shoot lower than 1080p HD. The higher the resolution, the better your image quality will be. You can choose the resolution from your device's camera settings. Newer iPhones can shoot at 4K resolutions.
- Microphones: Audiences notice bad sound before they notice bad picture.[3] In a pinch, your money should be spent on a great mic, even if it is just a shotgun mic that attaches to the camera.
- Lighting: All you need are 5-10 clamp lights and a few different light bulbs (tungsten, frosted, LED, etc.) to fit whatever scene you have. That said, a professional 3 or 5-piece light kit will make your life easier and a lot more fun.[4] [5]
- Other Essentials: No matter what you're shooting, you need a few memory cards and extra batteries, a backup hard drive and laptop to review and save footage when cards fill up, tripods, extension cords and power strips, and a few rolls of strong black tape.[6]
-
Cameras: You need at least 2, though 3 is far more standard, as it allows you to get two people talking as well as a master shot (which covers the whole scene). Your cameras must be able to shoot in the same format (1080p, 4K, etc.), otherwise, they can't be edited together smoothly. On a budget? Check out the Sundance-screened Tangerine, which was shot entirely on iPhone 6s.
-
6Recruit a crew to run cameras, lights, special effects, and any other set job you need. If you have some cash, head to Craigslist or Mandy.com and put out ads to recruit a talented crew. If not, hit your friend list, offering them a free lunch and a credit for helping. When possible, look for friends with photo or film experience, and people you can comfortably order around without hurting feelings. You'll need:
- Director of Photography (DP): This is your cinematographer, responsible for the overall look of each shot. They take point setting up lights and cameras and work with you to get your tone and mood across visually. It is very, very hard to both be a DP and a director, and this job is perhaps the most essential to fill with an experienced hand.
- Camera and microphone operators: One person per camera and usually one person for all the audio. If using a boom pole, make sure you have a boom operator who is strong and doesn't mind standing all day long.
- Continuity / Set Design / Make-Up: Put someone in charge of making sure all costumes, props, and make-up are consistent throughout the shoot.
- Sound Engineer: Listen to all the sound as it is being recorded, ensuring that it is right. They also place the microphones to pick up the dialog after the lights have been set.
- Production Assistant: If you can, try to always have one "free" person floating around, able to do whatever needs doing at the drop of a hat. With so many moving parts in a movie, they will be utilized.[7]
-
7Cast your actors from the internet, local art colleges, and paid postings. Every role is different, as is every director, so what you're looking for in an actor is up to you. However, there are good ways to audition people to make sure you get the best look at someone in a brief period of time. It is always a good idea to film an audition so you can get a second look when comparing actors. Some possible audition strategies include:
- Memorized Monologues where the actor comes in and performs the speech of their choice.
- Line Reads are when you send out 2-3 pages of script, which they perform with you or another actor in the room.
- Cold Reads are when you hand an actor a page of the script right when they walk in. They can read it once, then they have to plunge in. Good if you want improv actors.
Working Efficiently on Set
-
1Start each day with an overview of the shots and scenes that need to be captured. Run this by the entire crew and cast in the morning, laying down exactly which pages you'll be shooting. This should also be known in advance, but it is a good way to get everyone on the same page. If this is the very first day of shooting, review roles and responsibilities with each crew member. A communicative crew is an effective one, so set a good example first thing.
- You should only expect to shoot, at most, 5-6 pages a day in a full production.
- Some meetings are more crucial than others -- you'll likely want to talk to your Director of Photography every morning about mood, lighting, and shots, as well as talking to the main actors about their lines.
- Have a backup plan -- if a shot goes too long, which other shots do you cut from the days schedule? If you have extra time, what scenes can you shoot in addition to the schedule?
-
2Work with the actors to establish blocking first. Blocking is where the actors go, how they move, and when they do it. While you should be mindful of lights, cameras, and sound, these can be adjusted to fit the scene once you know where the actors will be and where they deliver their lines. Still, keep the blocking as simple as possible. Cameras only capture a small sliver of the set, and convoluted choreography makes everyone else's jobs much, much harder.
- If it helps, use tape to mark where the actors need to end up after each scene.
- You don't need the main actors for all the blocking preparation. If you can use crew members to experiment with blocking in advance you can simply direct the actors to their spots when they arrive on set.
-
3Work with your Director of Photography to set up the camera angles. If you're doing your own cinematography, the best advice is to consider each shot like a moving photograph. If you line it up like a compelling still image, you will have a compelling final shot. Don't attempt moving shots without equipment like steady-cams and a dolly unless you want an intentionally shaky shot (a la Blair Witch Project). For beginners, there are only three shots you need to master, and they will work for just about every scene:
- Master: This is a big, wide angle shot that captures all, or nearly all, of the action in the scene without having to move.
- Two-Shot: One camera goes over each actor's shoulder in a conversation, allowing you to jump from one perspective to the other. If there 3 or more people in the scene, try to fit at least two people in each shot. These two cameras should cover all of the dialogue.
- Establishing Shots: These are usually the first shots in the scene, used to place the audience in the scene (like following a character through the door of a tavern). In some cases, your master can double as an establishing shot.
-
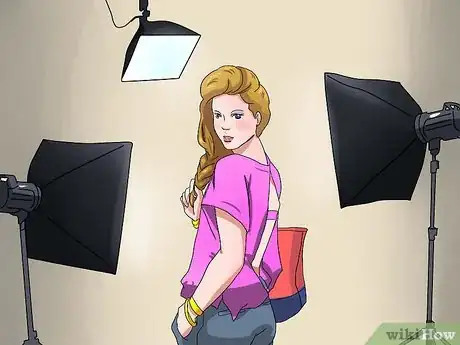
4Light the shot when the cameras and actors are set. While there are some people who like to set up both cameras and lights at the same time, you'll usually have to readjust the lights once you know your definitive camera angles. Lighting a movie set is an art form in itself, one that takes years to master, but beginning or independent filmmakers can generally play with two styles of lighting:
- Realistic: You'll want a lot of diffusers, bouncing light off of walls and the ceiling. You're aiming for even lighting across the scene. A good way to check this is to put the shot temporarily in black and white. You should have nice, deep blacks and a wide range of grays, with only a little bright white for contrast. Try using "practicals" -- which are in-set lights like lamps or ceiling fans, to help.
- Artistic or Dramatic: Use big lights, colored lights, and sharp contrasts to make striking, almost unrealistic compositions, like those in Sin City, or even "Her." While dramatic lighting is always fun to play with, make sure there is a purpose for it if you're straying from realism.
-
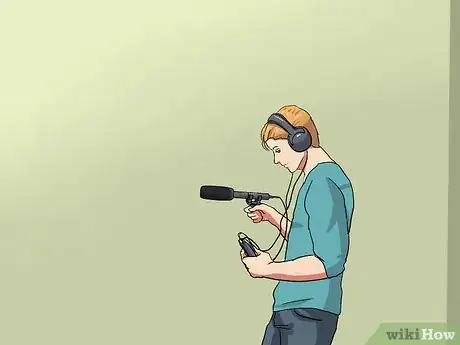
5Place your microphones last, watching for any accidental shadows or exposed mics. Though good audio is arguably more important than good video for a professional shoot, it still needs to go last so it doesn't intrude on the set. Like all jobs on set, film audio is a difficult and nuanced job, but that doesn't mean beginners can't do a good job. Depending on your equipment, you'll have different jobs:
- Boom Pole: This is a powerful mic on a long metal pole. Usually, it is held above the camera line with the mic pointing down at the actor's faces. It picks up incredible audio, but it needs to be moved to angle at whatever actor is speaking.
- Lavaliere Mics: These are stuck on the actor discreetly, like those small mics seen in documentaries. There are many that can be taped to an actor's chest, under the shirt, as well.
- Shotgun Mics: The cheapest and easiest mics to use, these are simply placed on the camera while shooting. They are almost always better than the camera's attached microphone.
-
6Start each shot with a professional checklist to prepare the crew. The following dialogue is used, in some form, on almost all movie sets. You can adapt it to suit your own needs and shoot, but you should always run through these checks, no matter how you say it.
- "This is picture, quiet on set!"
- "Roll sound!" This is the cue to start microphones. The audio person yells, "rolling!" when ready.
- "Roll Picture!" This is the cue to start cameras. When each camera person (or the DP) is ready, they yell "Speed!"
- "This is Awesome Wiki Movie, Scene 1, Take 2." Slap the clapboard or just clap when done.
- Give 3-5 seconds of silence, which makes editing the film much, much easier.
- "ACTION!"[8]
-
7After you have all the lines and essential action, pick up your "coverage." These are the small shots that are easy to forget but make up much more of movies than you might think. For example, when a character checks their watch, you might cut to a close up of their wrist showing the time. You can also try some extreme or fun camera angles for specific lines or moments, or set up a few artistic shots for intros and outros of scenes.
- Think about what shots are essential to tell your story -- for example, a shot of a test your protagonist just said they failed, a ticking clock, etc.
-
8Review your footage at the end of each day, noting any reshoots. In a perfect world you won't have to reshoot anything and at the end of the day you'll have usable, perfect footage for every scene. But in the crazy world of filmmaking, the day is rarely so simple. Whether or not to reshoot is often a judgment call depending on your time, budget, and actors. You have to weigh how much you need the shot against what it will cost to go shoot it again.
- The sooner you watch the day's footage, the sooner you can correct mistakes if you need.
Filming Longer Films
-
1Avoid the use of patented logos, trademarks, and copyrights as possible. If you have a Pepsi logo in the middle of your scenes, you will actually hurt your chances at getting into film festivals. Why? Because you would owe Pepsi money if the film was purchased, since they have the trademark. This includes music as well, meaning you can't use your favorite Red Hot Chili Peppers song unless you can pay for it.
- In a pinch, tape and permanent markers are a great way to cover up logos on objects you can't move, like an oven or fridge.
-
2Write contracts, even if you're just filming with friends. On a long movie, you could lose weeks of work if an essential cast member ups and leaves midway through. Contracts may feel impersonal, but they are quite the obvious -- a contract allows you to stay friends by always knowing where each other stand. There is too much to do on a movie set as it is -- don't add bickering or worrying about payment and schedules, too.[9]
-
3Set aside time to pick up B-roll, the connective footage that fills in between scenes. B-roll is generally considered any shots that don't have any spoken lines and non-essential shots that help transition through scenes. Watch a few movies and notice the little, 1-2 clips, usually between scenes, and note how they visually move the story along. Think of it like the shots outside the car in a road trip movie, the sleek shots of James Bond's new car, and any other purely visual embellishment or scene.
- Be creative with B-roll, this is you and the DP's chance to be artful with much less stress.
- Make sure your b-roll fits the tone or tenor of the movie. Punch Drunk Love uses bright, abstract colors to indicate mood swings. Horror movies use slow, dark shots. Action movies use stark, extreme, and dramatic landscapes, etc.[10]
-
4Make and keep track of a budget. Movies get expensive, quickly, but the worst thing that can happen is a to run out of essential funds with only 10 pages left to shoot. You need to budget everything out considerably once you've finished pre-production, including:
- Cast and crew wages and food
- Rights to music our sounds
- Transportation
- Props and Costumes
- Filming equipment
-
5Secure an editor for your film. There are a lot of people who don't believe a director should edit their own work. Why? Because editing is about ruthlessly cutting the movie down to only the very best parts, and most directors are too attached to the material to cut it objectively. You will, of course, give guidance, and watch rough cuts and provide notes, but you should look online for another editor to help wade through the 100's of hours of footage you have.
- Be ready to watch the movie hundreds of times. It can help to bring in a trusted friend or two as well to notice things you and your editor might miss.
- Depending on your editor's skill set, you may need a sound designer as well to create sound effects and find and place music.
-
6Have the film professionally mastered and color graded. This usually costs around a $1,000-$5,000 for a full-length movie. Mastering will take the audio volumes and balance them into a cohesive track, making sure everything is easy to hear and there are no jarring transitions. Color correction simply ensures that every shot looks the same, fixing small issues and creating an eye-popping final image.
- Color-grading can be used to create the whole visual mood and motif of the scene by making it brighter or darker, more vibrant or more somber.
-
7Treat your crew, the unspoken soldiers of the film, with love and respect. Throw them a wrap party. Buy them coffee and donuts every now and then. Many of these people will never be well known, and they will be putting in just as many backbreaking and tiring hours as you are. It is easy to remember to pamper your actors, but the crew is just as important and just as worth your attention.
- Always be one of the first people on set. There will always be something for you to do, and it sets a good example.
Expert Q&A
-
QuestionWhat is a storyboard and its purpose?
 Gavin AnsteyGavin Anstey is the COO at Cinebody. Cinebody is User-Directed Content software that empowers brands to create instant, authentic, and engaging video content with anyone on earth. Gavin studied Journalism at the University of Colorado Boulder, before launching a career in video production and software.
Video Producer, COO at Cinebody A storyboard helps clarify who your fleshed-out idea should resonate with. Storyboarding involves asking lots of questions about who you think will watch your movie and what you want them to feel. Imagine your target audience: What's the age range, the gender breakdown? Are they looking for an action-oriented plot or an emotionally-driven one? What drives them to see a movie?
 -
QuestionCan I make movies as a kid?
 Community AnswerOf course! You might want to check out the article on How to Make a Movie As a Kid.
 -
QuestionI want to make a movie. I can only use my younger siblings as actors, but they always want to change the plot. Help!
 Community AnswerPlan what script and plot you want to make with your siblings in the first place, and when ready, tell them they have to stick to it. If you rewatch the full movie and are not satisfied, you can also delete some scenes or plan a different plot.
References
- ↑ http://www.nytimes.com/2010/02/07/movies/07scorcese.html?pagewanted=all
- ↑ http://www.indiewire.com/article/15-tips-on-making-your-first-micro-budget-film-20140714
- ↑ http://www.indiewire.com/article/the-5-people-filmmakers-need-for-a-tiny-skeleton-crew?page=2
- ↑ http://nofilmschool.com/2015/04/essential-items-include-your-diy-lighting-kit
- ↑ http://www.desktop-documentaries.com/video-production-equipment.html
- ↑ http://www.desktop-documentaries.com/video-production-equipment.html
- ↑ http://www.indiewire.com/article/the-5-people-filmmakers-need-for-a-tiny-skeleton-crew?page=2
- ↑ http://www.theblackandblue.com/2011/05/26/hollywood-myth/
- ↑ http://www.indiewire.com/article/15-tips-on-making-your-first-micro-budget-film-20140714


