This article was co-authored by Ashley Adams. Ashley Adams is a Licensed Cosmetologist and Hair Stylist in Illinois. She completed her Cosmetology education at John Amico School of Hair Design in 2016.
There are 7 references cited in this article, which can be found at the bottom of the page.
This article has been viewed 495,413 times.
Dyeing your hair black is easy, because you don't have to worry about bleaching it first. Depending on the shade you choose, you can have a natural look or a gothic look. It can be tricky to achieve the perfect shade, but with the right technique, you can ensure that your hair will come out just the way you want it to.
Steps
Choosing and Preparing the Dye
-
1Choose a soft black if you want a natural look. A soft black will look more like a dark brown than an actual black, especially if you hold up a piece of black clothing next to it. As far as hair goes, however, "soft black" is still considered black, and will look the most natural.
- This is the safest color to start out with. If you want your hair to be darker, you can always dye it darker later on.
-
2Try a deep black if you'd prefer a gothic look. Because of how dark it is, this black can look unnatural, especially if your skin is fair. Some deep blacks will even include tints of other colors, such as blue or purple. They will look pitch black under most lights, but in the sunlight, they may look blueish or purplish.
- If you aren't sure how a color will look on you, head over to a wig shop and try on some wigs in that color.
Advertisement -
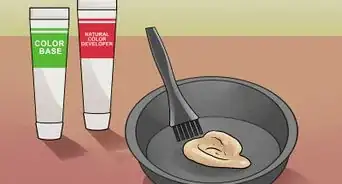
3Pick up dye and volume 10 developer if you are not using a boxed kit. If you bought your dye in a kit, it will contain everything you need: developer, dye, conditioner, gloves, etc. Otherwise, you'll need a tube of dye and a bottle of 10 volume developer.
- You should also get gloves, a tinting brush, and a non-metal bowl.
-
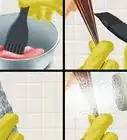
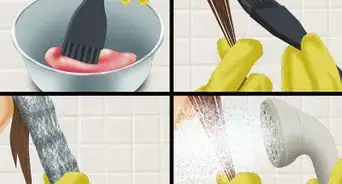
4Prepare your dye according to the instructions if you're using a kit. Most dye kits come with instructions, but if you lost yours, don't worry, it's pretty self-explanatory. Pour the dye into the larger bottle containing the developer. Close the developer bottle, then shake it to mix the dye. Break or cut off the plug at the tip of the bottle.
- If your hair is past your shoulders, it would be a good idea to prepare 2 boxes of hair dye. This will ensure that you have enough to cover all your hair.[1]
-
5Mix the dye and developer in a non-metal bowl if you aren't using a kit. Pour enough 10 volume developer to saturate your hair into a non-metal bowl. Add an equal amount of dye, then stir the 2 ingredients together with a non-metal spoon or a tinting brush. Keep stirring until the color is consistent and no streaks remain.
- Plan on using about 2 ounces (57 g) of developer. If you have very long or thick hair, you may want to use 4 ounces (113 g) of developer instead.
- Using a non-metal bowl, such as glass or plastic, is important; metal may react with the dye and change the color.[2]
-
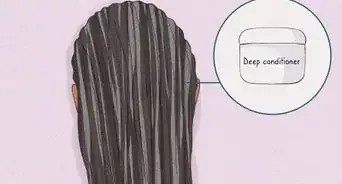
6Add a protein filler to the dye if you have bleached hair. You need to apply a protein filler because when you bleach your hair, you strip it of pigment. This means that if you try to dye your hair, the color may come out patchy or the wrong color. In some cases, it may end up greenish.
- If you've never dyed your hair before, you do not need to apply a protein filler.
- Read the instructions on the bottle to find out how much protein filler you should use. In most cases, it will be half of a bottle.
- You can get a clear or tinted protein filler. A tinted protein filler will give you subtle undertones that may be visible in your hair in the sunlight.


Applying the Dye to Your Hair
-
1Protect your skin, clothing, and work surface against stains. Put on an old shirt that you won't mind getting ruined, then apply some petroleum jelly to the skin around your hairline. Pull on latex or nitrile gloves, then cover your counter and floor with newspaper.[3]
- It would be an even better idea to wear a shirt with long sleeves so that your arms don't get stained.
- If you don't want the shirt to get dirty, drape a hair dyeing cape around your shoulders. You can use an old towel too.
-
2Divide your hair into 4 sections if it is long or thick. Part your hair horizontally at about ear-level, as though making a half-up ponytail. Divide the top section of your hair in half, twist each half into a bun, then secure the buns with hair ties or hair clips. Next, divide the bottom section of your hair in half too, then drape each half over each shoulder.[4]
- If you have medium-length hair, you can just divide your hair in half like making a half-up ponytail. Secure the half-up ponytail with a hair clip or hair tie.
- If you have short hair, you don't need to divide your hair.
-
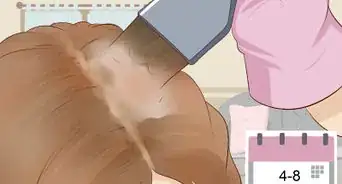
3Apply the dye to 1–2 in (2.5–5.1 cm) sections starting from the roots. Choose 1 of the bottom sections to start with, then separate out a 1 to 2 in (2.5 to 5.1 cm) section of hair from it. Dip a tinting brush into the dye, then brush the dye onto your hair, starting from the roots. Work your way down towards the ends of your hair. Be sure to completely saturate each strand.[5]
- Alternatively, if your dye came with an applicator bottle, squeeze the dye onto your roots, then work it down through your hair with your fingers. Apply it to the rest of the hair shaft, then work it in. Be sure to wear gloves to avoid staining your skin!
-
4Continue to apply the dye in 1 to 2 in (2.5 to 5.1 cm) sections. When you finish the first bottom section, move onto the second bottom section. After that, undo 1 of the buns at the top of your hair, and apply the dye to your hair in the same manner. Finish with the final bun on the other side of your hair.[6]
- Make sure that you apply the dye liberally to your part and hairline.
- Alternatively, you can undo both buns, and apply the dye starting from your front hairline and finishing at the back of your crown.
-
5Cover your hair with a shower cap and wait at least 20 minutes. Wearing a shower cap will help keep your surroundings clean, and it also traps your body heat which helps the dye to process. How long you wait for the dye to process depends on the brand of dye that you are using, so be sure to read the instructions. In most cases, you'll have to wait about 20 minutes, but in some cases you may have to wait 45 minutes.
- If your have very long hair, twist it into a low bun first, then secure it with a hair clip.


Finishing the Job
-
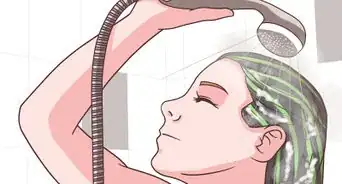
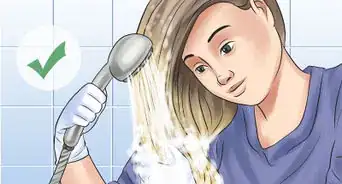
1Rinse the dye out with cool water. Tilt your head over a sink, and rinse the dye out. Alternatively, get undressed and step into the shower. Rinse the dye from your hair with cool water until the water runs clean.
- Do not use any shampoo, not even color-safe shampoo.
- The water does not have to be freezing; it just needs to be the coldest temperature you can withstand.
-
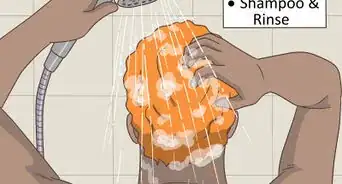
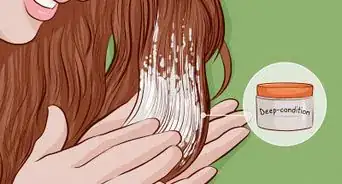
2Apply conditioner, then rinse it out with cool water. Choose a conditioner meant for color-treated hair or a sulfate-free conditioner. Apply it to your hair, then wait 2 to 3 minutes. Rinse the conditioner out with cool water once the time is up.
- Most dye kits come with conditioner. If yours did not come with conditioner, use a conditioner meant for color-treated hair.
- The conditioner is a must because it will make your hair nice and soft after the harsh dyeing process.
-
3Allow your hair to air dry. Dyeing is a harsh process for your hair, so it's best to treat it as gently as possible. Air drying is the gentlest drying method. If you can't let your hair air dry, apply a heat protectant and use a hair dryer on low heat.
-
4Don't wash your hair again for 72 hours. This is very important as it will give your hair cuticles time to close and the dye to set. After the 72 hours are up, you can wash your hair with color-safe shampoo and conditioner.[7]


Maintaining the Color
-
1Limit washing your hair to 2 to 3 times per week. The more often you wash your hair, the faster the color will fade. Instead, limit to washing your hair to only 2 or 3 times per week.[8]
- If your hair feels greasy, use some dry shampoo. Choose a dry shampoo that is specially formulated for color-treated black hair, otherwise it will show up.
-
2Use cool water when you wash your hair. Heat can cause dye to fade, and since your hair was so light to begin with, any fading will be noticeable. This doesn't mean that you have to use frigid temperatures--just use the coldest water that you can withstand. Anything between cool and lukewarm should be fine.[9]
-
3Use shampoo and conditioner made for color-treated hair. If you cannot find such products, use sulfate-free products instead. Most bottles will state on the front label whether or not they are sulfate-free, but it would still be a good idea to check the ingredient label on the back.[10]
- Sulfates are harsh cleaning agents that can not only make your hair feel dry, but can also fade dye.
- Avoid clarifying or volumizing shampoos. These shampoos open up the hair cuticle, which causes the dye to rinse out faster.[11]
- Consider using a color-depositing conditioner. You can pick one up at the salon or make one yourself by adding a little bit of your dye into a bottle of white conditioner.[12]
-
4Limit the heat styling, and use a heat protectant when you do. Heat styling includes things like hair dryers, flat irons, and curling irons. It is very damaging to your hair, especially if you do it on a daily basis. Instead, let your hair air dry whenever possible, and embrace your natural hair texture. When you do blow dry, straighten, or curl your hair, apply a heat protectant first.[13]
- Let your hair dry completely before you use a flat iron or curling iron.
- Consider heat-free curling and straightening methods.
-
5Protect your hair from the sun to reduce fading. The easiest way to do this would be to cover your head with a hat, scarf, or hood. If you don't like wearing those, however, consider using a UV protection spray instead. It is like sunscreen, except for hair. You can find it in beauty supply shops and hair salons.[14]
- Avoid exposing your hair to the pool and chlorinated water. Cover your hair with a swim cap if you have to.[15]
-
6Retouch your roots every 3 to 4 weeks. When you dye dark hair a lighter color, visible roots don't look that bad or unnatural--in some cases, they look like an ombre. When you dye blonde hair black, however, your visible roots will look unnatural.[16]
- If you notice overall fading, you can apply a glaze to the rest of your hair. This will freshen up the color without having to re-dye it.
- Alternatively, you can darken your roots with black eyeshadow or a root cover up kit.[17]


Community Q&A
-
QuestionDo most blonde people who dye their hair black regret it?
 Community AnswerNo! It might look quite harsh at first, but once you get used to it, you never want to go back again.
 -
QuestionCan I dye my beard red?
 Community AnswerYes, you can dye your beard whatever color you would like to dye it.
 -
QuestionMy hair is dark blonde and I want to try out black hair with semi-permanent dye without ruining my natural color. After 28 days, is your hair back to the normal color?Community AnswerYes, your hair should be back to its natural color by that time. The dye will slowly get washed out over time as you wash your hair.
Warnings
- Black dye is almost impossible to remove at home. Be ready to commit to your new color or prepare to pay a hefty salon bill to get a professional stylist to remove it.[20]⧼thumbs_response⧽
- Do not use dye to darken your eyebrows at home, or you risk losing your eyesight.⧼thumbs_response⧽
Things You'll Need
- Black hair dye (kit or dye and 10 volume developer)
- Plastic dyeing gloves
- Old shirt
- Petroleum jelly
- Tinting brush (if not using a kit)
- Non-metal bowl (if not using a kit)
- Color-safe shampoo and conditioner
- Protein filler (if dyeing bleached hair)


References
- ↑ https://www.allure.com/story/hair-color-hacks
- ↑ http://stylecaster.com/beauty/hair-dye-tricks/
- ↑ http://www.elleuk.com/beauty/hair/beauty-tips/a21135/how-to-dye-your-hair-at-home/
- ↑ https://www.allure.com/story/hair-color-hacks
- ↑ http://www.elleuk.com/beauty/hair/beauty-tips/a21135/how-to-dye-your-hair-at-home/
- ↑ http://www.elleuk.com/beauty/hair/beauty-tips/a21135/how-to-dye-your-hair-at-home/
- ↑ https://www.allthingshair.com/en-uk/hair-care/hair-dyeing/maintaining-black-hair-tips/
- ↑ https://www.allthingshair.com/en-uk/hair-care/hair-dyeing/maintaining-black-hair-tips/
- ↑ http://thedaintysquid.com/2014/09/7-tips-for-maintaining-bright-hair-color.html
- ↑ http://thedaintysquid.com/2014/09/7-tips-for-maintaining-bright-hair-color.html
- ↑ https://hellogiggles.com/hair/things-that-happen-to-your-hair-when-you-dye-it-darker/
- ↑ https://hellogiggles.com/hair/things-that-happen-to-your-hair-when-you-dye-it-darker/
- ↑ https://www.allthingshair.com/en-uk/hair-care/hair-dyeing/maintaining-black-hair-tips/
- ↑ http://thedaintysquid.com/2014/09/7-tips-for-maintaining-bright-hair-color.html
- ↑ https://www.allthingshair.com/en-uk/hair-care/hair-dyeing/maintaining-black-hair-tips/
- ↑ http://stylecaster.com/beauty/10-things-before-you-dye-your-hair-dark/
- ↑ http://stylecaster.com/beauty/hair-dye-tricks/
- ↑ http://stylecaster.com/beauty/10-things-before-you-dye-your-hair-dark/
- ↑ http://stylecaster.com/beauty/10-things-before-you-dye-your-hair-dark/
- ↑ https://hellogiggles.com/hair/things-that-happen-to-your-hair-when-you-dye-it-darker/
About This Article

To dye your blonde hair black, start by preparing the dye according to its instructions in a glass or plastic bowl. If your hair is bleached, add a protein filler to the dye to prevent your new color from coming out patchy. Then, divide your hair into 4 sections and apply the dye on 1-2 inch segments at a time. When your hair is covered in dye, put on a shower cap and wait 20 minutes. Next, rinse the dye out with cool water, apply conditioner, and rinse it out. Finish by allowing your hair to air dry. For tips on how to choose between soft black and deep black dye, and how to maintain your dyed color, read on!