This article was co-authored by wikiHow Staff. Our trained team of editors and researchers validate articles for accuracy and comprehensiveness. wikiHow's Content Management Team carefully monitors the work from our editorial staff to ensure that each article is backed by trusted research and meets our high quality standards.
There are 9 references cited in this article, which can be found at the bottom of the page.
The wikiHow Video Team also followed the article's instructions and verified that they work.
This article has been viewed 25,158 times.
Learn more...
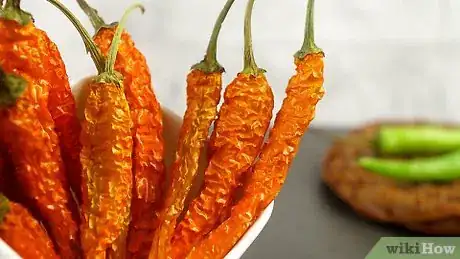
If you like to have chillies on hand when you’re in the kitchen, drying them is a great way to keep them stocked without having to worry about them going bad. Thread the chillies onto a string and let them dry out for about 3-4 weeks. You can use them in soups, stews, and sauces; you could even grind them up to make chilli powder or rehydrate them to make a paste. Chillies make great additions to many dishes with their various flavors and degrees of smokiness and heat.
Steps
Preparing to Thread
-
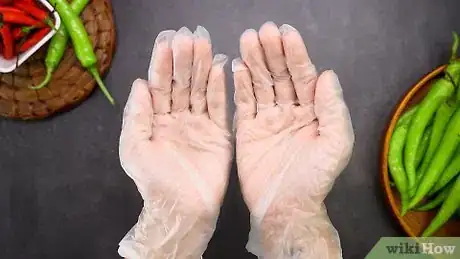
1Wear gloves while handling chilli peppers to protect your skin. The gloves should also hopefully remind you to not touch your face while working with the peppers. Chilli peppers have hot oils and capsaicin, which can burn your skin.[1]
- If you don’t wear gloves, keep in mind that capsaicin can cling to your skin for hours. Even if you wash your hands, there may still be remnants on your skin that can get passed to more sensitive areas, like your face.
-
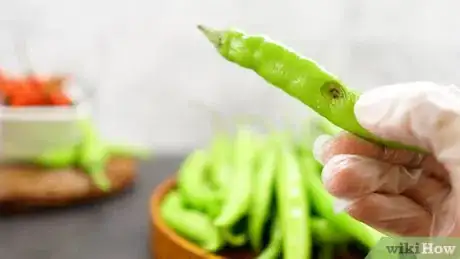
2Sort through the peppers and discard of any that are bruised. Peppers with soft or brown spots shouldn’t be used for drying because they’ll go bad before the process has finished. If you aren’t sure of what kind of chilli pepper to use, check out some of these options:[2]
- New Mexico, costeño, and choricero peppers are sweet. They’re most similar to red bell peppers.
- Pequin, cascabels, and árbol peppers are a great choice if you love heat.
- Choose chipotle, ñore, or guajillo peppers for smokiness.
- Look for anchos, mulatos, or pasillas for a fruity pepper, kind of life a sun-dried tomato.
Advertisement -
3Rinse and dry the chillies to prepare them for stringing. Give each pepper a quick rinse to dislodge any dirt. Either set them aside on a clean towel to let them air dry or dry them off right away so you can start stringing them sooner.[3]
- Make sure the chillies are dry before you string them. If they’re still moist, they could grow mold or start to rot.
-
4Cut a 3 to 4 ft (36 to 48 in) piece of strong string for 30-40 chillies. Use fishing line or a sturdy cotton thread. Whatever you choose needs to be able to support the weight of 30-40 chillies. Or, if you’re using a thinner thread, make the string 1 to 2 feet (12 to 24 in) long and thread it with just 10-20 chillies.[4]
- You can make multiple strands of chillies if you want to. Just plan out where you’ll hang them all from to make sure there will be enough space.
-
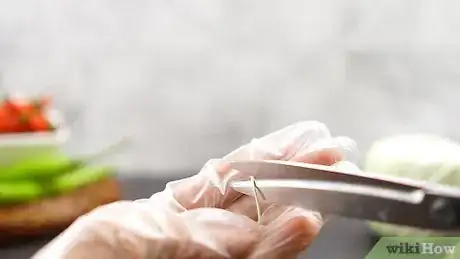
5Thread the string onto a sewing needle and knot the end. Any kind of sewing needle will work, though a longer, thicker one might be easier to push through the stems of the peppers. Tie a knot at the end of the thread so that the peppers won’t fall off the string.[5]
- To tie a knot, wrap the end of the thread around your middle finger 2-3 times. Roll the thread off your finger and pull it tightly to make the knot.
Threading and Hanging the Chillies
-
1Thread the chillies onto the string using your sewing needle. Poke the needle through each chilli at the base of its stem. Avoid piercing the actual skin of the pepper. Push the chillies down the string as you work so you can fit as many as possible.[6]
- Do your best to push the needle through the thickest part of the stem. If you pierce a thinner section, the weight of the pepper could rip it off the string.
-
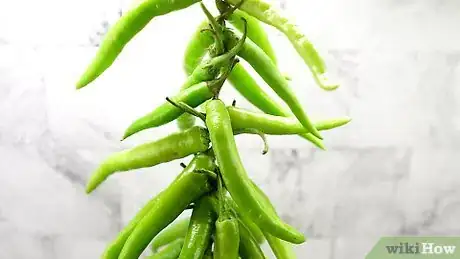
2Arrange the chillies in a loose spiral to optimize the airflow. After you’ve threaded the chillies onto the string, rearrange their positioning starting from the bottom. Hold the string of chilies upright, then turn each chilli so that it’s at a 30-degree angle from the one before it. When this is done, the chillies should form a spiral going up the string.[7]
- The spiral form makes it easier for air to circulate evenly around all the chillies, which will make them dry faster.
-
3Hang the chilli peppers in a dry, sunny spot. Avoid putting them anywhere there is a lot of moisture, as that could slow down the drying process or even make them develop mold. Try hanging them in front of a window where they’ll get some direct sunlight every day if possible. To hang them, simply tie the end of the thread around a hook.[8]
- Make sure to wash your hands thoroughly after handling the peppers, even if you were wearing gloves.
-
4Give the peppers 3-4 weeks to fully dry. If the peppers feel crispy to the touch when you squeeze them, they should be done. If there is still some plumpness or buoyancy to the peppers, leave them for another week.[9]
- You can leave the peppers hanging for longer if you like the way they look.
- If you live in a humid climate, it may take several extra weeks for the chillies to dry.
Storing and Using Dried Chillies
-
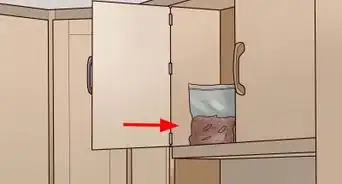
1Keep the chillies whole in an airtight container for 4-5 years. Remove the chillies from the string and place them into clean, dry containers. Glass is preferable because it won’t absorb any of the oil, but plastic is okay if you don’t have glass.[10]
- You could also use chilli-filled glass jars as attractive and functional decorations in your kitchen.
-
2Grind the dried chillies to make chilli powder. Cut off the stems and clean out the seeds. Put the peppers into a blender, spice grinder, or food processor and grind them until they’re a fine powder. Keep the powder in an airtight container and use it whenever a recipe calls for chilli powder or if you just want to add a little extra heat to a dish.[11]
- Make multiple chilli powders from different varieties of peppers so your cupboard is full of options.
-
3Add spice and flavor to your favorite dishes by incorporating chilli peppers. Try making chilli paneer, chilli chicken, or soups or stews with chillies added in for extra heat and flavor. You can add them whole or cut them up first and remove the seeds so they aren’t as hot.[12]
- If you plan on leaving the chillies in the dish, cut off the stems first. They don’t have any flavor and are a weird texture that you probably wouldn’t enjoy very much.
-
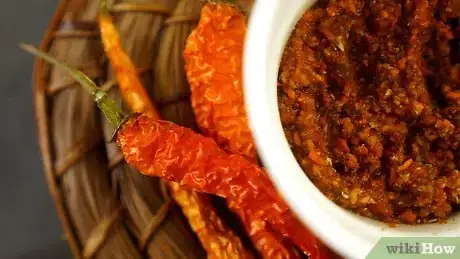
4Make a chilli paste to add to sauces, soups, and stews. Cut off the stems and remove the seeds. Rehydrate the chillies by soaking them in water until they’re soft. Then blend them in a food processor until they form a paste. Add 1 to 2 tablespoons (15 to 30 mL) of paste to the next dish you make.[13]
- Store the paste in an airtight container in the fridge for 3-4 weeks.
Warnings
- Wear gloves and keep your hands away from your face when working with chillies. If you do accidentally burn your skin, check out this article for some tips on cooling the burn.⧼thumbs_response⧽
- Make sure to hang your chillies high enough that a child or pet couldn’t accidentally get ahold of them.⧼thumbs_response⧽
Things You’ll Need
- String
- Scissors
- Needle
- Gloves
- Towel
- Air-tight container
References
- ↑ https://www.thekitchn.com/the-best-remedies-for-hot-pepper-hands-tips-from-the-kitchn-208527
- ↑ https://www.seriouseats.com/2015/01/how-to-clean-and-prepare-dried-chilies-chili-powder-substitute.html
- ↑ https://www.chilipeppermadness.com/preserving-chili-peppers/drying-chili-peppers/
- ↑ https://youtu.be/vu6hI2pUdjw?t=57
- ↑ https://youtu.be/vu6hI2pUdjw?t=87
- ↑ https://youtu.be/vu6hI2pUdjw?t=87
- ↑ https://youtu.be/vu6hI2pUdjw?t=87
- ↑ https://youtu.be/vu6hI2pUdjw?t=117
- ↑ https://youtu.be/vu6hI2pUdjw?t=127
- ↑ https://www.growveg.com/guides/how-to-dry-chili-peppers/
- ↑ https://www.seriouseats.com/2015/01/how-to-clean-and-prepare-dried-chilies-chili-powder-substitute.html
- ↑ https://www.seriouseats.com/2018/03/how-to-get-started-cooking-with-dried-chilies.html
- ↑ https://www.growveg.com/guides/how-to-dry-chili-peppers/
