This article was co-authored by Renée Plevy. Renée Plevy is an Internationally Acclaimed Portrait Artist from New York/Palm Beach who has painted The Grand Dames of Palm Beach and various celebrities and community leaders. With over 50 years of experience, Renée specializes in painting realistically in oil and capturing the soul of the person. She has studied under internationally renowned portrait artists John Howard Sanden, David Leffel, Robert Beverly Hale, Clyde Smith, and Leonid Gervits. Renée is featured in over 68 shows and galleries including a one-woman museum show at the Paterson Museum. She has garnered numerous awards including “Artist of the Year” from The Bloomfield Art League and First Prize from the Boca Raton Museum Artist’s Guild. Renée has even painted a portrait of celebrity, Vanilla Ice. She also teaches at the Boca Raton Museum Art School - formerly at SVA in Manhattan.
This article has been viewed 1,569,411 times.
Drawing a person may sound difficult, but it's really a simple process if you approach it systematically. The easiest way to draw people is with the 'Ball-and-Socket' technique, a method in which the artist sketches several conjoined ovals to form the body parts of the human figure and draft the figure's pose. It may seem basic, but many professional illustrators routinely use this technique to make their artwork, and this technique is both versatile and easy to learn.
Steps
Drawing People in a Scene/Background
-
1Sketch a scene. Don't be too focused on how it looks, but make sure it matches what your people are wearing and style.
-
2Sketch the wireframes and positions for your characters (or people). Remember that this is not the flesh, but just a kind of skeleton. Don't forget to add ovals to bends.Advertisement
-
3Sketch the body shapes needed to help you build the figures' bodies.
-
4Sketch the details for the faces, clothes, shoes, features, etc. Don't forget to match the weather in your scene! Keep it simple, but not too simple. Changes are made for women and men. Women have thinner hips, but bigger torsos and waists. Men have more angular faces and features, while women's are more round. Women also tend to have thinner necks.
- Make sure that you aren't sketching the people in your drawing at eye level. This looks very unrealistic; instead, try to adjust their head and/or posture a little bit.
-
5Refine the sketch using a smaller tipped drawing tool. Smooth out each straight line to be more curved and humane. You don't need a square-bodied person walking around! Make sure to add creases or lines coming out from the joints for more depth.
-
6Draw the outline over the sketch. You can use a marker, pen or just push harder with the pencil.
-
7Erase and remove the sketch marks.
-
8Add color to the drawing. Sign your name if you wish. Keep true to your shading and scene. Make sure to sign your name on the bottom right and not anywhere else!


Drawing People in Action
-
1Sketch the wireframes to create the pose for your people in the scene (sketch different colors to prevent confusion between figures).
-
2Sketch the body shapes needed to help you build the figures' bodies.
-
3Sketch the details for the faces, clothes, features, etc.
-
4Refine the sketch using a smaller tipped drawing tool.
-
5Draw the outline over the sketch.
-
6Erase and remove the sketch marks.
-
7Add color to the drawing.


Drawing A Single Person (Male)
-
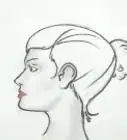
1Start with the upper body first. For the head, sketch a circle, and then add a sharp curve at the bottom of it to form an upside-down egg shape.
- Draw the head so it's slightly turned or angled a bit, as eye-level drawings don't feel realistic.
-
2Draw the neck next. You can usually just draw two short, straight lines roughly ears-width apart.
-
3Draw a horizontal line perpendicular to the base of the neck but very lightly. This is a guideline for the figure's collar bone. It should be about two to three head widths in length.
-
4Sketch circles that are slightly smaller than the circle you drew for the head. The circle should be at either end of the collar guideline. These will be the shoulders.
-
5Draw two ovals slightly longer than the vertical length of the head. Ensure that they are attached to the underside of the shoulder circles. These will be the upper arms/biceps.
-
6Draw the torso at the points where the bicep ovals meet the shoulder circles. This can be achieved by drawing a kind of upside-down trapezoid shape for the chest, and two vertical lines for the abdominal trunk. Beneath that, draw an upside-down triangle for the pelvic area.
-
7Draw a very small circle about half a head-length above the upside-down triangle. This is the belly button. To ensure your figure is proportionate, adjust the bicep ovals so that their bottoms are even with the height of the belly button. Draw a guideline if you need to.
-
8Sketch two circles that are slightly larger than your shoulder circles. They should each be halfway inside the pelvic triangle. These are your hip joints.
-
9Draw two long ovals (the same length as the torso) beneath the hip joint circles. These are the thighs.
-
10Draw two smaller ovals for the knees, half-overlapping the bottoms of the thigh ovals.
-
11Draw two more ovals beneath the knees for the calves/shins.
-
12Sketch two triangles at the bottoms of the calf ovals. These are the feet.
-
13Go back up to the biceps and draw two more ovals beneath them for the forearms.
-
14Draw two small circles on the ends of the forearms for the hands.
-
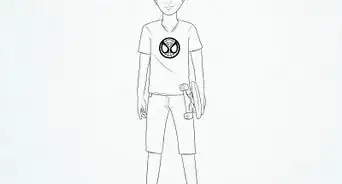
15Draw a smooth outline, add body details, and add clothing and accessories.
-
16Finished.


Community Q&A
-
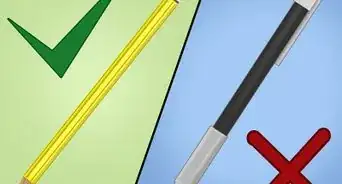
QuestionShould I use a pen or a pencil to draw people?
 Community AnswerUse pencil for the wire frame and the details so that you can erase as necessary, then go over the details and outline with something more refined and not eraseable so that when you erase the wire frame you only erase the wire frame and not the actual details.
 -
QuestionWhat does it mean to "refine the drawing"?
 Community AnswerRefining (in art terms) means to "clean up" the sketchy mess underneath what's going to be the proper piece. This usually involves erasing sketches, darkening outlines, etc.
 -
QuestionHow do I know when to make a creases on the clothes?Community AnswerStudy photos of people in various poses, and note where the crease are. In general, they appear at the joins: ankles, wrists, knees, and elbows.
Warnings
- Don't feel like you have to draw it exactly like the drawing. Get messy, and make mistakes, that's how you learn!⧼thumbs_response⧽
- Don't be disappointed if you don't believe that your drawings are good. Not everyone has the talent to be able to draw, but you will get better with practice.⧼thumbs_response⧽
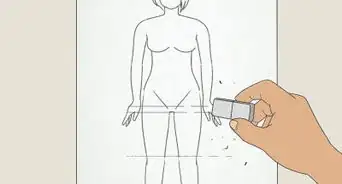
- Some people may find nude figures or adult subject matter offensive. As an artist, you have the basic freedom to draw whatever you want, but be mindful of whom you are drawing, and where.⧼thumbs_response⧽
- You may find yourself getting frustrated. If this is the case, take a break and come back to your drawing later.⧼thumbs_response⧽
Things You'll Need
- Pencil or pen
- Eraser
- Paper
- Coloring materials such as crayons or colored pencils (optional)

About This Article

To draw a person, start by sketching a basic wire frame for them that includes their head and body. Then, go back in and draw the shapes of their body parts, including their arms and legs. Once you're finished drawing their body, sketch their clothes, hair, and facial features. Finally, erase the sketch marks inside of the main outline and color or shade in your drawing. To learn how to draw people in action, scroll down!