This article was co-authored by Monica Morris. Monica Morris is an ACE (American Council on Exercise) Certified Personal Trainer based in the San Francisco Bay Area. With over 15 years of fitness training experience, Monica started her own physical training practice and gained her ACE Certification in 2017. Her workouts emphasize proper warm-ups, cool-downs, and stretching techniques.
There are 11 references cited in this article, which can be found at the bottom of the page.
This article has been viewed 103,509 times.
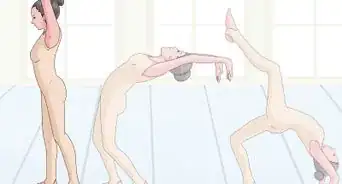
Doing a back limber will help you progress toward doing a back handspring. However, the back limber is an advanced move that requires a lot of practice to master. Before you try a back limber, make sure you can do the basic moves, including a bridge, backbend, and handstand. Next, choose a good spot to do the move and ask a spotter to help you. Then, you can perform a back limber safely.
Steps
Mastering Foundational Moves
-
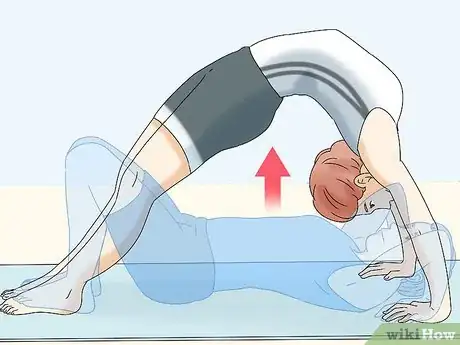
1Perfect your bridge to help you arch backward. Lie on your back on an exercise mat or the floor. Bend your knees, keeping your feet flat on the floor. Place your hands just above your shoulders with your palms pressed against the ground. Tighten your glutes and abs as you raise your hips off the floor, pulling your belly button up toward the ceiling. Arch your back so that your body looks like a bridge. Hold for 20 to 30 seconds, then release.[1]
- To build up your strength, repeat the move for 2 sets of 8 reps.
- You can modify your bridge by placing your hands on a higher surface, like a stair, when you’re first getting started.[2]
- The bridge position is a key element of the back limber, so practice it until you have a good feel for how to do it.[3]
-
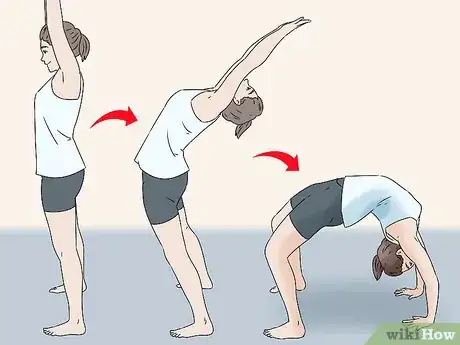
2Master the backbend move. Stand up straight with your feet about shoulder width apart. Raise your arms over your head with your palms facing forward. Then, arch your back and bend backwards toward the floor. Plant your palms firmly on the floor to complete the move. Your body should now be in bridge position.[4]
Variation: If you’re new to backbends, start by walking your hands down a wall. To do this, stand about 2 feet (0.61 m) away from a wall with your back toward it. Then, lean slightly backward, placing your hands palm-down against the wall. Slowly move your hands down the wall to arch down into a bridge. Step forward as you arch backward, if necessary.
Advertisement -
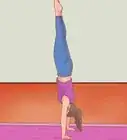
3Make sure you can do a handstand. Stand in a lunge position with your arms raised over your head. Press off the floor through your back leg, propelling yourself up onto your arms. Straighten your legs over your head, then hold for a few seconds. Release and lower your legs back down to the floor.[7]
- Keep your legs together as you go up into your handstand.
- You’ll need to be able to do a handstand to do a back limber.[8]
- Do partial pull-ups to help build up your serratus and intercostal muscles so handstands get easier to perform.
Warming up for Your Back Limber
-
1Choose a soft, level surface. You may fall, and a soft surface will help you avoid injury. The best place to do a back limber is on a gym mat. However, if you don’t have a gym mat, you might try a carpet, rug, or grass.
- Don’t try to do your back limber on concrete or hard tile. This increases your risk of injury.
-
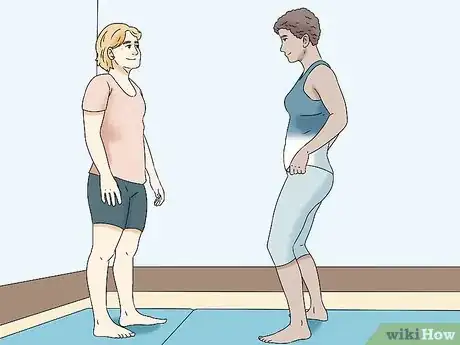
2Ask a spotter to help you. Since a back limber is an advanced move, it’s best to work with a spotter. They can help you maintain your balance and avoid falling. If you do fall, your spotter can reduce your risk of injury.[9]
- Get a spotter who has gymnastics experience, like an instructor or coach.
-
3Stretch your entire body, especially your back. You need to stretch your muscles before you do a back limber to help you avoid injury. It’s best to do several different stretches to warm up your body. Here are some options:
- Do a standing handspring stretch to warm up your entire body. Stand up straight with your legs hip-width apart and your arms at your sides. Exhale and hinge forward at your waist, lowering yourself down toward the floor. Then, wrap your arms around your legs to hold the stretch for about 1 minute. Release and return to a standing position.
- Warm up your hip flexors, quads, and back with a lunge with spinal twist. Stand up straight with your legs hip-width apart and your arms at your sides. Step forward into a lunge with your right foot, then reach your right hand down toward the floor. Twist your upper body, lifting your left arm up toward the ceiling. Hold for about 30 seconds to 1 minute, then release and repeat on the other side.
- Do a triceps stretch to warm up your arms, neck, shoulders, and back. Raise your arms up over your head, then bend your right arm at your elbow. Lower your right hand to touch the center of your back. Then, use your left hand to gently pull your right elbow toward your head. Hold for 30 seconds, then release and repeat on your left side.[10]
Tip: Doing yoga is a great way to stretch before you do a back limber. For example, you might do cat-cow pose, cobra pose, triangle pose, downward dog pose, and bridge pose.
Performing the Back Limber
-
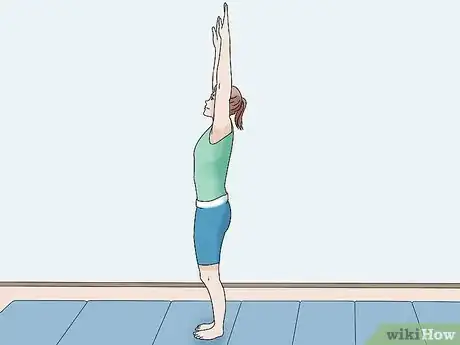
1Stand up straight with your arms raised over your head. Place your feet hip-width apart and face your palms forward. Keep your chin tilted up so you’re looking straight ahead. Your entire body should be in a straight line.[11]
-
2Push your hips forward as you arch backward into a backbend. Slowly lower your hands down to the floor. Bend your wrists backward as you plant your palms into the floor to complete the backbend.[12]
- When you first begin the move, it helps to act like you’re doing a limbo.
- Moving your hips forward will help you gain the momentum you need to move through the back limber.
- Have someone support your back as you bend backwards to help you control the move.
-
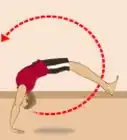
3Kick over by pushing off the ground with your feet. Tighten your shoulders and abs to help lift your legs into a handstand. With your upper body engaged, gently kick your feet off of the floor. Using your core muscles, raise your legs above your head into a handstand position.[13]
- This part of the back limber takes some practice to master, so you may not be able to do it perfectly at first. However, you can get better with practice.
Variation: If you’re having trouble transitioning into a handstand, you can try rocking your body forward and back to build some momentum, which will help you carry your legs up. As an alternative, you can try kicking up one leg and then the other.
-
4Step down out of your handstand to complete the move. Arch forward as your feet come back down toward the ground. When you’re just beginning, it’s easier to bring down one foot and then the other to come out of your handstand. As you improve your back limber, practice bringing both legs down at the same time. Plant your feet onto the floor and stand up straight.[14]
- As you come out of your handstand, let your body build momentum, which will help you come back to a standing position.
-
5Finish with your arms raised above your head. You should be in the same position as when you started. Stand up straight with your legs about hip-width apart. Your body should be in a straight line from your fingertips to your toes.[15]
Community Q&A
-
QuestionHow do I get enough momentum to kick over?
 Community AnswerTry to make your core stronger and practice doing your back limber faster for speed and momentum. Also, you can practice bridge kick overs for the feel of it.
 -
QuestionWhich warm ups can I do to enable back flexibility?
 Community AnswerDo arches and trunk lifts to help with your back flexibility. You can also try doing more back bends.
 -
QuestionDo you need shoulder strength for a back limber? If so, how to you get it?
 Community AnswerYes, you need tons of shoulder strength. Try doing push-ups, and do some shoulder shrugs, handstand pops - or go into a handstand and do shoulder touches.
Warnings
- Doing a back limber can be hard on your wrists. If you have weak wrists, wear a support wrap while you’re doing a back limber to help prevent spraining your wrist.⧼thumbs_response⧽
References
- ↑ https://www.youtube.com/watch?v=hKAl-jcRzWM&feature=youtu.be&t=160
- ↑ https://www.youtube.com/watch?v=hKAl-jcRzWM&feature=youtu.be&t=107
- ↑ https://www.youtube.com/watch?v=q57aNEYQ0Jo&feature=youtu.be&t=67
- ↑ https://www.youtube.com/watch?v=3RzV2rX8brA&feature=youtu.be&t=150
- ↑ https://www.youtube.com/watch?v=3RzV2rX8brA&feature=youtu.be&t=77
- ↑ https://www.youtube.com/watch?v=q57aNEYQ0Jo&feature=youtu.be&t=67
- ↑ https://youtu.be/roQsSjufpdk?t=7
- ↑ https://www.youtube.com/watch?v=q57aNEYQ0Jo&feature=youtu.be&t=67
- ↑ https://www.youtube.com/watch?v=q57aNEYQ0Jo&feature=youtu.be&t=36
- ↑ https://www.self.com/gallery/essential-stretches-slideshow
- ↑ https://www.youtube.com/watch?v=q57aNEYQ0Jo&feature=youtu.be&t=16
- ↑ https://www.youtube.com/watch?v=q57aNEYQ0Jo&feature=youtu.be&t=16
- ↑ https://www.youtube.com/watch?v=q57aNEYQ0Jo&feature=youtu.be&t=43
- ↑ https://www.youtube.com/watch?v=q57aNEYQ0Jo&feature=youtu.be&t=52
- ↑ https://www.youtube.com/watch?v=q57aNEYQ0Jo&feature=youtu.be&t=52

