This article was co-authored by Matt King. Matt King is the Director of Education at Fox and Jane Salon Group. With over 15 years of experience and expertise in cutting and coloring hair, he specializes in crafting trend-forward and technically savvy training and development materials for hairstylists. Matt received his cosmetology education from The Blaine Beauty School.
wikiHow marks an article as reader-approved once it receives enough positive feedback. In this case, 100% of readers who voted found the article helpful, earning it our reader-approved status.
This article has been viewed 104,933 times.
Want to recreate Princess Leia's famous hair buns? Replicating her out-of-this-world hairstyle is easier than you'd think, and we're here to walk you through how to do it step-by-step. If Leia's cinnamon hair buns aren't your thing, we've also included tutorials for some of her other iconic hairstyles, like the beautiful braided crown she wore during Empire Strikes Back.
Steps
Making the Buns for Longer Hair
-
1Brush your hair, then part it down the middle. Comb through your hair to remove any knots or tangles. Use the handle part of a rat-tail comb to part your hair down the center. Have the part go from your forehead down to the nape of your neck.[1]
- This method is great for those who have very long hair, at least to elbow-length.
-
2Pull your hair up into two high pigtails. Grab the left side of your hair. Pull it up into a high pigtail, about 1 inch (2.54 centimeters) above your ear. Tie it off with a hair tie that matches your hair color. Repeat the process for the right side of your head.[2]Advertisement
-
3Twist one pigtail into a rope. Leave the other pigtail alone for right now. If you want a fancier Leia bun, braid the pigtail instead, then tie the end off with a clear hair elastic.
-
4Wrap the rope around the base of the pigtail. Tuck the end of your hair under the bun after you coil it. Princess Leia's buns are not like regular buns. Instead, they are coiled in the same fashion as cinnamon buns. This is the effect you are aiming for.[3]
-
5Secure the bun to your head with bobby pins. You will need a good amount of bobby pins to secure the style, otherwise the bun will fall apart.[4] Plan on using one bobby pin every inch (2.54 centimeters). Be sure to use something that matches your hair color.
- You may need to add some pins to the inside of the bun to help hold it together.
-
6Repeat the process for the other pigtail. Make sure that you wrap your pigtail in the same direction as the first one. For example, if you started wrapping your first pigtail towards the back of you head, you should wrap this one towards the back as well.
-
7Repeat the same process for the other bun. Coil your bun in the same direction as you coiled the first one. This way they will match. For example, if you coiled the first bun away from your face, coil the second one away from your face as well.
-
8Spray your hair using hairspray. Now find some fellow rebels to overthrow the Empire with!
Making the Buns for Shorter Hair
-
1Brush and part your hair down the middle. Comb through your hair to remove any knots or tangles. Use the handle of a rat-tail comb to create a neat, even center part, going from your forehead to the nape of your neck.
- This method works best on hair that's shoulder length.
-
2Tie your hair into two high pigtails. Gather all your hair on the left side of the part into a high pigtail. Position it about 1 inch (2.54 centimeters) above your ear and secure it with a hair tie that matches your hair color. Do the same thing for the right side of your head.
- Make sure that the hair going into each pigtail is smooth and neat.
-
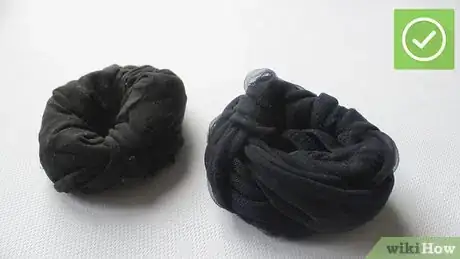
3Create a set of sock buns. Find a pair of clean socks that match your hair color. Cut the toes off, then roll each sock from top-to-bottom to form a doughnut shape.
- The socks need to be long enough to cover your ankle, otherwise your buns will turn out too small.
-
4Slip a pigtail through one of the sock buns. Pull the entire pigtail through the sock bun first, then bring the bun towards the end of the pigtail. Set the other sock bun off to the side for now.
-
5Spread the ends of your hair around the top of the sock bun. Try to spread the hair as evenly as possible. Tuck them under the sock bun so that they are nestled between the bun and the body of the pigtail.
-
6Use both hands to roll the sock bun towards the base of the pigtail. This step can be tricky, and it may take you a few tries before you get the hang of it. Place your thumbs on the top edges of the sock bun, and your fingers on the bottom edges. Push inward with your fingers and pull outward with your thumbs. This will cause the bun to roll down a notch. Keep going until the bun reaches the hair tie.
-
7Secure the sock bun to your head with bobby pins that match your hair color. Plan on using a bobby pin on the top, bottom, and both sides of the sock bun. Use more, if necessary.
-
8Repeat the whole process for the other side's sock bun. Check yourself in the mirror to ensure that both buns are the same size and at the same height. Make any adjustments, if needed.
-
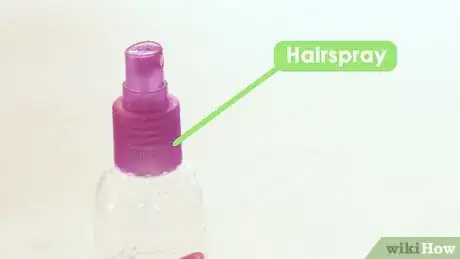
9Spray the buns lightly with hairspray. Now you are ready to rebel against the Empire and save the galaxy.
Creating Leia's Braided Ceremony Bun
-
1Brush your hair and pull it into a high ponytail. Secure the ponytail with a hair tie, preferably one that matches your hair color. Make sure that the hair going into the ponytail is smooth.
- This style works best on longer hair.
-
2Split the ponytail in half horizontally. You want to have a top section and a bottom section. Use the handle of a rat-tail comb to divide the ponytail, if needed.
-
3Pull the top half of the ponytail through a bun maker. Bring the bun maker all the way down to the base of the ponytail. Clip the hair in the bun maker out of the way for now.
- Use a large bun maker that matches your hair color.
- Bun makers look like doughnuts, except that they are made out of a spongy, netted material
-
4Braid the bottom half of the ponytail. Split the bottom half of the ponytail into three sections. Cross the left and right sections over the middle one until you reach the end of your hair. Secure the braid with a clear hair elastic. This part of the style is now complete.
- If you have thin hair, gently tug on the outer loops forming the braid to fluff it up and give it some volume.
-
5Spread your hair over the bun maker and secure it with an elastic. Unclip the upper half of the ponytail. Use your hands to smooth the hair around the bun maker so that it is no longer visible. Slide a clear hair elastic over the bun, pinching the hair underneath it.
- If you can't cover the bun maker completely with your hair, switch to a smaller size.
-
6Split the excess hair into three sections. Your hair will be coming out from under the bun maker after the previous step. Gather all that hair, and pull it towards the back of your head. Split this hair into three sections.
-
7Braid each section separately. When you are done, you should have three mini braids coming out of the back of your bun. Secure each braid with a clear hair elastic.
- It might be a good idea to clip the other sections out of the way while you work on the braids.
-
8Wrap right braid around the top of the bun and secure it with pins. Take the right mini braid. Pull it upward and wrap it counterclockwise around the top part of the bun. Make sure that the center of the bun is still visible. Tuck the end of the braid down against the bun, then secure everything with bobby pins.
- Use bobby pins that match your hair color.
-
9Wrap the middle braid around the bun. Bring the middle mini braid upward, and wrap it counterclockwise around the bun, just below top braid. Tuck the end down, as before, and secure everything with bobby pins.
-
10Wrap the final braid around the base of the bun. Take the final mini braid. Wrap it counterclockwise around the base of the bun. Try to cover the gap between the middle braid and your head. Tuck the tail under the bun, then secure everything with bobby pins.
-
11Set the style with hairspray. You are now ready to attend important ceremonies and award those who helped you save the galaxy!
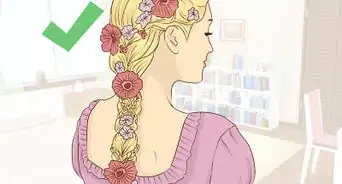
Creating Leia's Hoth Braided Crown
-
1Brush your hair and create a deep side part. It does not matter which side you part your hair on, as long as you made the part deep. It should be level with your eyebrow.[5]
- This style will be easier with longer hair, but you can attempt it if you have short hair.
- It helps to start on your less dominant side.
-
2Split the hair at your hairline into three sections. Gather some hair from the thicker side of the part. It should be perpendicular to the part, not parallel to it. Split it into three sections. Each one should be no thicker than your finger.[6]
- Use a rat tail comb or your pinky finger and nail to create even sections of hair.
-
3Braid for two stitches. Cross the front strand under the middle one, then cross the back strand under the middle one. This will be the start of your Dutch braid. It is very important that you cross the left and right strands under the middle one and not over, otherwise you'll get a French braid instead.[7]
-
4Begin to Dutch braid across your forehead. Gather some hair from your hairline, and add it to the front section. Cross the front section under the middle one. Gather some hair from just behind the back section. Add it to the back section, then cross it under the middle one.[8]
- Keep the braid about an inch (2.54 centimeters) from your hairline.
-
5Continue to Dutch braid towards the nape of your neck. When you reach the nape of your neck, brush your hair back to hide the part, then continue adding it into the braid as before. Braid across the back of your head, then stop.[9]
-
6Gather the rest of your hair together and do a regular braid. Pull all the hair from the other side of your head into the Dutch braid. Finish off with a regular braid. Your braid needs to be long enough to wrap around the side of your head and reach just past the part.[10]
- If you hair isn't long enough for this, continue Dutch braiding until you reach the part, then finish off with a regular braid.
-
7Wrap the braid across the top of your head. Keep the braid right against the inside edge of the Dutch braid. Tuck the tail-end of the braid underneath the braid, then secure everything with bobby pins.[11]
- Use bobby pins that match your hair color.
- Depending on your hair length, you may have to wrap the braid a few times around your head. This is perfectly fine; Leia herself had very long hair!
-
8Set the style with hairspray. You are now ready to brave the cold and save your friends from AT-ATs and wampas.
Community Q&A
-
QuestionDoes my hair need to be braided?
 PrincessKK0123Community AnswerNo, your hair can just be loose and down, for both the longer and shorter methods. However, you can put your hair in a bun for the longer hair method if you prefer.
 -
QuestionHow do I do my hair like Princess Leia if my hair is in between?
 Community AnswerI suggest trying both and sticking with what works best. I have the same problem and the shorter one worked better for me, but your hair might be thicker or thinner than mine as well.
 -
QuestionCan I do this with extremely short hair?
 Community AnswerNo. Short hair isn't long enough to make into buns. Wait for it to grow out, or you could use a wig or extensions.
Things You'll Need
Making the Buns for Longer Hair
- Brush
- Rat-tail comb
- Hair ties
- Bobby pins
- Hairspray
Making the Buns for Shorter Hair
- Brush
- Rat-tail comb
- Hair ties
- Bobby pins
- Socks that match your hair color
- Scissors
- Hairspray
Creating Leia's Braided Ceremony Bun
- Brush
- Rat-tail comb (optional)
- Bun maker or hair doughnut
- Hair tie
- Clear hair elastics
- Bobby pins
Creating Leia's Hoth Braided Crown
- Brush
- Clear hair elastic
- Bobby pins
- Hairspray
References
- ↑ http://www.vogue.com/article/how-to-do-princess-leia-buns-hairstyle
- ↑ http://www.vogue.com/article/how-to-do-princess-leia-buns-hairstyle
- ↑ http://www.vogue.com/article/how-to-do-princess-leia-buns-hairstyle
- ↑ http://www.vogue.com/article/how-to-do-princess-leia-buns-hairstyle
- ↑ https://slashedbeauty.com/2-princess-leia-hair-tutorials-honor-carrie-fisher/
- ↑ https://slashedbeauty.com/2-princess-leia-hair-tutorials-honor-carrie-fisher/
- ↑ https://slashedbeauty.com/2-princess-leia-hair-tutorials-honor-carrie-fisher/
- ↑ https://slashedbeauty.com/2-princess-leia-hair-tutorials-honor-carrie-fisher/
- ↑ https://slashedbeauty.com/2-princess-leia-hair-tutorials-honor-carrie-fisher/
