This article was co-authored by Alana Schober and by wikiHow staff writer, Aly Rusciano. Alana Schober is a Professional Makeup Artist at Pout by Lipsticknick, an inclusive beauty bar in Los Angeles, California. With over a decade of experience, Alana specializes in hair and makeup. As a Licensed Comselotologist, she has worked for both MAC Cosmetics and Paul Mitchell. Alana's celebrity clientele includes Iggy Azalea, Solange, YG, and ASAP Nast. She has worked on campaigns with Nike, Adidas, Morphe, Jaclyn Hill Cosmetics, and Quay. Alana has also worked on countless music videos and photoshoots and her work has been featured on two billboards in Los Angeles.
There are 32 references cited in this article, which can be found at the bottom of the page.
This article has been viewed 10,404 times.
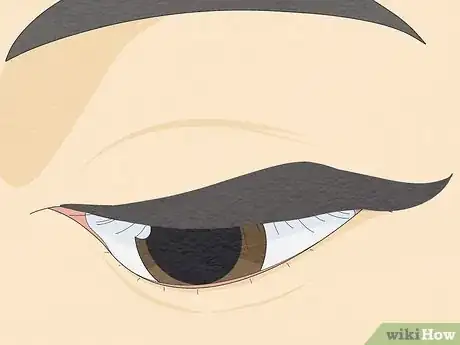
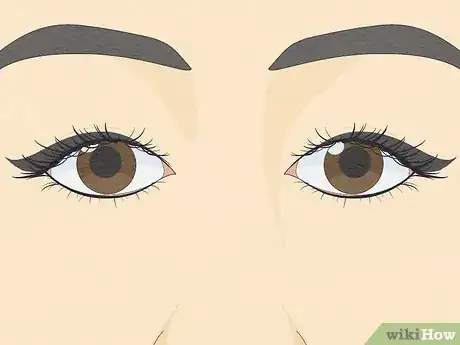
Bold eyeliner is all the rage these days. From dark colors to sparkling gemstones, people are decorating their eyes to bring some dramatic flare into their lives. If you want to make a statement or add some extra glam to your look, you’ve come to the right place! We’ve got tutorials for the trendiest eye makeup looks, so keep reading to learn how you can do bold eyeliner and look absolutely fabulous.
Steps
Dramatic Winged Eyeliner Look
-
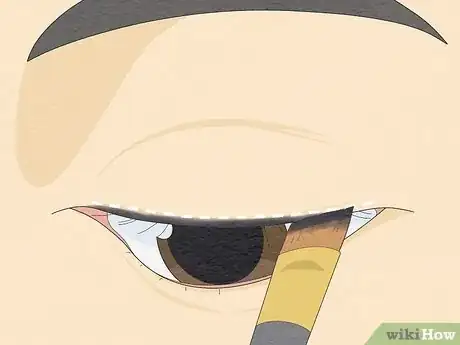
1Create the base of your winged eyeliner using black eyeshadow. Before you use any eyeliner, you’ll want to make a base for the wing with black eyeshadow. This will help your bold eyeliner look really pop. Basically, you’re creating the shape of the wing with eyeshadow first, and then going over it with eyeliner. To start, use an angled brush and gentle strokes to outline your eyeliner. Start at the outer corner of your upper lash line and move inward towards the inner corner.[1]
- Black eyeshadow is more forgiving than black eyeliner, so don’t worry if you make a mistake!
- For hooded eyes, make sure you keep the eyeshadow below your crease. This will keep your look fresh and smudge-free.
- If you’re confident with liquid liner, you can skip this step and go straight for it, but we highly recommend creating a guide so you can make a perfect wing.
-
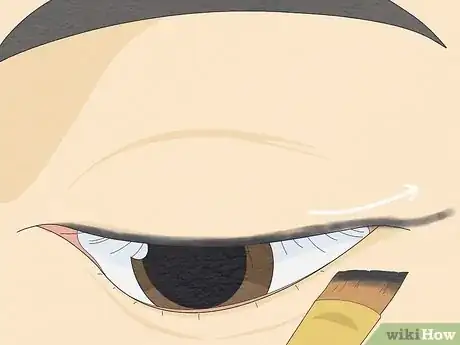
2Outline your wing with black eyeshadow. Using the same angled brush as before, create a simple wing with black eyeshadow. Start at the outer corner of your eye and follow the natural line from your lower lashes. Bring the wing line out to the center of your brow bone. This will be the length of your wing.[2]Advertisement
-
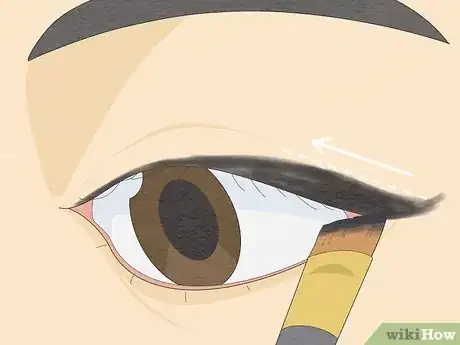
3Thicken the base of your eye look with more black eyeshadow. Now that you have a basic wing shape, it’s time to make the look even bolder. Using your angled brush, dab and drag eyeshadow along the edge of the outline you’ve made. Keep that triangular, tapered shape by leaving the tip of your wing thinner than the rest of your look.[3]
- Think of this like building up a marker line on paper. If you start with a thin line, you want to add another overlapping line to make it thicker. Eyeliner works the same way!
- Try looking in multiple directions when doing this step, especially if you have hooded eyes. This will help you fill in gaps and ensure that your eyeliner is flawless at all angles. Keep building until you’ve reached a thickness you like.[4]
- If you make a mistake, no worries! You’re starting with black eyeshadow rather than eyeliner for this very reason. There’s a little more wiggle room with eyeshadow, and you can easily wipe away mistakes with a cotton swab and makeup remover.
-
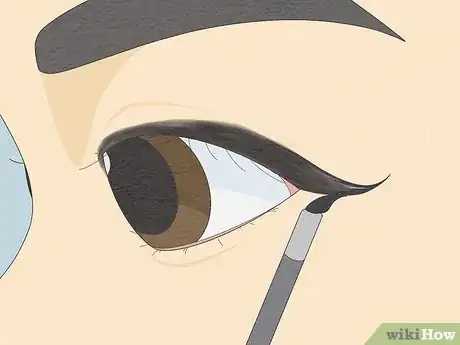
4Trace over your eyeshadow outline with a liquid eyeliner. The hard work is done—you did it! Now that you have your bold eyeliner outlined in eyeshadow, all that’s left to do is seal the look with eyeliner. Use a thin, black liquid eyeliner pen to trace over the outer lines, creating a border.[5]
- Don't be discouraged if you have some trouble at first—practice makes perfect when it comes to liquid eyeliner!
-
5Fill in the rest of your eyeshadow outline with liquid eyeliner. Color in the rest of your look with the same eyeliner pen as before. This will bring everything together and give you a bold and dramatic eyeliner look that’ll capture everyone’s attention.[6]
- Try using a brush tip liquid eyeliner if your pen liner is too thin. This can help you fill in your eyeliner faster.
- Make sure the eyeliner is dry before you open your eyes all the way. You don’t want your cut-throat look to smudge![7]
-
6Finish this bold look with mascara and false lashes. With such thick eyeliner, you want to go big! This look screams false lashes, so bring the drama with voluminous lashes that’ll draw all eyes on you.[8]
Dreamy Colorful Eyeliner Look
-
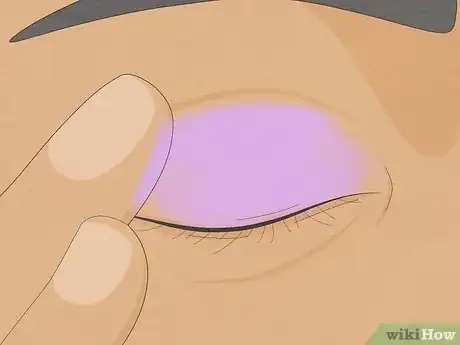
1Apply matte purple eyeshadow to your eyelid. Use your finger or an eyeshadow brush to apply the pigment all over your upper lid. This will be the base of your bold and dreamy eyeliner look.[11]
- If you don’t have a purple shadow, you can create your own. Mix blue and pink shadows on the back of your hand and wallah! You now have a unique purple shade just for you.[12]
- Purple not your color? No worries! This look works great with any color; just make sure your eyeshadow and eyeliner colors are complementary.
-
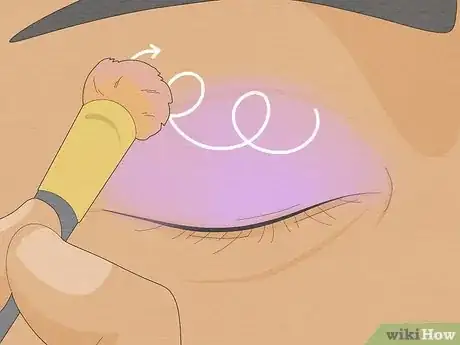
2Blend the shadow with a fluffy brush. With circular, buffing motions, smooth out the eyeshadow in your crease. This will give you a softer look and reduce any harsh lines.[13]
-
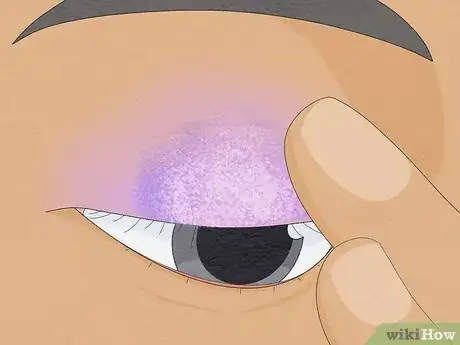
3Dab a shimmery purple shade on your lid. Adding an iridescent or multi-chrome eyeshadow to the center of your eyelid will bring more light to your eyes and give you a whimsical look. Simply add a little bit of shimmery shadow to the center of your lid with your finger or eyeshadow brush for some extra sparkle.[14]
- Make sure the shimmery shadow is the same color as the eyeshadow you’ve already applied.
-
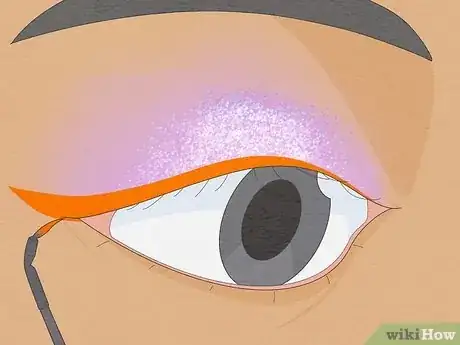
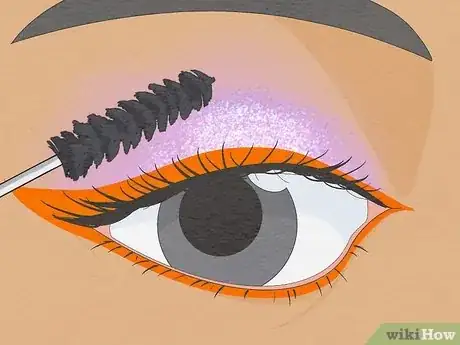
4Line your upper lid with a neon orange eyeliner. Start at the inner corner and work your way along your upper lash line, flicking the liner out at the wing. Use small strokes at first to create the base of your eyeliner. Keep applying coats and thickening the line until it’s just below your crease.[15]
- If you don’t have colored eyeliner, no worries! You can create your own with liquid lipstick and an eyeliner brush. Simply paint on the liquid lipstick with the brush the same way you would with a liquid eyeliner.[16]
- Don’t have liquid lipstick? Try using a brightly colored eyeshadow and angled brush. Dampen your brush and apply the eyeshadow as you would a liner, slowly building up the product with multiple coats.
-
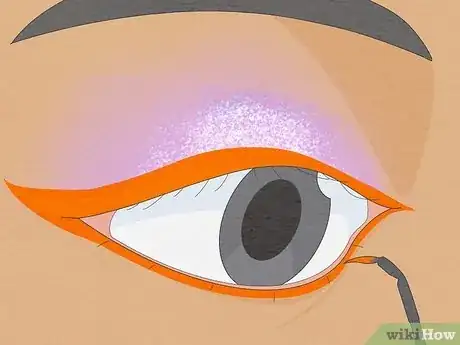
5Create a thick line on the lower lid. Frame your eye with more neon orange liner by bringing the eyeliner onto your lower lash line. Starting at the inner corner, follow the natural curve of your lower lash line with the orange liner. Connect the lower lash line with the wing for a seamlessly bold and artistic look.[17]
-
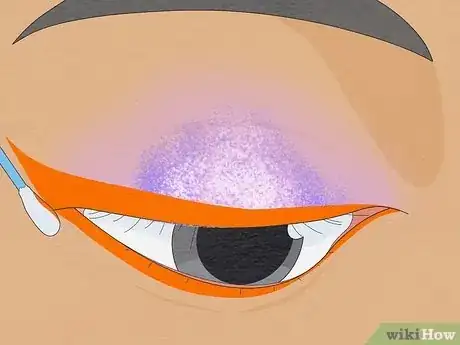
6Sharpen your eyeliner wings with a cotton swab. If you make a mistake, don’t sweat it! You can easily fix it up with a little makeup remover or concealer and a cotton swab. Dab a little bit of product on the swab and glide it under the wing to create an edge sharp enough to cut out all the haters.[18]
-
7Add length to your lashes. To finish the look, apply a coat of volumizing mascara or try your hand at fake lashes. And that’s it! Now you have a super dreamy, bold, and sparkly look that’s perfect for a night out, music festival, or an everyday pick-me-up. [19]
Bold Graphic Eyeliner Look
-
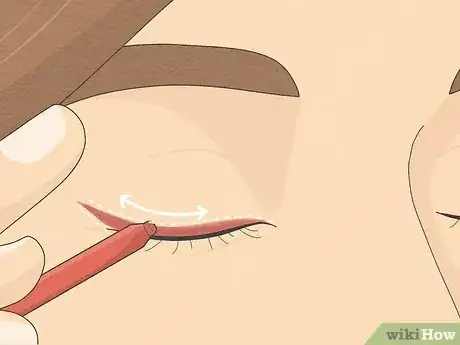
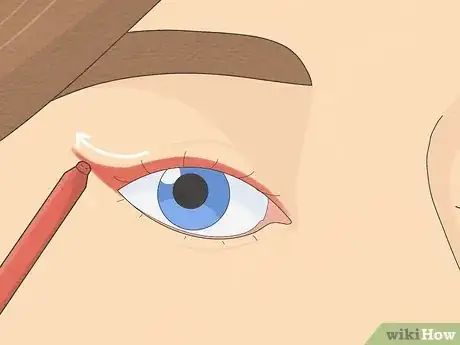
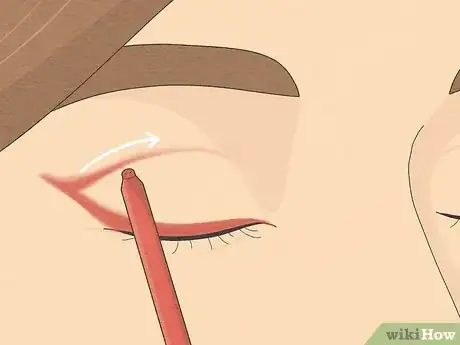
1Apply bold, colorful eyeliner to the upper lash line. Using back-and-forth motions, create a gentle wing. Bring the liner to the tear duct, and then follow your natural lash line to the outer corner of your eye. Next, flick the liner out, using the angle of your lower lashes as a guide, to create a simple wing. It’s best to do this with the eye closed, so you get an even amount of pigment.[20]
- Pick any color for this look! Just make sure your eyeshadow and eyeliner are the same color.
-
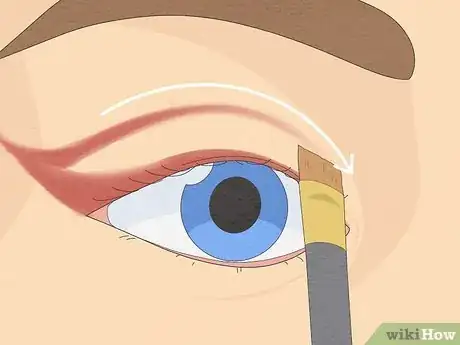
2Bring the wing out with small strokes. Extend the wing you’ve created, so it travels past your lid to your eyebrow bone. Put some eyeliner on an eyeshadow brush and blend out the wing. Focus on where the wing meets the eyeliner on your lid. The line should be crisp and clean.[21]
- Holding the skin back can help you make a straight line.
-
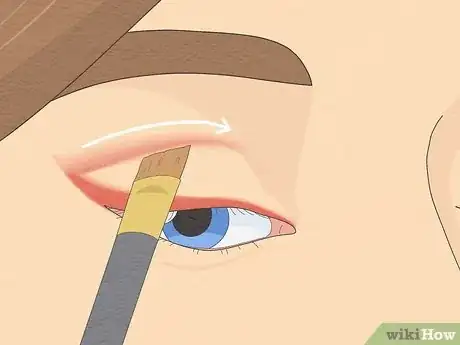
3Create a cut crease. Run an eyeshadow brush through the eyeliner pencil. Then, make a soft outline from the tip of your eyeliner wing to the center of your crease. Follow the natural curve of your lid to make your eye pop.[22]
-
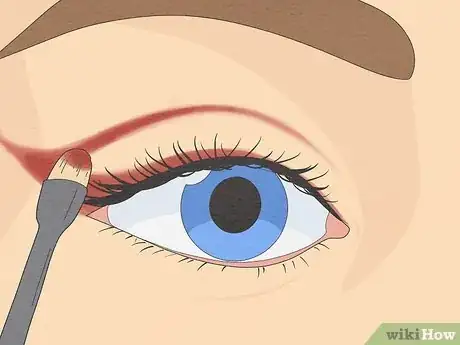
4Darken the cut crease with eyeliner. Go over the faint cut crease with a back-and-forth motion to make it more intense. How bold the line is is totally up to you![23]
- Remember to peek in the mirror between each step to see how amazing you’re doing.
-
5Buff out the cut crease. Using the same eyeshadow brush as before, drag the cut crease along the rest of your crease. The line should be softer the closer you get to your tear duct.[24]
- If you have a hooded eyelid, you can still do this look! Simply create the illusion of a crease by pulling the shadow and liner over your lid.
- No need to wipe or clean the brush in-between steps. If there’s excess pigment on the brush, awesome! This will help with blending.
-
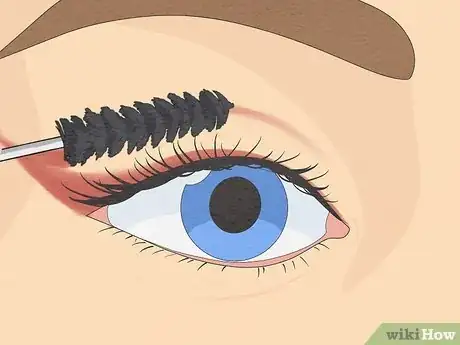
6Put on a thin coat of mascara. This will help open and brighten your eyes. You only need a few strokes to darken your lashes, and be careful not to get any mascara on your liner.[25]
- Your mascara doesn’t have to be the same color as your eyeliner or eyeshadow, but it can if you want it to!
-
7Set the eyeliner with a matching eyeshadow. Lightly dip your eyeshadow brush from before into the palette, and tap off any loose pigment. Next, go over the liner you’ve done with gentle back and forth strokes. This will help blend out the look and make sure it lasts all day or night long.[26]
-
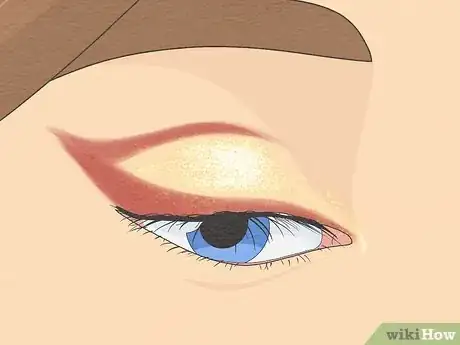
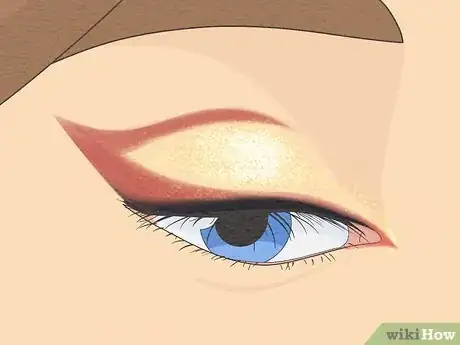
8Apply eyeshadow to your lid. With a clean eyeshadow brush, pat an iridescent or shimmery color in the space between your eyeliner. This will help your eyes catch the light and bring a little extra sparkle to this dramatic look.[27]
- Build up the pigment by adding multiple layers.
- Stick to a neutral shimmer or go for a complementary color for an even bolder statement.
- For example, if you’re using red eyeliner, use a golden shimmer for a more natural look. For a bolder look, try a shimmer with cyan sparkles.
- If you don’t have a brush, use your finger.
-
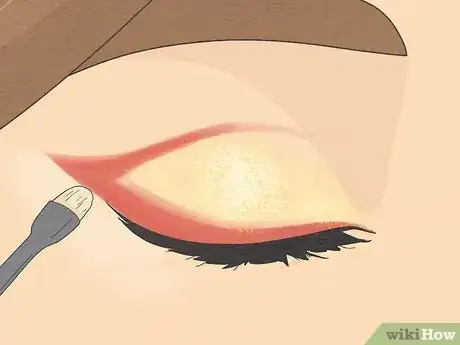
9Clean up the look with concealer. With a tapered brush, tidy up the edges of your look. Simply place the concealer in a line under your wing and blend downwards. Tap the area with your finger to set everything in place.[28]
-
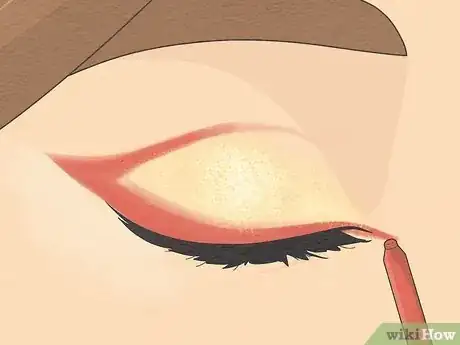
10Bring the colored liner into the tear duct. Using the eyeliner pencil from before, brush the color along the inner corner of your eye inside the waterline. This tiny detail will tie the whole look together and make you look absolutely ethereal.[29]
-
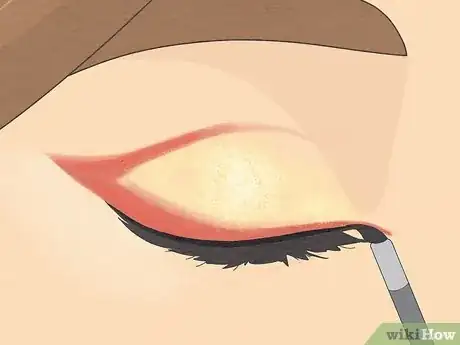
11Frame the eye with black liquid eyeliner. Apply a very thin line of black liner to your lash line for that final dramatic pop. The colored liner is the star here, so be light-handed with this step.[30]
- For precise, thin lines, lay the tip of the liner brush flat against your lash line and tap the pigment on.
-
12Smudge the black liner with eyeshadow. Using the same eyeshadow color as your cut crease, lightly blend out the thin line of black liner with a tapered brush. This reduces the sharpness of the black for a more cohesive and flawless look.[31]
- And that’s it! You now have a bold and colorful eye look that’s fit for the runway or a day at the mall.
References
- ↑ https://youtu.be/vrAVuF3ETy8?t=31
- ↑ https://youtu.be/vrAVuF3ETy8?t=84
- ↑ https://youtu.be/vrAVuF3ETy8?t=110
- ↑ https://youtu.be/vrAVuF3ETy8?t=130
- ↑ https://youtu.be/vrAVuF3ETy8?t=316
- ↑ https://youtu.be/vrAVuF3ETy8?t=351
- ↑ https://youtu.be/vrAVuF3ETy8?t=374
- ↑ https://youtu.be/vrAVuF3ETy8?t=376
- ↑ https://youtu.be/vrAVuF3ETy8?t=400
- ↑ https://youtu.be/vrAVuF3ETy8?t=424
- ↑ https://youtu.be/_Pl0AR-f8sY?t=402
- ↑ https://youtu.be/_Pl0AR-f8sY?t=377
- ↑ https://youtu.be/_Pl0AR-f8sY?t=441
- ↑ https://youtu.be/_Pl0AR-f8sY?t=531
- ↑ https://youtu.be/_Pl0AR-f8sY?t=645
- ↑ https://youtu.be/_Pl0AR-f8sY?t=604
- ↑ https://youtu.be/_Pl0AR-f8sY?t=675
- ↑ https://youtu.be/_Pl0AR-f8sY?t=700
- ↑ https://youtu.be/_Pl0AR-f8sY?t=763
- ↑ https://youtu.be/B5bSgCCIHO8?t=66
- ↑ https://youtu.be/B5bSgCCIHO8?t=89
- ↑ https://youtu.be/B5bSgCCIHO8?t=111
- ↑ https://youtu.be/B5bSgCCIHO8?t=124
- ↑ https://youtu.be/B5bSgCCIHO8?t=140
- ↑ https://youtu.be/B5bSgCCIHO8?t=157
- ↑ https://youtu.be/B5bSgCCIHO8?t=164
- ↑ https://youtu.be/B5bSgCCIHO8?t=189
- ↑ https://youtu.be/B5bSgCCIHO8?t=224
- ↑ https://youtu.be/B5bSgCCIHO8?t=237
- ↑ https://youtu.be/B5bSgCCIHO8?t=241
- ↑ https://youtu.be/B5bSgCCIHO8?t=282
