This article was co-authored by wikiHow staff writer, Jessica Gibson. Jessica Gibson is a Writer and Editor who's been with wikiHow since 2014. After completing a year of art studies at the Emily Carr University in Vancouver, she graduated from Columbia College with a BA in History. Jessica also completed an MA in History from The University of Oregon in 2013.
There are 8 references cited in this article, which can be found at the bottom of the page.
This article has been viewed 134,385 times.
Learn more...
A family tree is a great visual tool for displaying your family history. Do some genealogy research to learn about your ancestors and keep track of the information. Decide what information you'd like to include on the family tree and choose the dimensions of the tree. Arrange the information and embellish the tree to really make it stand out. You can also use a template or have the tree professionally printed.
Steps
Gathering the Information
-
1Determine how much detail you need for your family tree. Before you begin, ask yourself how detailed you want the family tree to be. If you're making a family tree for a class at school, you might only need basic information going back a few generations. If you're making a family tree that can be shared electronically, you might want to be as detailed as possible.[1]
- Keeping the purpose of the tree in mind can prevent you from feeling overwhelmed as you find and sort through a lot of information.
-
2Decide the type of information you want to display. For a basic family tree, you might want to just use the names of your family members. This is also best if you want to make a simple tree design. For more detailed family trees, you can also include:[2]
- Birth and death dates
- Marriage information
- Places of residence
- Military service
- Photographs
Advertisement -
3Talk with your relatives to get background information. Start with the information you already have and ask family members to talk about their relatives. This will give you a basic outline which might be enough if you want to do a simple family tree. Or their information can be a starting point for future research.[3]
- You may want to confirm details with other family members. For example, you could say, "Aunt Frances told me that grandma actually had four siblings. Do any of you know their names?"
-
4Use genealogy websites. There are many websites that allow you to join and use their research tools. Most of these provide templates that you can fill in as you find information. You can also choose how you want to organize the details. Keep in mind that many sites charge annual or monthly membership fees.[4]
- Websites can be especially useful if you're working on your family tree with other relatives. They can log into their accounts and add information to the family tree.
-
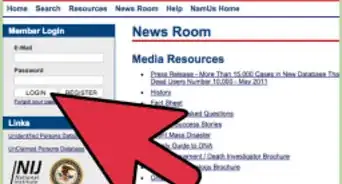
5Use libraries and public records to find information. Check to see if there's a genealogy library in your area or ask your local library if they have public records. Sort through birth certificates, census records, death certificates, and marriage certificates to get the information you want to include in your tree.
- You may need to ask librarians for help with using microfilm or microfiche, since many older records are stored this way.
-
6Organize hard copies of the research. Keep track of all the information you get, so you can arrange it later. To create hard copies, you can print off templates, file index cards, or write the information in a notebook. Even if you want to work electronically, it's a good idea to have a physical backup with your research notes.
-
7Store the information on your computer. If you want to organize the info electronically, use genealogy software that stores the information. Unlike genealogy websites, you won't need to pay membership fees for the software once you've purchased the program.
- Most genealogy software programs offer a family tree printing option. If your family history information is in a genealogy database, you may not need to design a family tree from scratch.


Arranging the Information
-
1Plan the dimensions of the tree. Before you begin laying out the information, decide how wide and how tall you'd like the tree to be. Determining the size of the tree is especially helpful if you'll be downloading templates that you can cut and attach to the tree.
- For example, if you're using a template to fill out boxes of information for each family member, ensure that the boxes will fit on the tree. If they don't, you may need to adjust the size of the tree or edit down the information you're including.
-
2Decide how many generations you want to show. Many simple family trees include 3 or 4 generations, but more complex trees can go back farther. Keep in mind that the more generations you include, the bigger the tree will have to be.[5]
-
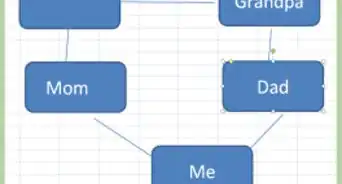
3Use a template to input information for each family member. Find a genealogy or ancestry website that has downloadable templates. You can download and fill out the template on your computer. Print out the template and then cut out the squares of information for each family member.[6]
- You may be able to customize the templates to include information. For example, some templates might include a space to list your family member's occupation.
-
4Write out the information for each family member, alternatively. If you don't want to arrange your family tree electronically, gather your notes and write out the information for each family member on separate squares or cards.[7]
- The informational squares should be the same size, so they're easy to arrange on the family tree.
- Put all of your informational squares on a large work surface. Arrange them as though they're on the tree, so you get an idea of how much space to leave between each square.
-
5Place the most recent information at the base of your tree. Lay your informational square at the base of the tree and put your parents' squares above yours. The tree should start branching out with your parents.[8]
-
6Create branches of previous generations. Continue working back through generations from the most recent to the oldest. As you go back each generation, move up a branch in the tree, so the oldest generation is near the top.[9]
-
7Arrange the squares by relationships. Husbands and wives should be placed next to each other on the tree and siblings should also be on the same generational line in birth order. For example, ensure that siblings are placed in order (oldest on the left down to the youngest on the right).[10]
-
8Consider adding additional horizontal spaces for future growth. It's common to uncover new siblings or spouses of ancestors, even with mature family history projects. Leave a few spaces to make it easier to add newly discovered information.


Designing the Tree
-
1Choose the material for your tree. You can be as creative as you like with your family tree. A basic family tree can be made from paper, poster board, or felt. For a larger, more detailed tree, use butcher paper or firm packaging paper. If you'd like a tree that you can paint or add detail to, consider using cloth or artist's canvas.[11]
- For a truly unique family tree, stick a family tree decal to the wall where you want to display it or hang photographs in the outline of your family tree.
-
2Attach each family member's information to your family tree. Use the informational squares that you made for each family member and secure them to the tree using glue or tape. Depending on the type of tree you're making, you might be able to write the information directly on the tree.
- If you're writing the information on the tree, consider first writing out the information using pencil, so you can correct any mistakes. Then write over the pencil using ink.
-
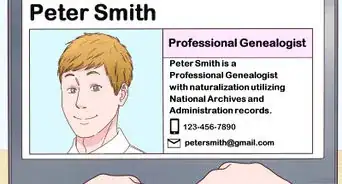
3Use a professional printing service. If you're using a downloadable template or just want your family tree to have a polished look, pay to have a professional printing service print the tree. Using a professional service is a good idea if you'd like the family tree in a large format that you'll frame.[12]
- If you're including photographs, ask the printing service if they can digitally restore any old or damaged images.
-
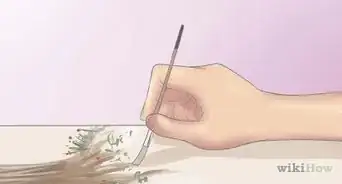
4Decorate the family tree. Once you've secured all of the information to the family tree, add embellishments and decorations. Consider adding scrap booking stickers or drawing illustrations around the tree. You can also include other textures to make the tree really stand out. For example, cut out leaves for the tree using wallpaper, maps, or scrap booking paper.[13]
- If you're making a family tree as part of a school project, have your child press their thumbs into ink. Make leaves on the tree from your child's thumbprints.


Community Q&A
-
QuestionHow do I do a family tree on a poster board?
 Community AnswerTry using different colors of paper and pasting it onto the poster board. Make sure you have a poster board big enough for all the names. You can also write the names directly onto the poster board with sharpie, or another marker if you don't want to glue paper onto it. Make sure to plan the layout beforehand.
 -
QuestionHow should you organize everything if there isn't enough room for everyone's descendants?
 Community AnswerConsider streamlining the family tree to only show ancestors for one person. That way, there's no need to list aunts, uncles, cousins, etc.
 -
QuestionWhat does genealogy mean?Community AnswerIt's basically your ancestry, like who originated from whom, the origins of your family. It's a compiled list, or in this case a family "tree" of descendants.
Things You'll Need
- Notebooks, index cards, or file folders
- Material for the family tree
- Pencils and pens
- Informational squares
- Glue or tape
- Scrapbooking decorations
- Templates, optional
- Photographs, optional


References
- ↑ https://www.smartdraw.com/family-tree/
- ↑ https://www.findmypast.com/content/10-tips-to-start-your-family-history-journey
- ↑ http://www.bbc.co.uk/history/familyhistory/get_started/get_started.shtml
- ↑ https://www.ancestry.com/
- ↑ http://howtoadult.com/how-to-layout-a-family-tree-12855604.html
- ↑ https://www.thoughtco.com/chart-and-display-your-family-tree-1420736
- ↑ http://howtoadult.com/how-to-layout-a-family-tree-12855604.html
- ↑ http://howtoadult.com/how-to-layout-a-family-tree-12855604.html
- ↑ http://howtoadult.com/how-to-layout-a-family-tree-12855604.html
About This Article