This article was co-authored by Sam Hubbard. Sam Hubbard is a Professional Carpenter and the Owner of Hubbard Carpentry and Remodeling. He has over 19 years of experience in the industry. Sam specializes in kitchen remodels, home woodworking, cabinetry, and handyman services.
This article has been viewed 95,779 times.
MDF, or medium-density fibreboard, is a type of engineered wood made by combining wax, resin, and wood fibres. Though MDF may look similar to plywood, the material itself is far denser, which means that cutting it takes some special blades and techniques.
Steps
Keeping Yourself Safe
-
1Put on thick working gloves and a long-sleeved shirt. Before handling or cutting through your MDF piece, make sure to put on a pair of heavy-duty working gloves and a durable, long-sleeved shirt. This will give you a small layer of defense against rough MDF edges and your saw blade.[1]
- To avoid getting caught in the saw blade, do not wear clothing with loose sleeves.
-
2Wear a dust mask and safety goggles. When cut, MDF releases a massive amount of dust particles into the air. To make sure this dust doesn’t get into your eyes or throat, wear a high quality dust mask and a pair of clear safety goggles while working.[2]
- MDF dust particles are not inherently dangerous, but the sheer amount of them may lead to unwanted irritation.
Advertisement -
3Make your cuts in a large, clear area. Since MDF releases so much dust, try to cut your wood outside or in an open room like a garage. If you don’t have a clear space to work in, open any windows or doors near the cutting area so the dust has a way to escape. If you’d like, place a fan in the room to help blow the dust outside.[3]
- Cover objects around your working area in thin plastic sheets to keep them from getting dirty.


Making Straight Cuts
-
1Attach a sturdy blade to a circular saw. To make straight cuts in your MDF, acquire a circular saw that has a cutting speed between 3,000 and 3,350 metres per second (9,800 and 11,000 ft/s). For the best cut possible, install a fine blade that has at least 60 teeth and a width of about 355 mm (14.0 in). For additional strength, pick a blade that has a carbide tip.
- You can find circular saws at most home improvement stores. High-quality models typically cost between $100 and $300.
- Before installing the blade, make sure you unplug the device to prevent any accidents.
-
2Adjust your blade’s depth so it is slightly lower than your board. Position your circular saw so that the bottom of the saw blade sits flush against the side of your MDF board. Then, loosen your saw’s depth knob or lever and carefully move the blade until the tip sits just below your MDF plank. When you’ve positioned the blade where you want it, retighten the depth knob or lever.[4]
- To ensure the blade cuts properly, try to position it so that the tip sits between 1⁄8 in (0.32 cm) and 1⁄4 in (0.64 cm) below the MDF plank.[5]
-
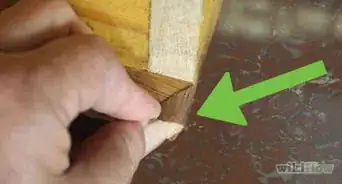
3Attach your board to a sturdy table. Place your MDF piece on a large working table or, if you’re cutting through the middle of the plank, place each end on a separate working table or saw horse. Make sure the area you need to cut hangs over the edge of the surface, then lock the MDF in place using heavy-duty clamps.
-
4Make a line over the area you want to cut through. Using woodworking tape or a pencil, create a line on top of your MDF piece indicating the area you wish to cut through. Since you can only cut through the wood once, double check the line’s length using a tape measure and its alignment using a level or L-square.
- If you’re using a pencil, make sure the line is thick enough that you can see it easily from a distance.
-
5Cut through the marked area using your circular saw. Line up the front of your circular saw with the beginning of your marked line. Then, turn the saw on and gently push it through your MDF piece. Do your best to hold the saw steady, and make sure your cutting speed is slow and consistent.[6]
- If you feel your saw jitter or kick, turn the device off and let it rest for a minute.


Creating Curved Cuts
-
1Get a jigsaw with a bi-metal cutting blade. To make curved cuts in your MDF piece, acquire a jigsaw that is compatible with quick-change blades. Then, purchase a bi-metal jigsaw blade and place it inside your device’s blade clamp mechanism. For the best results possible, look for a narrow blade that has lots of small teeth, such as a T-shank.[7]
- High-quality jigsaws normally cost between $80 and $200. Look for them at home improvement stores.
- For safety, unplug your device before installing the blade.
-
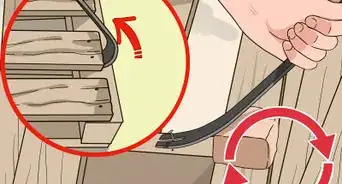
2Secure your MDF piece to a solid table. Set your plank of wood on a sturdy working table and position it so the area you need to cut hangs over the edge. Then, place large clamps around the edges of your MDF piece to keep it from moving around.
- If the area you’re cutting is in the middle of the MDF piece, place each end of the wood on a sturdy table or saw horse.
-
3Mark the area you want to cut. Using a pencil, draw a line on the surface of the wood showing where you intend to cut it. If necessary, use a drafting compass or stencils to create more precise curves.
-
4Use your jigsaw to cut through the marked area. Place the front of your jigsaw’s shoe at the start of the area you want to cut. Make sure the device’s blade lines up with your marked line, then turn the saw on and ease it into the wood. MDF is incredibly dense, so use slow, gentle motions to work your way through it.[8]


Things You’ll Need
Straight Cuts
- MDF piece
- Circular saw with a sturdy blade
- Solid working table
- Heavy-duty clamps
- Pencil or woodworking tape
- Tape measure
- Level or L-square
Curved Cuts
- MDF piece
- Jigsaw with a bi-metal blade
- Solid working table
- Heavy-duty clamps
- Pencil
- Drafting compass or stencils (optional)


References
- ↑ https://www.familyhandyman.com/woodworking/woodworking-tips/what-is-mdf-plus-tips-for-using-mdf/view-all/
- ↑ https://www.familyhandyman.com/woodworking/woodworking-tips/what-is-mdf-plus-tips-for-using-mdf/view-all/
- ↑ https://www.familyhandyman.com/woodworking/woodworking-tips/what-is-mdf-plus-tips-for-using-mdf/view-all/
- ↑ https://www.familyhandyman.com/tools/circular-saws/circular-saw-tips-and-techniques/view-all/
- ↑ https://www.youtube.com/watch?v=nvVFXJp-T40&feature=youtu.be&t=1m36s
- ↑ https://www.bhg.com/home-improvement/remodeling/carpentry/how-to-use-a-circular-saw/
- ↑ https://www.popularmechanics.com/home/tools/reviews/g1334/6-tips-to-get-the-most-from-your-jigsaw/
- ↑ https://www.bobvila.com/articles/how-to-use-a-jigsaw/
About This Article

Before cutting your MDF, put on gloves, a long-sleeved shirt, goggles, and a dust mask for safety. To make a straight cut, first grab a circular saw and attach a thick, sturdy blade to it. For the best cut possible, adjust the blade so that its bottom tip sits slightly lower than the side of your wood piece. When you’re ready to make the cut, secure the MDF to a sturdy working table and draw a line over the spot you want to cut through. Then, turn your saw on and gently guide it through the cutting line. If you want to make a curved cut, scroll down to learn how!