This article was co-authored by wikiHow staff writer, Hannah Madden. Hannah Madden is a writer, editor, and artist currently living in Portland, Oregon. In 2018, she graduated from Portland State University with a B.S. in Environmental Studies. Hannah enjoys writing articles about conservation, sustainability, and eco-friendly products. When she isn’t writing, you can find Hannah working on hand embroidery projects and listening to music.
There are 10 references cited in this article, which can be found at the bottom of the page.
The wikiHow Video Team also followed the article's instructions and verified that they work.
This article has been viewed 33,069 times.
Learn more...
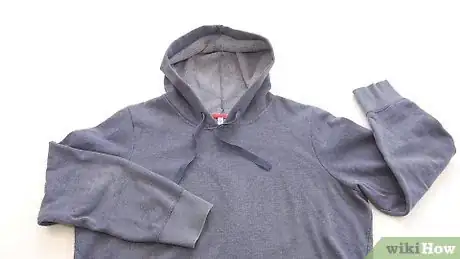
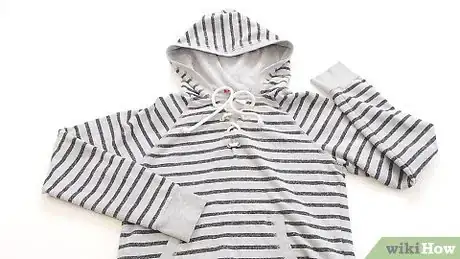
Hoodies are super versatile pieces, but they can get a little boring style-wise. If you want to freshen up your hoodie, you may be thinking about taking the sleeves off. You can make your hoodie into a vest or keep some of the sleeves for a short sleeve hoodie to spice up an old piece of clothing and make it look new again.
Steps
Making a Vest
-
1Spread your hoodie out face up on a flat surface. You can work on your table, countertop, or even the floor. You don’t need to iron your hoodie, but smooth it out as much as you can with your hands.[1]
Tip: Try to line up the side seams with each other so that your hoodie is laying evenly.
-
2Cut about 1 in (2.5 cm) away from the shoulder seam. You don’t have to be exact with your measurements, but try to start around 1 in (2.5 cm) away from the shoulder seam. Make your initial cut on the bottom armpit area.[2]
- You can always go back and cut more off, but you can’t put back anything that you’ve cut. It’s better to cut off too little than too much.
Advertisement -
3Follow the shoulder seam as you cut the sleeve off. Keep cutting up towards the top of your hoodie, using the shoulder seam as a guide. Your cut will make a slight curve as it goes upwards.[3]
- Your cuts don’t have to look perfect, but try to make them as smooth as possible.
-
4Position the cut sleeve on top of the next sleeve. Take the sleeve that you just cut off and line it up over the second sleeve. Match the shoulder seams in each sleeve so they are laying directly on top of each other.[4]
-
5Use the cut sleeve as a guide to cut your other sleeve. Use your scissors to cut off the second sleeve by following the curve of the first sleeve. This will ensure that your sleeves are cut off evenly so that your hoodie is symmetrical.[5]
- The edges of your hoodie won’t be hemmed, so they may fray a little bit. Cut off any loose threads with scissors to prevent your hoodie from unravelling.
Creating a Short Sleeve Hoodie
-
1Spread your sweatshirt out face up on a flat surface. You can work on a table, countertop, or the floor, as long as the surface is mostly flat. Smooth out your hoodie with your hands to get any wrinkles and creases out.[6]
-
2Place a T-shirt on top of your sweatshirt. Find a T-shirt from your closet that fits you well with sleeves that hit halfway between your shoulder and your elbow. Line up the neckline of the T-shirt with the neckline of your hoodie, then smooth them both out with your hands.[7]
- You’ll be using the T-shirt sleeves as a guide for your sweatshirt sleeve length, so make sure you’re happy with how long they are.
-
3Cut just underneath the T-shirt sleeves on each hoodie sleeve. Position your scissors right underneath the edges of the T-shirt sleeves and make your cut, following the T-shirt sleeves the whole time. Try to cut evenly and smoothly so that your sweatshirt looks even.[8]
- The sharper your scissors are, the more even and smooth your cuts will be.
-
4Roll the raw edges up for a finished look. Grab the edges of the sleeves you just cut and roll them up about 0.5 inches (1.3 cm) for a faux hemline. This is a more sporty and classic look.[9]
- If your hoodie is made of terrycloth, it will probably naturally roll up on its own.
Tip: If your sleeves aren’t staying rolled up, flatten them into place with an iron or a hair straightener.
-
5Fray the edges with scissors for a distressed look. Open your scissors up and position one of the blades on the raw edge of your hoodie sleeve. Rub the blade of the scissors back and forth over the raw edge until the loose threads start poking out. This is a more modern streetwear look that pairs well with jeans.[10]
- You can make your hoodie look more distressed by cutting a few small holes in the bottom hem and up near your shoulders.
Things You’ll Need
Making a Vest
- Scissors
Creating a Short Sleeve Hoodie
- Scissors
- T-shirt
References
- ↑ https://www.youtube.com/watch?v=fOeHpvuqTr0&feature=youtu.be&t=49
- ↑ https://www.youtube.com/watch?v=fOeHpvuqTr0&feature=youtu.be&t=69
- ↑ https://www.youtube.com/watch?v=pK_g38Pg9Q4&feature=youtu.be&t=32
- ↑ https://www.youtube.com/watch?v=pK_g38Pg9Q4&feature=youtu.be&t=58
- ↑ https://www.youtube.com/watch?v=pK_g38Pg9Q4&feature=youtu.be&t=71
- ↑ https://www.youtube.com/watch?v=TKxshj33XPA&feature=youtu.be&t=139
- ↑ https://www.youtube.com/watch?v=Bz6rBP35fRI&feature=youtu.be&t=135
- ↑ https://www.youtube.com/watch?v=Bz6rBP35fRI&feature=youtu.be&t=151
- ↑ https://www.youtube.com/watch?v=Bz6rBP35fRI&feature=youtu.be&t=186
