This article was co-authored by wikiHow staff writer, Travis Boylls. Travis Boylls is a Technology Writer and Editor for wikiHow. Travis has experience writing technology-related articles, providing software customer service, and in graphic design. He specializes in Windows, macOS, Android, iOS, and Linux platforms. He studied graphic design at Pikes Peak Community College.
The wikiHow Tech Team also followed the article's instructions and verified that they work.
This article has been viewed 229,496 times.
Learn more...
Unturned is an entertaining and user-friendly zombie-survival game. Playing singleplayer in Unturned is fun, but playing with other people is more fun. Luckily, Nelson (the creator of Unturned) has added Multiplayer options and servers. These allow people from all of the world to connect and slay zombies together. This wikiHow teaches you how to create an Unturned server.
Steps
Creating a Server and Server Files
-
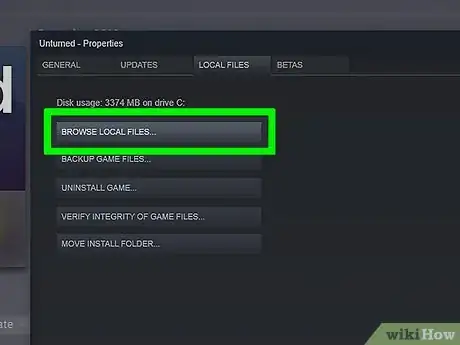
1Access your Local Files. These files control what your game looks like, and all the stats of the game. You can access your local files in Steam. Using the following steps to open your local files.
- Open Steam.
- Click the Library tab at the top of the screen.
- Right-click Unturned in the list of games..
- Click Properties at the bottom of the menu.
- Click the Local Files tab.
- Click Browse Local Files to open the Local File folder in Windows Explorer.
-
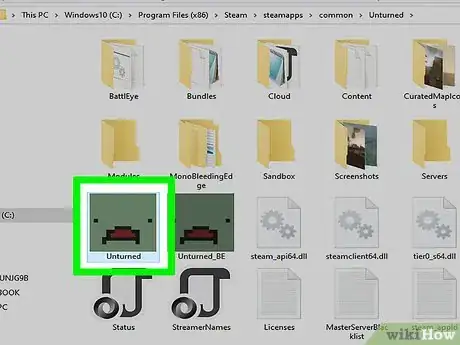
2Right-click the Unturned.exe. This is the Unturned launch file. It has the green Unturned icon that resembles a zombie's face. Right-clicking it displays a menu to the right of the file.Advertisement
-
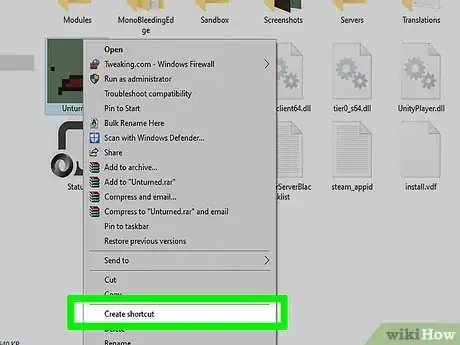
3Click Create Shortcut. This will create another executable file called "Unturned.exe - Shortcut". This will be the file you will use to start your server later.
-
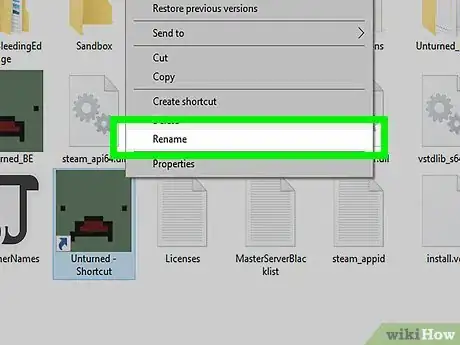
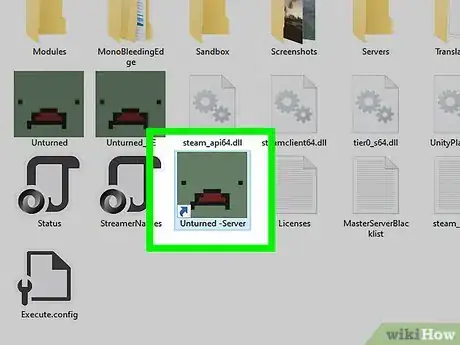
4Rename the shortcut. To rename the shortcut, click on it once to select it, then click it again to highlight the file name. Type a new file name. You can name it anything you want. It's recommended you name it something like "Unturned - server" or something similar that you can remember later on.
-
5Right-click the shortcut. This displays a menu next to the file. Make sure you right-click the new shortcut and not the original "Unturned.exe" file.
-
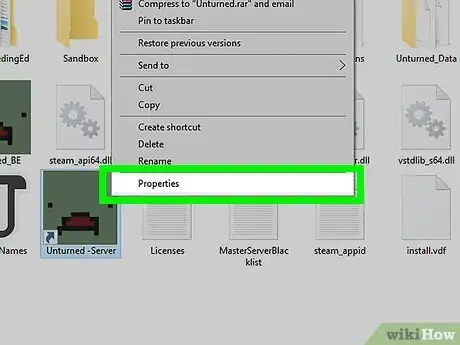
6Click Properties. It's at the bottom of the menu that appears when you right-click the Unturned shortcut file.
-
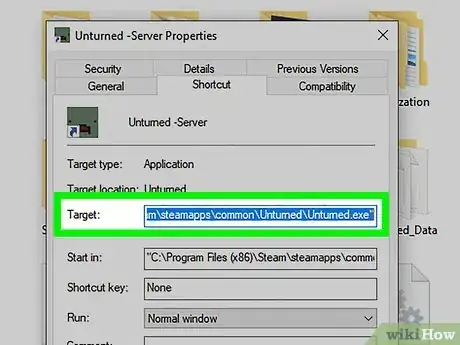
7Place the target location in quotations. The target location is in the field next to the field labeled "Target". It should read something like this:"C:\Program Files (x86)\Steam\steamapps\common\Unturned\Unturned.exe". If it is not already in quotations marks, add a quotation mark before and after the text in the field.
-
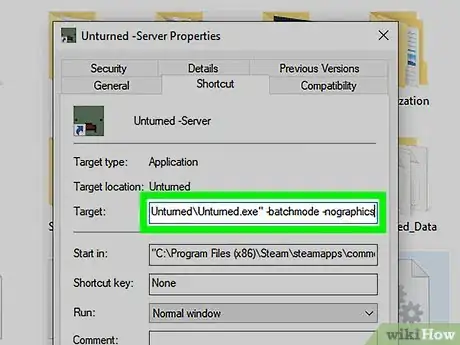
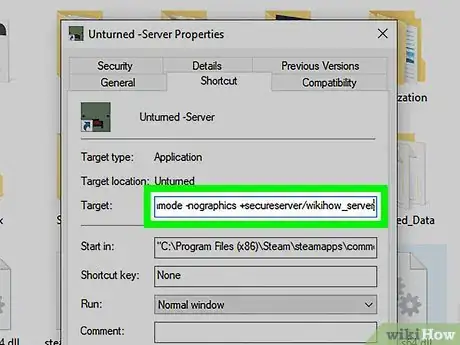
8Add a space then type -batchmode - nographics. This goes after the target location in the "Target Field".
-
9Add a space and type +secureserver/server_name. This goes after "-nographics" in the "Target" field. Replace "server_name" with whatever you want to name your server. Your final target field should look like: "C:\Program Files (x86)\Steam\steamapps\common\Unturned\Unturned.exe" -batchmode -nographics +Secureserver/Wikihow
- If you want to create a local server, replace "secureserver" with "LAN server". Only players on your local network will be able to join a LAN server.[1]
-
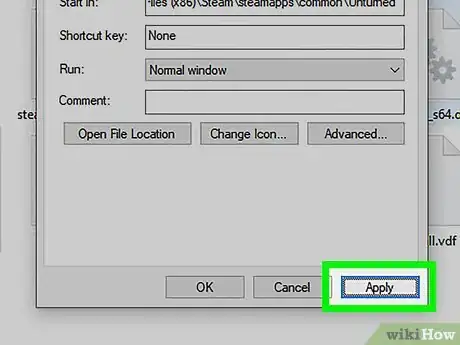
10Click Apply followed by Ok. This applies the changes to the file and closes the window.
-
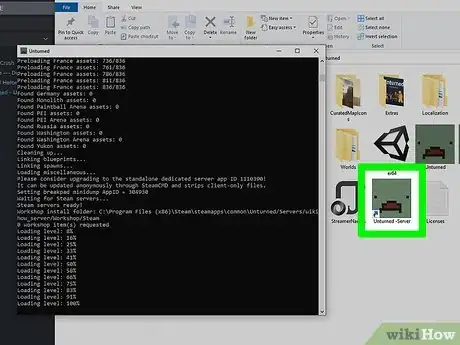
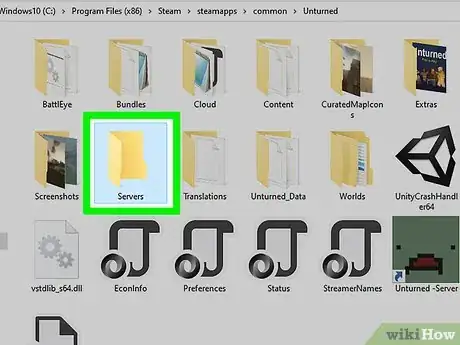
11Run the shortcut. You should see a command prompt window open. This also creates a new folder created called "Servers". Once the servers folder is created, close the Command Prompt window.
Editing the Command.dat File
-
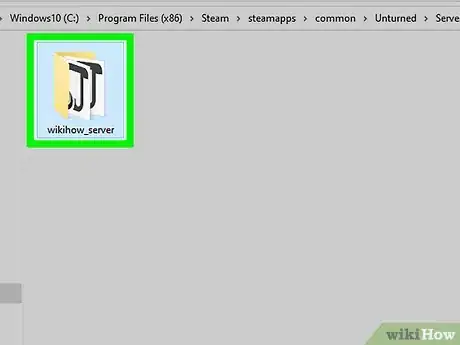
1Open the Servers folder. It's the newly created folder in your local files.
-
2Open the folder named for your server. This folder should be named whatever you put in earlier after the secureserver. For example, if you put +Secureserver/Wikihow, the folder should be called "Wikihow".
-
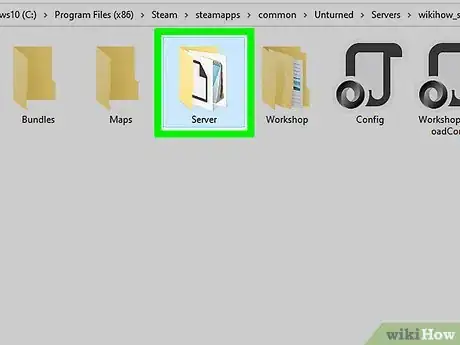
3Open the Server folder. It's in the folder named after your server.
-
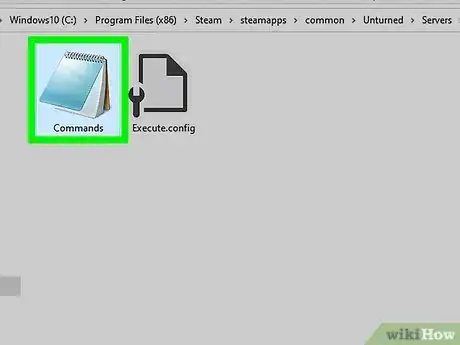
4Double-click Commands.dat. This opens the Command.dat file.
- If Windows doesn't recognize the file when you double-click on it, right-click on it and go to Open With. Click Notepad as the program to open the DAT file with it.
-
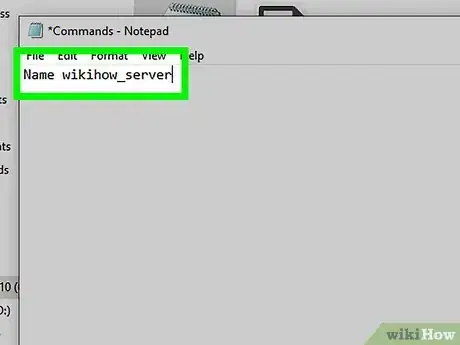
5Type Name followed by the name of your server and press ↵ Enter. For example, Name wikiHow Server. This will be what other people over the internet see when they search for your server. The title can only be 50 characters or less.
-
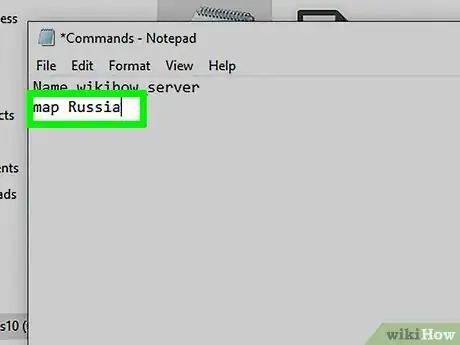
6Type map followed by the map you want to play on your server. For example map Russia. Whichever map you want your server to be on. Current maps include; Hawaii, Russia, Germany, PEI, Yukon, or Washington.
- You can also enter the name of a custom map you downloaded.
-
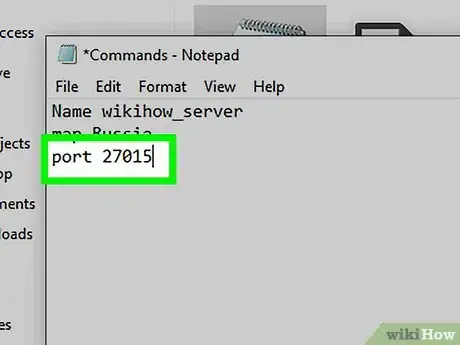
7Press ↵ Enter and type port 27015. This will be the Port your server uses to connect to other players. There are other ports you can connect to, but it's recommended you use port 27015.
-
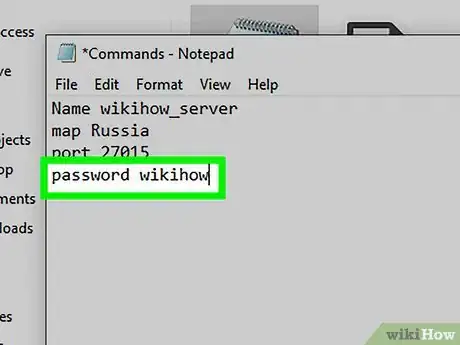
8Press ↵ Enter and type password followed by a password (optional). If you want to add a password to your server, you can set on by typing "password" followed by the password you want to set.
-
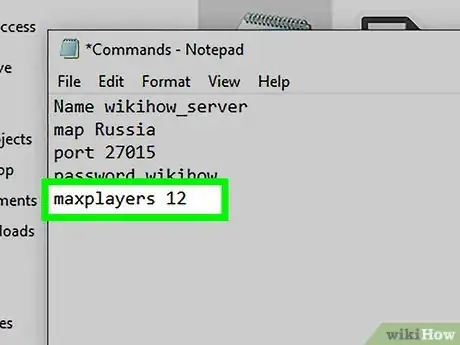
9Press ↵ Enter and type maxplayers 12. This sets how many players can connect to your server at once.
-
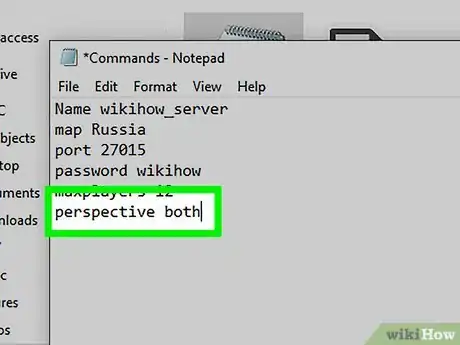
10Press ↵ Enter and type perspective both. This sets the player perspective. Perspective can be set to only allow players to run the game through first-person, third-person, or both. it's recommended you set it to Both.
-
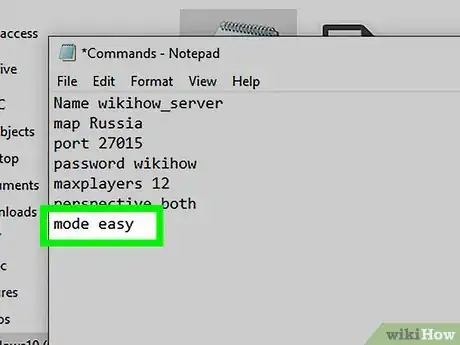
11Press ↵ Enter and type mode followed by the difficulty. This sets the difficulty for your server. More difficult levels have more rewards. Difficulty levels include; Easy, Normal, Hardcore, and Gold.[2]
- Gold mode has twice the gold and experience as normal mode.
-
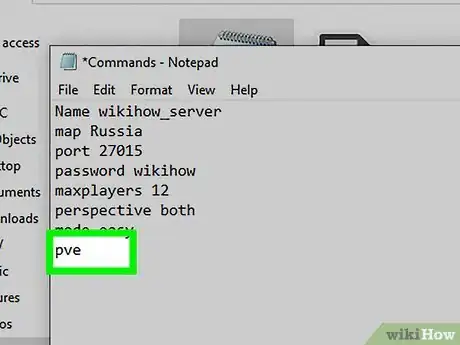
12Press ↵ Enter and type pvp or pve. This sets the game type. You can set the game type as Player-vs-player (PVP) or Player-vs-environment (PVE).
-
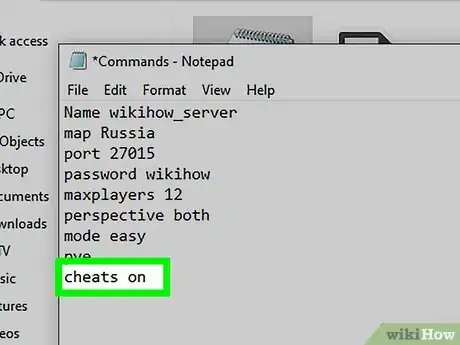
13Press ↵ Enter and type cheats on. This sets whether admins can use cheats and commands or not. It's recommended you turn cheats on.
-
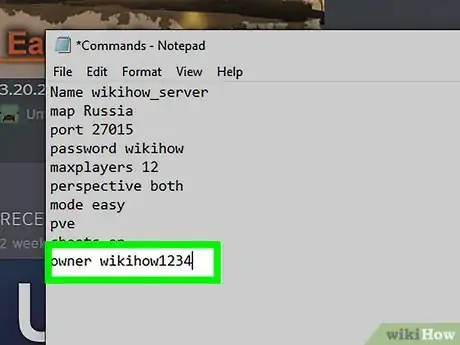
14Press ↵ Enter and type owner followed by your Steam ID. This sets you as the owner of the server. You will automatically be made an admin automatically when you connect to your server.
-
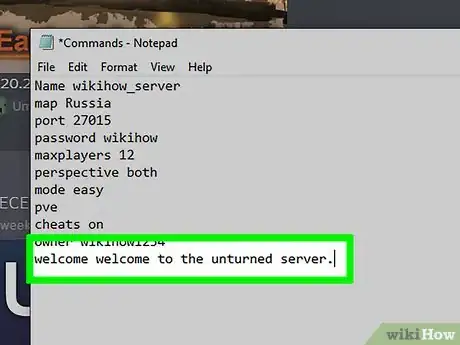
15Press ↵ Enter and type Welcome followed by a welcome message. This is the message the server will automatically send in chat to anyone who joins. It can be friendly or stating the rules.
-
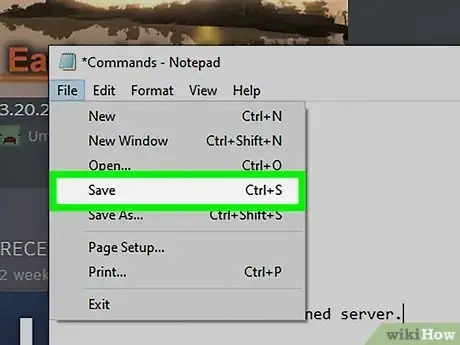
16Save the Commands.dat file. To save the DAT file, click File in the menu bar at the top, and click Save.
-
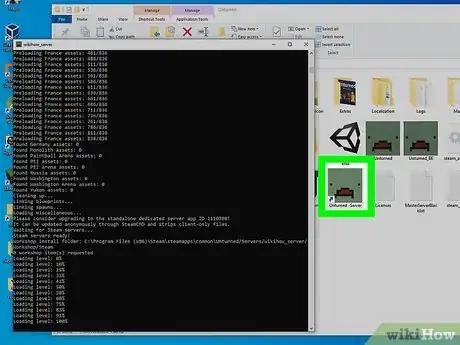
17Run your server again. Go back to the Unturned folder and double-click the server file. All of the changes should now appear upon starting your server. The top should say something such as "Successfully set name to Wikihow!"
-
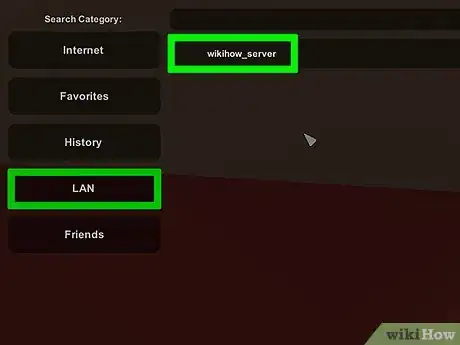
18Run your Unturned game and connect to your server. To connect, go to Play, Servers, then on the left click LAN. Your server should pop up, connect to it and have fun!
- If you want to get people not on your wifi, you'll need to port forward your game.
Community Q&A
-
QuestionWhat does "+SecureServer" do? Does it make it so that people can't hack the IP address? I am looking into making a server, and hosts are too expensive.Secure Servers will automatically kick or ban people who have been VAC-banned. Yes, secure servers should prevent most hacking and should make your IP address more secure.
-
QuestionWhen I try to open the COMMANDS.DAT file it only opens in Windows Power Media Player, and there is no option to open this file with Notepad. Any ideas?If you are using Windows 10 (the OS used for this article), right-click the file and select "Open With". Select "Choose another app"; Notepad should be on that list.
-
QuestionCan you explain, "If you want to get people not on your Wi-Fi, you'll need to port forward your game"?Port forwarding opens up ports on your router for other people to connect through. The ports for Unturned are 27015-27017. To open up ports/port forward, you will need to access your router. You can find your router through Command Prompt. People who have connected through your Wi-Fi connection at home can connect to your server with no need for port forwarding. However, to get a friend from another house, another state, or country to connect, you will need to port forward. Your router's manual or manufacturer's support online will have details specific to your model.
Warnings
- Be careful once you shut down your server. If you just click the red X in the corner, it might not save properly. Always type in "save", then press enter. Then type in "Shutdown 1". This will save your server, and then shut it down in 1 second.⧼thumbs_response⧽
References
About This Article
1. Open Steam and click Library.
2. Right-click Unturned and click Properties.
3. Click the Local Files tab and click Browse Local Files.
4. Right-click "Unturned.exe" and click Create Shortcut.
5. Rename the shortcut.
6. Right-click the shortcut and click Properties.
7. Put the location next to "Target" in quotation marks.
8. Type "-batchmode -nographics" next to location in the "Target" field.
9. Add "+secureserver/" in the "Target" field followed by the name of your server.
10. Click Apply and close the window.
11. Run the shortcut and then close the command prompt when new folders are created.
12. Open the Servers folder followed by the folder with your server name.
13. Open the "Server" folder and then open the "Command.dat" file in Notepad.
14. Type "Name" followed by the name of your server on the first line.
15. Type "map" followed by the map you want to play on in your server on the second line.
16. Type "port 27015" on the third line.
17. Save the command.dat file.
18. Run the server shortcut file.
19. Connect to your server in Unturned.
