This article was co-authored by wikiHow staff writer, Darlene Antonelli, MA. Darlene Antonelli is a Technology Writer and Editor for wikiHow. Darlene has experience teaching college courses, writing technology-related articles, and working hands-on in the technology field. She earned an MA in Writing from Rowan University in 2012 and wrote her thesis on online communities and the personalities curated in such communities.
This article has been viewed 12,265 times.
Learn more...
This wikiHow will teach you how to create a Shopify store using the mobile app and website. If you sign up with Shopify and open your first store, you'll get a free 14-day trial of the service.
Steps
Using the Mobile App
-
1Open Shopify. This app icon looks like a green bag featuring a white dollar symbol ($) that you can find on one of your Home screens, in the app drawer, or by searching.
- If you don't have the Shopify mobile app, you can get it for free from the App Store or Google Play Store.
-
2Tap Sign Up or Log in. If you don't have a Shopify account, you'll need to enter your email address, create a password, and provide a name for your store as well as your physical address.
- If you already have an account, you'll be directed to the Home tab once you log in and won't be eligible for the free 14-day trial.
- Your shop is pretty much set up now, but you can customize it further by continuing.
Advertisement -
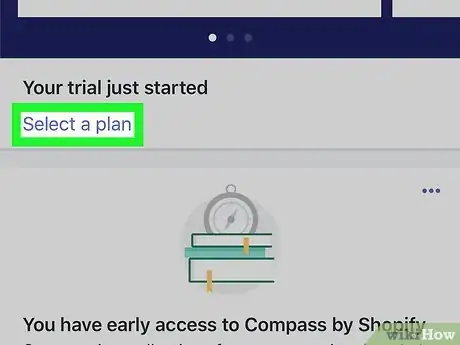
3Tap SELECT A PLAN (if you want to use Shopify more than 14 days). You'll need to set up a plan to set up your store. If this is your first time using Shopify, you'll qualify for a 14-day free trial.
- You'll see this under the header "Your trial just started" if you created a new account.
- You can tap on a plan to learn more about it, then tap Choose this plan to continue. It'll be used after your 14-day trial ends if you add a payment method.
- If you want to use your 14-day free trial without entering payment information, you can skip this step.
-
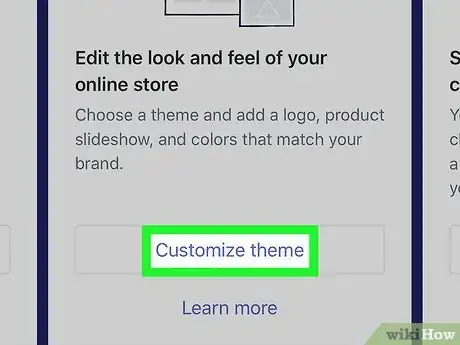
4Tap CUSTOMIZE THEME. You'll see this in the tile above "Select a Plan." You can either upload your own theme or use some of the offered designs, some of which are free to use.
- You'll see the theme you have active, and you can also choose to "Customize" your current theme, "Upload theme," and "Explore free themes."
- You can return to the main store creation screen by tapping the x in the top right corner once you have a theme chosen.
-
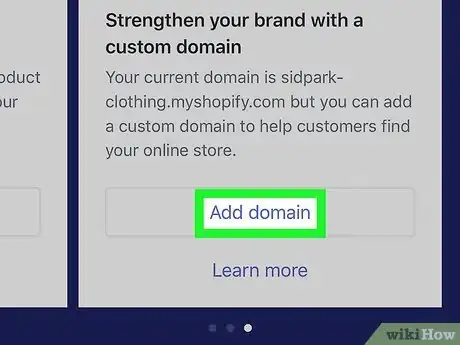
5Tap ADD DOMAIN. This is in the tile to the right of the "Customize Theme" tile.
- You can opt to "Buy new domain" if you don't like the free one Shopify offers (it usually ends with ".myshopify.com."
- You can also edit all this information later by tapping the Store tab that's located in the menu at the bottom of your screen with the icon of a storefront. You'll see your online store located at the bottom of the menu, and if you tap it, you'll be able to manage the theme, domain, and plan.
- Your store is pretty much set up and ready to use now.
Using the Website
-
1Go to https://shopify.com. You can use any web browser to create a store on Shopify.
-
2Enter your email address in the text field in the center of the page. This will only work if you don't have a Shopify account associated with that email address.
-
3Click Start free trial. This purple button is below the text field where you entered your email address. You'll be able to try Shopify for free for 14 days without needing to add a credit card.
-
4Create your password and enter your store name. Your email address should be automatically populated in the top text field. When you enter your store name, Shopify will make sure that shop name is not already used. You might have to enter a few different store names to find one that isn't taken.
-
5Click Create your store. This purple button is below the text fields and will start the process of creating your store.
- Your shop is pretty much set up now, but you can customize it further by continuing.
-
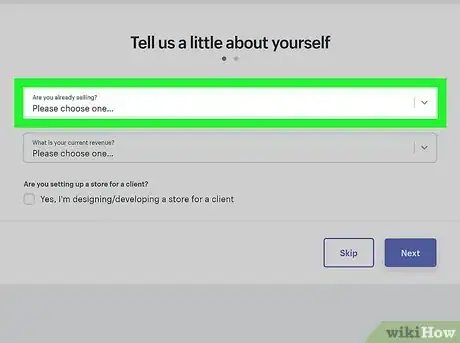
6Click the drop-down arrows to answer the questions or click Skip. You'll need to answer using the drop-down menus what and how you're selling.
- Click Next to continue if you didn't skip.
-
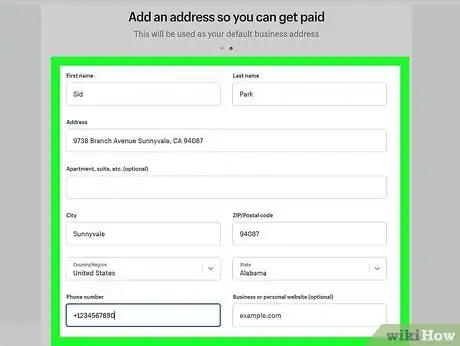
7Add an address. You can type in your address to be used as your default business address.
- Click Enter my store to continue.
-
8Click Select a plan (if you want to use Shopify more than 14 days). You'll need to set up a plan to use your store for more than 14 days.
- You'll see this as a floating bar that follows you when you scroll up and down the page.
- You can click on a plan to learn more about it, then tap Start plan to continue. It'll be used after your 14-day trial ends if you add a payment method.
- If you want to use your 14-day free trial without entering payment information, you can skip this step.
-
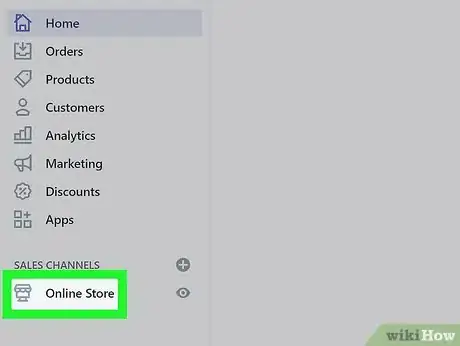
9Click the Online Store tab. You'll see this in the menu on the left side of the page under "Sales Channels."
-
10Choose a theme for your store. Either click Customize next to your current theme or click Explore free themes or Visit Theme Store to change your current theme.
-
11Set a domain for your store. Click Domains from the menu on the left side of the page under your store.
- You can skip this step to use the domain offered by Shopify (it normally ends in ".myshopify.com").
- You can also buy a domain or link to a domain you've already purchased.
-
12Add products to your store. Click Products in the menu on the left side of the page under Home and Orders.
- Click Add product in the middle of the page to create a product listing.
About This Article
1. Open Shopify.
2. Tap Sign Up or Log in.
3. Tap Select a Plan if you want to continue using Shopify after the 14-day free trial.
4. Tap Customize Theme.
5. Tap Add Domain.







-Step-20-Version-3.webp)


