This article was co-authored by wikiHow Staff. Our trained team of editors and researchers validate articles for accuracy and comprehensiveness. wikiHow's Content Management Team carefully monitors the work from our editorial staff to ensure that each article is backed by trusted research and meets our high quality standards.
This article has been viewed 31,212 times.
Learn more...
Before making a pull request on Github, you will need to create your own branch off the master branch and make sure it is up to date. After that you are free to make and commit changes without affecting the main branch. Once a commit is made, you can create the Pull Request on GitHub, then merge your changes back into the main branch. You can use both the Git command line as well as the Github web interface to perform much of this process.
Steps
Creating a New Branch
-
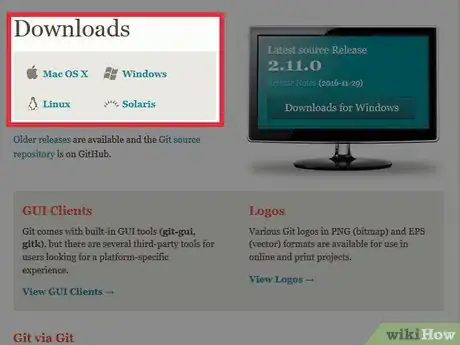
1Open Git. If you do not already have a Git program, go to https://git-scm.com/downloads and choose and installer for the platform you are using.
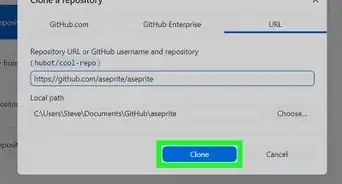
- If you are setting up git for the first time you also need to clone or import/create a repository before contributing to it.
-
2Navigate to your projects directory. Enter “cd <path_to_project_folder>” in the command line and hit ↵ Enter, where <path_to_project_folder> is the directory chain that leads to where you cloned or created your project folder.
- You can drag and drop the folder into the Git command window to automatically fill out the directory path.
Advertisement -
3Make sure your repository is up to date. Enter “git pull origin master” into the command line and hit ↵ Enter. A message will appear letting you know that repository is up to date.
- Master is the default branch on a project.
-
4Navigate to the github repository page. Open your web browser and enter your repository’s unique github URL.
-
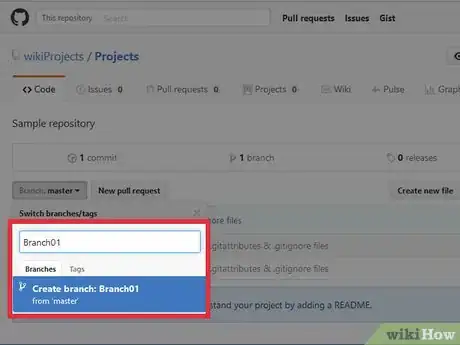
5Click the “branch:master” dropdown”. This is located in the upper left of the page and will open a list of other branches and a text box.
-
6Enter a branch name and click “Create branch” when it appears. This will create a new branch off the master branch using whatever name you entered into the text box.
- You can also create a branch from the command line. Enter “git checkout branch -b <branch_name>” and hit ↵ Enter, where <branch_name> is whatever you want your branch to be called.[1]
- You can now use “git commit” and “git push” to safely make changes to your branch without affecting the main project. Making a pull request will allow others to review and discuss your changes before merging them back into the main branch.[2]
-
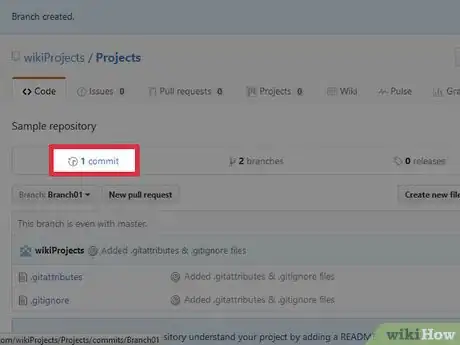
7Commit changes to your new branch. Click the Pencil icon to edit a file on the repository. Once edits are made, enter a commit message and click “Commit” from the window below the editing area.
- You can also make commits from the command line. This is useful when making changes to files locally rather than on the git website. Enter “git commit -m <message>” into the command line and hit ↵ Enter after making changes to a file. <Message> should be a brief description of the changes you made.
- Commit message text can be anything, but something here is required.
Making a Pull Request
-
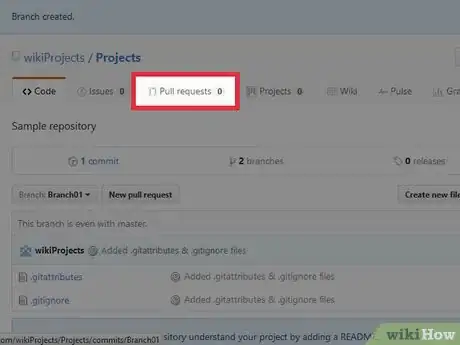
1Click the “Pull Requests” tab. This is located along the top menu bar on your repository page.
- A Pull Request is a Git feature used to present changes made on independent branches for review by collaborators before being merged into the main project.
-
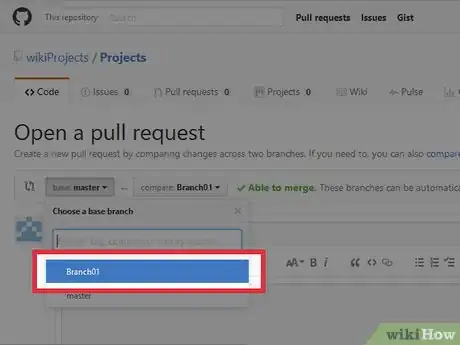
2Select the branch you created from the list. This will display the changes you made compared with the original content on the master branch.
-
3Click “Create Pull Request”. Once you are satisfied with the state of your changes, this is the green button in the upper left, by the branch dropdown.
-
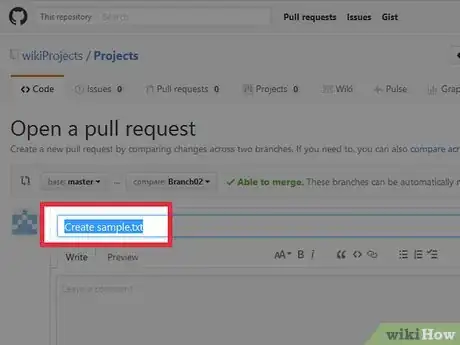
4Enter a name/description for your pull request. Use these fields to help identify and briefly describe the change you are making to other collaborators.
-
5Click “Create Pull Request”. This will create the pull request with the entered name and description.
Merging a Pull Request
-
1Click “Merge Pull Request”. This button appears in the lower right once the pull request has been successfully created.
- You can also use “git merge <branch_name>” in the command line to perform the same action.
-
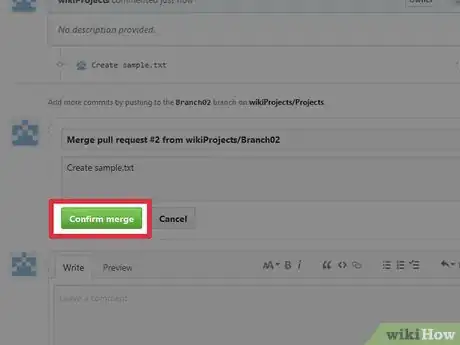
2Click “Confirm merge”. A notification will appear informing you that the pull request was successfully merged back into the master branch. Since your branch is no longer necessary, you will be prompted to delete it.[3]
- If you have any merge conflicts, you will be notified and unable to proceed with the merge. You will need to go back and re-pull from the master branch to make your own branch up to date with any changes, then create a new pull request.
-
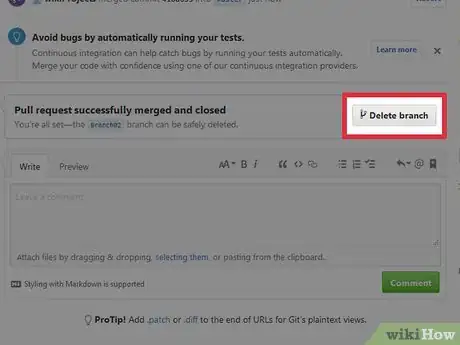
3Click “Delete Branch”. This will appear in the notification next to the purple branch icon. Deleting merged and outdated branches is a good way to keep a project organized and easy to manage.
