This article was co-authored by wikiHow Staff. Our trained team of editors and researchers validate articles for accuracy and comprehensiveness. wikiHow's Content Management Team carefully monitors the work from our editorial staff to ensure that each article is backed by trusted research and meets our high quality standards.
The wikiHow Tech Team also followed the article's instructions and verified that they work.
This article has been viewed 52,495 times.
Learn more...
Git is a very common tool in collaborative software development. Cloning a repository locally stores the latest changes of a project, allowing you to branch off and make your own edits without immediately affecting someone else’s work. To do this, you will need to download Git or other Git-supported software, locate the repository you wish to clone, and specify a location to save the cloned repository. This can be done from the command line program, or with a program’s supported graphical user interface (GUI).[1]
Steps
Using the Command Line
-
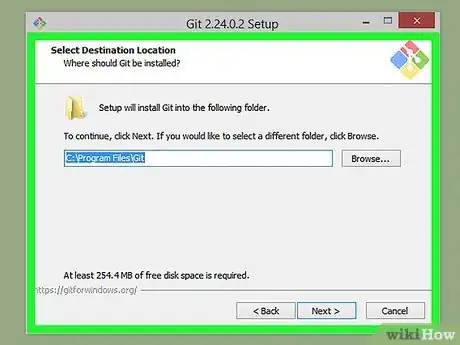
1Download and install Git. Go to https://git-scm.com/downloads and select the download for the platform you are using.
-
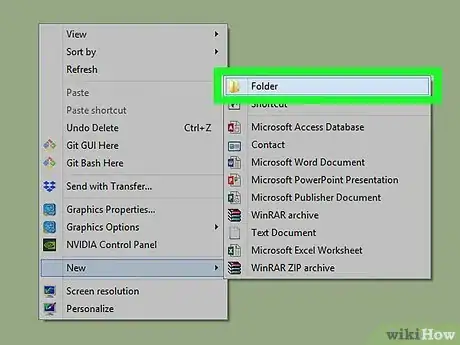
2Create a directory for your repository. Navigate to a location of your choosing in your computer. Then right-click (or Ctrl + click) and select “New Folder”.
- For simplicity, it may be best to create your first repository folder on the Desktop.
Advertisement -
3Open Git CMD. This program is installed along with the git tools, however you can also use the natively installed Command Prompt (Windows) or Terminal (Mac/Linux).
-
4Navigate to your target directory in the command line. Enter the “cd” command following by the path to the repository folder you created. Folders in the path are separated by “\”. Hit ↵ Enter to complete the action.
- For example, a folder on the desktop for Windows would use the command “cd c:\users\[username]\desktop\[foldername]”
- “cd” stands for “change directory”
- You can change directories one at a time instead of all at once if you find it faster to type: “cd desktop” ↵ Enter “cd folder name” ↵ Enter.
-
5Navigate to the repository page in your web browser. Go to the github (or whichever git alternative) page of the repository you are trying to clone. The source location of the repository will be displayed on the repository page.
- The exact location of the source location will vary depending on which repository site you are using, but they are usually located near the top for easy access. Look for a URL.
-
6Copy the source location. Click the source location (typically a URL starting with “https” or “ssh”) and hit Ctrl+C or ⌘ Cmd+C to copy.
-
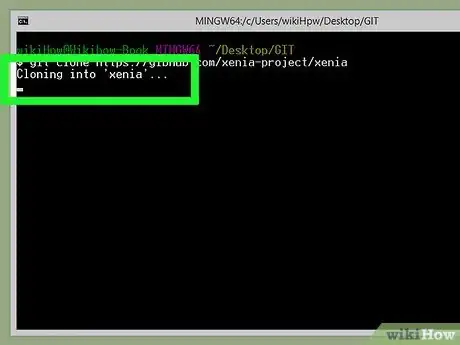
7Enter “git clone” followed by the source location into the command line. The “git” command tells the command line you are using a Git function, and “clone” tells it to clone the location following the command. Paste or type out the source location after the command.
- In order to paste into the Windows command line, you have to right-click and select “Paste” from the context menu. This is not necessary in the Mac or Linux Terminal.
-
8Hit ↵ Enter. The cloning process will begin and display its progress in the command line. You will be notified when the process in completed by a message in the command line.
Using the Git GUI
-
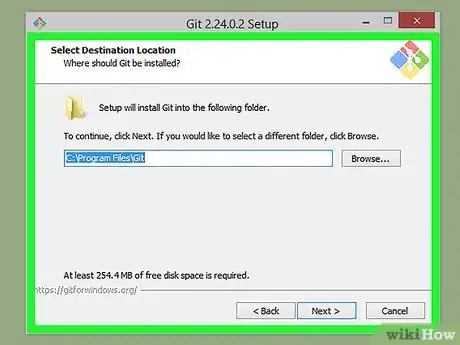
1Download and install Git. Go to https://git-scm.com/downloads and select the download for the platform you are using.
-
2Create a directory for your repository. Navigate to a location of your choosing your computer. Then right-click (or Ctrl + click) and select “New Folder”.
- For simplicity, it may be best to create your first repository folder on the Desktop.
-
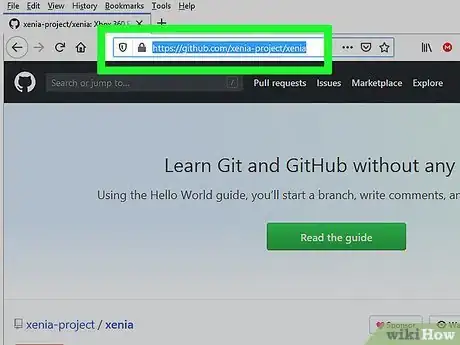
3Navigate to the repository page in your web browser. Go to the github (or whichever git product) page of the repository you are trying to clone. The source location of the repository will be displayed on the repository page.
- The exact location of the source location will vary depending on which repository site you are using, but they are usually located near the top for easy access. Look for a URL.
-
4Copy the source location. Click the source location (typically a URL starting with “https” or “ssh”) and hit Ctrl+C or ⌘ Cmd+C to copy.
-
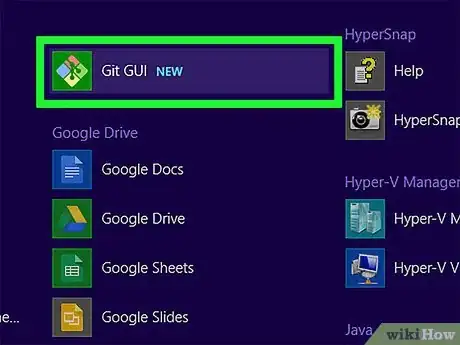
5Open Git GUI. This program is installed along with the git tools. Instead of booting into a text command line, you will see a window with clickable buttons.
-
6Click “Clone Repository”. This is the first option on the boot splash screen.
- You can also select “Clone” from “Repository” dropdown menu.
-
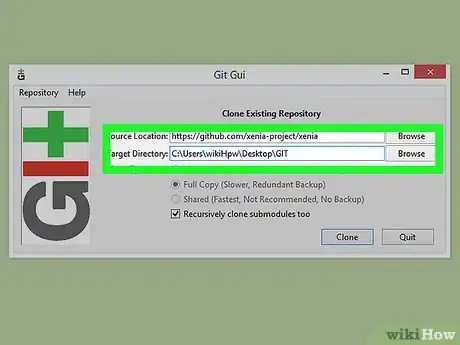
7Enter the source location. Paste or type the source location into this field.
-
8Enter target directory. Enter the path to the repository folder you created.
- You can also click “Browse” to search for the folder without having to type it out.
-
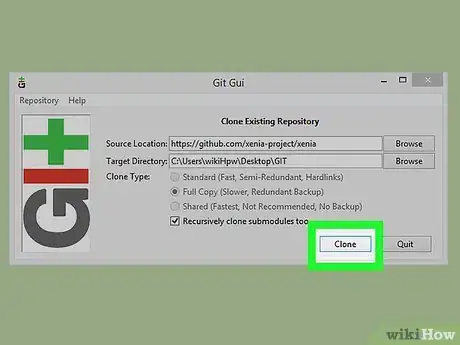
9Click “Clone”. The GUI will display your progress and notify you once the clone is complete.
Using Visual Studio
-
1Navigate to the repository page in your web browser. Go to the github (or whichever git product) page of the repository you are trying to clone. The source location of the repository will be displayed on the repository page.
- The exact location of the source location will vary depending on which repository site you are using, but they are usually located near the top for easy access. Look for a URL.
-
2Copy the source location. Click the source location (typically a URL starting with “https” or “ssh”) and hit Ctrl+C or ⌘ Cmd+C to copy.
-
3Open Visual Studio. Visual Studio is common in Windows development environments, but is not free. You can download VS Express to get a stripped down free edition.
-
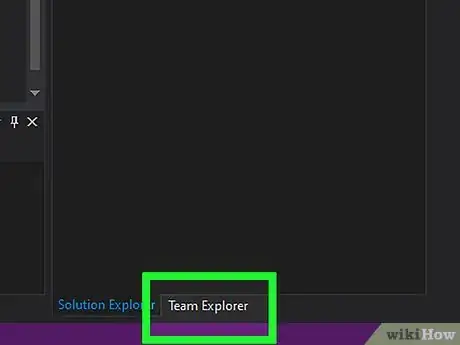
4Select the “Team Explorer” tab. This is located in the bottom of right-hand sidebar.
-
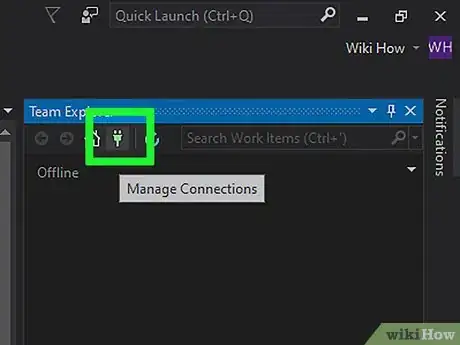
5Click the “Manage Connections” button. This button is represented by the plug icon and is located in the top menu bar of the right sidebar.
-
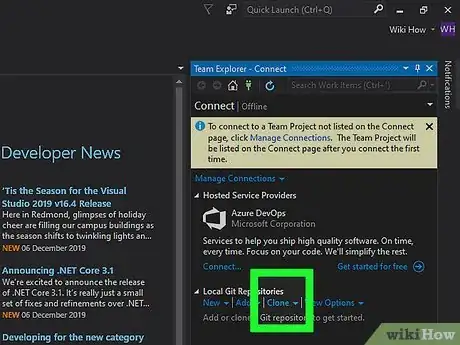
6Click “Clone”. This is located in the “Local git repositories” section in the right sidebar.
-
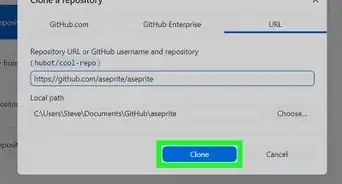
7Enter or paste the source location into the text field. Once in the field, the “Clone” action button will become clickable.
-
8Click “Clone”. This button is located below the source location field. Once clicked a progress bar will appear displaying the clone process. The process is complete once the bar is filled.
- Cloned repositories are automatically cloned to a local directory in your visual studio directory.[2]
