This article was co-authored by wikiHow Staff. Our trained team of editors and researchers validate articles for accuracy and comprehensiveness. wikiHow's Content Management Team carefully monitors the work from our editorial staff to ensure that each article is backed by trusted research and meets our high quality standards.
The wikiHow Video Team also followed the article's instructions and verified that they work.
This article has been viewed 55,841 times.
Learn more...
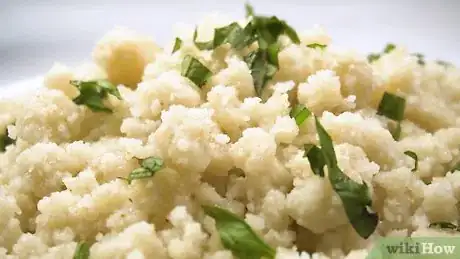
Semolina most commonly refers to a byproduct of milled wheat that has a courser, yellower texture than regular all-purpose flour.[1] It is typically used to make couscous, pastas, breads, porridge, and even a British pudding dessert. Whether using it as an ingredient or the centerpiece itself, cooking semolina is simple and tasty.
Ingredients
- 24 ounces (680 g) Semolina flour
- 2 3⁄4 cups (650 mL) water
- 1⁄3 cup (79 mL) oil
- salt to taste
- 2 whole eggs
- 4 egg yolks
- 10 ounces (280 g) Semolina flour
- 2 cups (470 mL) milk
- 1 cup (240 mL) water
- 1⁄4 teaspoon (1.2 mL) salt
- 2.6 ounces (74 g) Semolina flour
Steps
Cooking Semolina Couscous
-
1Mix 1 1⁄4 cups (300 mL) of water into all of the flour in a large bowl. Use a hand mixer or a wooden spoon to stir thoroughly. Be sure that you get as many of the flour lumps out as you can.
-
2Fill a steamer pot halfway and bring the water to a boil. You steamer should have a water pot on the bottom followed by a second level for the couscous mixture to be cooked above the water. Lastly, you will have a lid to top it off.
- You can certainly use another steamer setup if you have one, so long as the mixture is separate from the boiling water.
Advertisement -
3Steam the flour mixture for 40 minutes. Make sure the water below is not bubbling up into your mixture and over wetting it. Lastly, don’t forget to cover the pot so the steam will stay trapped inside while it cooks.
-
4Remove the flour mixture and mix in 1 1⁄2 cups (350 mL) of water, all of the oil and salt to taste. You will want to mix the new ingredients in well.
- A hand-mixer will work especially well for mixing in the additional wet ingredients.
- Mixing for 4-5 minutes should be sufficient to adhere the mixture and the new liquids.
-
5Let your mixture set for 30 minutes. Here, the water and oil are saturating into the flour, similar to when working with pasta. If leaving for longer, the couscous can become slightly tougher. Less time and it will be too moist.
-
6Steam for an additional 30 minutes. Using the same setup as before, you will add the mixture above boiling water and cover.
- Once you have finished steaming, you will be done. So, this is often a good time to cook any meat or vegetables you intend to add to your dish. Typical additions include vegetables, chicken and chickpeas.
-
7Plate your dish. If the couscous seems too wet or moist, you can press it through a strainer to help remove some excess moisture.
Making Semolina Pasta
-
1Mix the eggs and egg yolks into all of the flour by hand on a hard surface. Make a sort of crater in the flour so your eggs don’t run out.
- Often, the addition of oil or water will make the noodles come out too sticky to handle. If you are needing more moisture, consider adding another egg white with a little flour to balance.[4]
- Mix by hand to ensure you get the right elasticity. If the pasta feels too wet and sticky after about 10 minutes of mixing, add a little flour.
- You can add a little salt at this point to avoid having to salt too much of your cooking water when the time comes, if you like.
-
2Let your dough rest for 1-3 hours. Anything above one hour up to about three will produce pretty consistently equivalent results. The less time the dough rests, the tougher it will be to work later on.[5]
-
3Roll your dough out. Using a wood roller, begin to roll your dough into a long, mostly equal width form. This is what you will feed into your pasta roller. If you are doing the process entirely by hand, you will want to continue rolling until you get your desired thickness.
- If making a stuffed pasta, you will want to roll extra thin since it will be double the thickness when you combine the top and bottom portions.
- If using an attachment to roll to your final thickness, you will then feed your hand-rolled piece into the roller incrementally decreasing the spacing. Starting too thin too soon will deform your sheets.
-
4Cut your pasta into the desired form. You can either hand-cut or use an attachment for your mixer. The pasta can be cut into strips, similar to fettuccine noodles, or into sheets for lasagnas.
- Hand-cutting simply requires you to use a flat blade and cut your rolled pasta into strips that resemble the pasta product you are going for.
- Most counter mixers have an available pasta roller and cutter attachment available. You will simply feed the dough through to roll and eventually cut into strips.
-
5Dust with some semolina flour as you roll into small bundles. This will help keep the pasta ready to store or cook. The added flour will help the pasta from sticking to itself and whatever you decide to store iti in.
- When it comes time to cook your pasta, you will only need to cook for about 60-90 seconds in boiling salted water. Unlike store-bought pastas, homemade pasta will cook much quicker.[6]
- Semolina flour will give a slightly more grainy texture to your pasta that makes it easier for sauces to stay on. All-purpose flour is typically silkier, and at the complete other end of the spectrum is “00” flour, which is much finer grain.[7]
Making Semolina Porridge
-
1Heat the milk, water, and salt in a small pot until boiling. You can simply mix the ingredients in the pot as you begin to heat. This will save you dirtying a bowl right away.[8]
- Stir the mixture occasionally as it heats so that the milk does not create a skin along the top.
-
2Remove from heat and whisk in the semolina flour. Make sure to mix thoroughly until there are no lumps present. Otherwise, you will have bites of flour clumps in your finished product.
- It can be easier if you start with about half of the flour, mix and then add the rest.
- Mixing by hand can help to keep the flour from getting too messy and out of hand.
-
3Heat the new mixture back to boiling. Do not worry about salting the water more. It will be easier to season your dish to taste when it is done.
-
4Cover and reduce the heat to a simmer after it boils. Let the porridge cook for approximately 20 minutes until it thickens. Stir it consistently so it cooks evenly and does not burn along the edges or bottom of your pan.[9]
-
5Remove from heat and let it cool down for a few minutes. Pour the porridge into a serving bowl. You can add in sugar or any additional toppings, such as nuts or berries, while it cools. After about 4 minutes, it will be ready to enjoy!
References
- ↑ http://www.geniuskitchen.com/about/semolina-471
- ↑ https://www.seriouseats.com/2015/01/best-easy-all-purpose-fresh-pasta-dough-recipe-instructions.html
- ↑ https://www.allrecipes.com/recipe/257261/cream-of-wheat-semolina-porridge/
- ↑ https://www.seriouseats.com/2015/01/best-easy-all-purpose-fresh-pasta-dough-recipe-instructions.html
- ↑ https://www.seriouseats.com/2015/01/best-easy-all-purpose-fresh-pasta-dough-recipe-instructions.html
- ↑ https://www.seriouseats.com/2015/01/best-easy-all-purpose-fresh-pasta-dough-recipe-instructions.html
- ↑ https://www.seriouseats.com/2015/01/best-easy-all-purpose-fresh-pasta-dough-recipe-instructions.html
- ↑ https://www.allrecipes.com/recipe/257261/cream-of-wheat-semolina-porridge/
- ↑ https://www.allrecipes.com/recipe/257261/cream-of-wheat-semolina-porridge/


