This article was co-authored by wikiHow Staff. Our trained team of editors and researchers validate articles for accuracy and comprehensiveness. wikiHow's Content Management Team carefully monitors the work from our editorial staff to ensure that each article is backed by trusted research and meets our high quality standards.
There are 7 references cited in this article, which can be found at the bottom of the page.
The wikiHow Video Team also followed the article's instructions and verified that they work.
This article has been viewed 269,153 times.
Learn more...
Chickpeas are a healthy and versatile legume. You can eat them plain, or add them to salads, chicken dishes, etc. Canned chickpeas are also quick to prepare and especially fast to cook. By either boiling canned chickpeas, baking them, or microwaving them, you can prepare your own chickpeas!
Ingredients
- Canned chickpeas
- Seasonings of your choice
Steps
Boiling Canned Chickpeas
-
1Open the can of chickpeas and drain them over the sink. Pour the chickpeas into a strainer and shake it lightly to remove the majority of the aquafaba, which is the thick, goopy liquid in the can. Then, set the strainer in the sink and let it sit until most of the aquafaba is gone.[1]
- Aquafaba is starchy and full of sodium.
- Place a can opener on the rim of the can and firmly squeeze the arms together. Then, twist the handle until you’ve cut through the circumference of the can.
- If you don’t have a can opener, use kitchen utensils, like a spoon, to try and open the can.
-
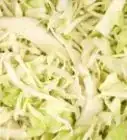
2Rinse the chickpeas. Keep the peas in the strainer and run cold water over them. Keep the water running until all the aquafaba is gone. To speed the rinsing process up, use your hands to roll the chickpeas around while they are rinsing.[2]
- Use the highest water pressure you can to clean them faster.
Advertisement -
3Pour the chickpeas into a pan. Spread them out to make 1 layer. If the chickpeas are still overlapping even after you rearrange them, pour them into a bigger pan.[3]
- The chickpeas need to be in 1 layer to ensure that they cook evenly.
-
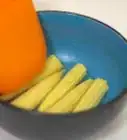
4Pour water over the chickpeas. The amount of water you should use depends on how many chickpeas you’re cooking. Pour enough water to have the chickpeas submerged, but not floating.[4]
- If the pan can’t fit the chickpeas and water, switch to a larger pan.
-
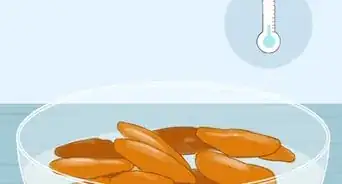
5Heat the pan for 5 minutes over medium heat. Make sure to watch the pan while it cooks. If the water starts to boil over the top of the pan, turn down the heat.[5]
-
6Drain the boiled chickpeas. Pour them into a strainer and let the water drizzle out. If you use the same strainer that you used to drain the aquafaba, make sure to wash it before putting in the boiled chickpeas.[6]
- If the chickpeas are still wet after straining, then dry them with paper towels or a clean kitchen towel.
-
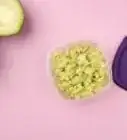
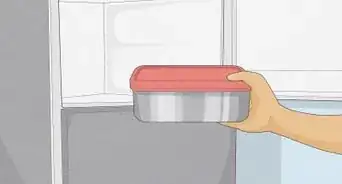
7Serve the chickpeas or store them for later. You can add them to salads, eat them plain, mix them with sauces, etc. If you want to save them for later, put them in a plastic or glass container in the fridge.[7]
- If you put your leftovers in the fridge, they’ll stay good for up to 1 week.


Baking Canned Chickpeas
-
1Preheat the oven to 365 °F (185 °C). Preheat your oven while you are preparing the chickpeas to speed up the whole process. Set an alarm to let you know when the oven is ready.[8]
-
2Dry the rinsed and strained chickpeas. Roll them between paper towel sheets or clean dish towels. If the towels get too damp and are no longer able to dry the peas, swap them out for new towels.[9]
- The chickpeas need to be dry so they can get crispy in the oven. If they’re still wet when they go into the oven, they can get mushy.
-
3Arrange the chickpeas on a baking sheet. Use your hands to spread the chickpeas over the surface area of the pan. Make sure they are arranged in 1 layer and not overlapping. If they are overlapping, they won’t cook evenly.[10]
- For an easier cleanup, line the pan with parchment paper.
-
4Drizzle the chickpeas in olive oil. Make sure to cover every chickpea in olive oil so they all cook the same. The olive oil will not only enhance the flavor of the chickpeas, but add to their texture.[11]
- You can use other kinds of oils as an olive oil substitute, like canola, sesame, or avocado oil.[12]
-
5Season the chickpeas if you'd like. There isn't a right way to season chickpeas, but a common way is to sprinkle them with ground coriander and chili flakes. However, be careful not to add too much seasoning because chickpeas naturally have a high sodium content.[13]
- Try sprinkling a little bit of salt, pepper, and garlic powder over the chickpeas.
-
6Bake the tray for 1 hour. Place the tray in the oven carefully. Then, set a timer for 1 hour to remind you when time is up.[14]
- Watch the chickpeas while they bake in case there are complications.
- If the chickpeas aren’t crisp after 1 hour, let them continue to cook until they get crispy.
-
7Take the chickpeas out of the oven. Use heat protection, like oven mitts, to the remove the tray from the oven. Then, place the tray on a heat-safe surface, like a stove top or heat pads.[15]
- Remember to turn off the oven once you remove the tray.
-
8Let the chickpeas cool and serve. Once they’re cool, serve them plain or add them to your favorite dishes! If you have leftovers, put them in the fridge for up to 1 week and store them in a plastic or glass container.[16]
- You can reheat the leftovers in the oven or microwave.


Microwaving Canned Chickpeas
-
1Mix the chickpeas with olive oil in a bowl. The bowl should be big enough so that the chickpeas don’t fall out while you're mixing them. You can use your hands or a spoon to cover the chickpeas in olive oil.[17]
- If you don’t like olive oil, try using a substitute, like avocado or sesame oil.
-
2Season the chickpeas if you’d like. While this isn’t necessary, it adds a pop of flavor. Try sprinkling the peas with a little bit of salt, pepper, and paprika. Or, you can sprinkle them with a dry dressing, like dry ranch, or some cinnamon powder.[18]
- Use your hands or a spoon to spread the seasoning over all of the chickpeas.
-
3Place the chickpeas on a microwave-safe plate. Arrange them in 1 layer so they cook evenly. To make the cleanup easier, put down a paper towel on the plate before adding the chickpeas.[19]
- The more paper towels you put down, the easier the cleanup will be.
- Plates that aren’t microwave-safe have the potential to break or melt in the microwave.
-
4Microwave the plate for 3 minutes. Make sure to watch the plate while it cooks. After 3 minutes, take the plate out of the microwave.[20]
-
5Shake the chickpeas. Keep shaking the plate gently until the chickpeas move. If you can’t move them without them falling off the plate, use a spoon to stir them around.[21]
- This redistributes moisture, spreads around the seasoning, and helps make sure the chickpeas cook evenly.
-
6Microwave the plate of chickpeas for 3 more minutes. Keep watching the plate while it cooks. Then, take the plate out of the microwave and place it on a heat-safe surface, like a hot pad.[22]
- The plate might get really hot, so consider using heat protection when taking it out of the microwave.
-
7Serve the chickpeas or store them for later. Before you eat them as a snack, let them sit for a few hours so they get even crispier and cool down. Or, you can store them in an airtight container at room temperature.[23]
- Microwaved chickpeas that are stored will stay good for up to 2 days.


Chickpea Recipes

Community Q&A
-
QuestionWhat health benefits do chickpeas have?
 Community AnswerAs a rich source of vitamins, minerals, and fiber, chickpeas may offer a variety of health benefits, such as improving digestion, aiding weight management and reducing the risk of several diseases. Additionally, chickpeas are high in protein and make an excellent replacement for meat in vegetarian and vegan diets.
Warnings
- The oven and stove are hot. Be careful!⧼thumbs_response⧽
Things You’ll Need
- Can opener
- Strainer
Boiling Canned Chickpeas
- Pan
Baking Canned Chickpeas
- Paper towels or a clean kitchen towel
- Baking Sheet
- Oven
Microwaving Canned Chickpeas
- Bowl
- Microwave-safe plate
- Microwave

References
- ↑ https://www.thekitchn.com/5-mistakes-to-avoid-when-cooking-with-canned-beans-227383
- ↑ https://www.thekitchn.com/5-mistakes-to-avoid-when-cooking-with-canned-beans-227383
- ↑ https://www.foodnetwork.com/recipes/claire-robinson/spicy-baked-chickpeas-recipe-1921840
- ↑ https://www.foodnetwork.com/recipes/claire-robinson/spicy-baked-chickpeas-recipe-1921840
- ↑ https://www.foodnetwork.com/recipes/claire-robinson/spicy-baked-chickpeas-recipe-1921840
- ↑ https://www.thekitchn.com/5-mistakes-to-avoid-when-cooking-with-canned-beans-227383
- ↑ https://www.thekitchn.com/5-mistakes-to-avoid-when-cooking-with-canned-beans-227383
- ↑ https://www.healthyfood.co.nz/articles/2008/october/what-to-do-with-canned-chickpeas
- ↑ https://www.thekitchn.com/5-mistakes-to-avoid-when-cooking-with-canned-beans-227383
- ↑ https://steamykitchen.com/10725-crispy-roasted-chickpeas-garbanzo-beans.html
- ↑ https://www.healthyfood.co.nz/articles/2008/october/what-to-do-with-canned-chickpeas
- ↑ https://oureverydaylife.com/substitutes-olive-oil-cooking-23576.html
- ↑ https://steamykitchen.com/10725-crispy-roasted-chickpeas-garbanzo-beans.html
- ↑ https://www.healthyfood.co.nz/articles/2008/october/what-to-do-with-canned-chickpeas
- ↑ https://www.healthyfood.co.nz/articles/2008/october/what-to-do-with-canned-chickpeas
- ↑ https://www.healthyfood.co.nz/articles/2008/october/what-to-do-with-canned-chickpeas
- ↑ https://www.myrecipemagic.com/microwave-chickpeas-snack-2500596356.html
- ↑ https://www.myrecipemagic.com/microwave-chickpeas-snack-2500596356.html
- ↑ https://www.myrecipemagic.com/microwave-chickpeas-snack-2500596356.html
- ↑ https://www.myrecipemagic.com/microwave-chickpeas-snack-2500596356.html
- ↑ https://www.myrecipemagic.com/microwave-chickpeas-snack-2500596356.html
- ↑ https://www.myrecipemagic.com/microwave-chickpeas-snack-2500596356.html
- ↑ https://www.thespruceeats.com/crispy-spiced-chickpeas-recipe-450291
About This Article

One way you can cook canned chickpeas is on the stovetop. First, drain the chickpeas in a strainer and rinse them off with cool water. Pour the chickpeas into a large pan so they’re in a single layer, then fill the pan with enough water to just cover the chickpeas. Heat the chickpeas over medium heat for 5 minutes. Finally, drain the chickpeas in a strainer and transfer them to a bowl. You can also bake canned chickpeas in the oven. Start by draining the chickpeas and rinsing them off with cool water. Then, dry off the chickpeas with paper towels, which will help them get crispy in the oven. Spread the chickpeas out in a single layer on a baking sheet, then drizzle them with olive oil and season them with salt, pepper, and your favorite seasonings. Bake the chickpeas at 365°F (185°C) for 1 hour or until they’re nice and crisp. Finally, remove the chickpeas from the oven and let them cool before eating them. To learn more, like how to bake canned chickpeas, read on!