wikiHow is a “wiki,” similar to Wikipedia, which means that many of our articles are co-written by multiple authors. To create this article, 9 people, some anonymous, worked to edit and improve it over time.
This article has been viewed 39,264 times.
Learn more...
Soap dispensers for liquid dish washing soap are wonderfully convenient when mounted by a kitchen sink. That is, until they stop pumping. What happens? It is usually when the liquid dries or jells just enough to cause the pump to stick. Unfortunately, fixing it means disassembling the pump or buying a new pump body. A soap pump has a cylinder with a piston inside of it, a foot and head valve, an intake and an outlet. If these names make you want to throw up your hands and say, "I'll never be able to do this!" take heart. For a Delta soap dispenser, this takes only minutes and requires only one tool.
Steps
-
1Prepare your one tool. You'll need a putty knife with a stiff, 1/16 inch blade with a single 45 degree bevel on one side of the working edge. These are commonly available at hardware stores. A wide screwdriver also works if it is ground in the same way. But note: make sure the working edge is not sharp enough to cut anything. It can be rounded slightly with sandpaper.
- Note that directions in these instructions, like "top" and "bottom," are relative to when the pump is installed in the sink. That is "top" and "up" are above the sink and "bottom" and "down" are below the sink.
-
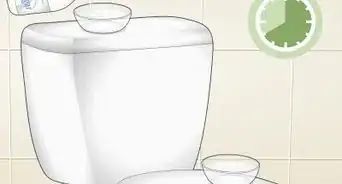
2Remove the pump mechanism from the dispenser and rinse all of the soap off. Remove the spout by gently pulling it up off the pump body. Pull the supply tube from the other end of the pump body. Continue rinsing the now exposed parts. Blot the pump body dry.Advertisement
-
3Place the pump body on its side on a work surface. Looking very closely, find the joint between the pump body and the pump top. It is on the shoulder, the widest part of the pump body. The top of the shoulder is part of the pump top and the bottom of the shoulder is part of the pump body. Gently place the beveled edge of the putty knife on the joint and press gently to force the top up and out of the bottom.
-
4Free the coil spring. Be prepared to catch it by cupping the pump body in your hand while pulling up on the pump top gripped between your thumb and forefinger. It helps to have a paper towel on your work surface right under your hands. At this point the pump parts will all come apart and soap will get all over your hands. Carefully rinse each part and lay them out. Don't lose any parts! None of them are optional.
-
5Lay out the cleaned parts in order and in the orientation in which they need to be assembled. Inspect that the parts are smooth and that the O-ring is not cut or nicked. If any part is rough, cut, nicked or otherwise damaged the entire pump must be replaced.
- Supply tube (or intake tube, slanted end goes down)
- Pump body (cylinder, square end of supply tube inserts in the bottom)
- Foot valve (looks like the head valve, pointed lips point up)
- Foot valve holder (also holds the large end of the coil spring)
- Coil spring (small end goes up)
- Head valve holder (also holds the small end of the coil spring)
- Head valve (pointed lips point up)
- Piston (includes the outlet tube on its top and the o-ring near its bottom)
- Pump cap (holds the spring and piston in the pump cylinder).
- Spout (connects to the outlet tube on top of the piston)
-
6Insert the foot valve into the foot valve holder such that the lipped opening points up.
-
7Insert the foot valve and holder into the bottom of the pump body (the cylinder). This is a little tricky, as the assembly cannot be just dropped into the cylinder.
- Hold the coil spring with the large end up.
- Place the upside down assembled foot valve holder and foot valve over the large end of the spring.
- Continue holding this vertically while placing the upside-down cylinder over the assembly until the valve is against the bottom of the cylinder.
- Turn the assembly over, keeping the valve against the bottom of the cylinder.
- Keep the cylinder pointing up.
-
8Place the long end of the head valve holder into the small end of the coil spring.
-
9Put the head valve over small end of the head valve holder with the pointed lips of the valve up.
-
10Insert the outlet end of the cylinder into the bottom of the pump body top. The o-ring end should be pointed at by the notched end of the pump body top.
-
11Put the o-ring end of the cylinder over the head valve holder and thread the notched end of the pump body cap into the cylinder. Press the cap and cylinder together until the two shoulders meet. The last 1/8 inch or so snaps together with just a small amount of extra pressure.
-
12Insert the outlet end of the pump into the bottom of the pump spout and the square end of the supply tube into the bottom of the pump body.
-
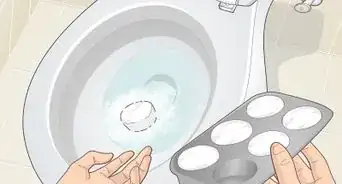
13Drop the pump into the dispenser and test. It will take about 5 to 10 pumps before soap will come out of the spout. The pump should work smoothly and not stick.