wikiHow is a “wiki,” similar to Wikipedia, which means that many of our articles are co-written by multiple authors. To create this article, volunteer authors worked to edit and improve it over time.
This article has been viewed 24,718 times.
Learn more...
This article will be useful for the Volkswagen CC production model years spanning from 2008 to 2017. Usually, the Volkswagen dealer charges at least $50 for an oil change, and may even charge more. As this car is German, careful attention must be put on changing the oil, and the different parts that are required to change the oil. Using the same oil-changing procedure as a different car, mostly American, will render the engine useless, and total the car by breaking the engine, turbo, and other components around the engine and in the engine bay. Being careful and mindful of the exact parts and items needed is essential if you want a working car, a successful oil change, and to save a lot of money.
Steps
Preparing the Car
-
1Check the dipstick to make sure that the oil requires a changing. This is important if the car has not been driven for 10,000 miles before the last oil change. This can be told by the color of the oil. Oil that is black requires an oil change immediately, regardless of the amount of miles driven after the last oil change.
-
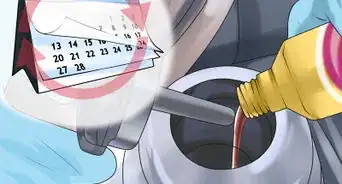
2Grab your car keys. You want to drive the car for a little bit so that the oil can get warm and is loosened, so that all of the oil will fall out of the oil bay underneath the car. If the oil is not warm enough, some oil will be left over due to the high viscosity of cold oil.
- Be careful not to drive the car so much that the oil will become hot and will burn you during the draining process. A good rule of thumb is to just drive the car around the block.
Advertisement -
3Park the car on a level surface, preferably in a garage.
- The process of an oil change does require some physical work, and having a place that has a comfortable temperature helps.
- If the car is parked on an incline, it will not allow the oil to reach the drain point due to the effects of gravity.
-
4Place one jack on both sides of the car underneath the jack points in the front if using two. If using four, place on jack underneath each of the jack points. These points should be located right behind the side skirts of the car. They will be isolated breaks in the metal lining behind the skirts.
-
5Jack the car up so that you can fit, comfortably, underneath the car. If using two jacks, be careful not to jack the car up so high as to add a considerable incline to the car.
Removing the Old Oil
-
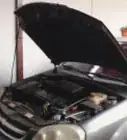
1Open the hood to remove the oil filter. The hood release will be on the left side of the foot well in the car. To release the hood, pull the large plastic handle toward you. Then, walk to the front of the car and pull up on the hood by pulling up in the corner in the headlights. Then, walk to the front of the car, reach inside, and pull the latch that will release the hood. The hood will stay open by itself due to hydraulic pistons, and does not require a separate support.
-
2Remove the engine cover. To do this, gently, and firmly, pull up toward you on the engine cover by the bottom two corners first, and then by the top two corners.
-
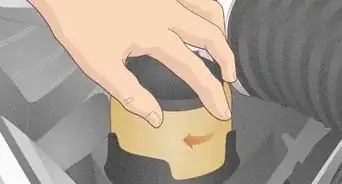
3Unscrew the oil filter. This forces the pressure inside of the engine to be equal to the surrounding atmospheric pressure. The oil filter will be located next to the lower lefthand corner of the engine. This will require some force and may require some thick gloves to increase the friction between your hands and the oil filter.
- If this is too difficult, the oil filter wrench can be used, and will make the removal process much easier. After removal, it can be thrown out. The old oil filter is not going to be needed anymore and it is important that oil filters are not reused, so the old oil filter may be thrown away in the garbage.
-
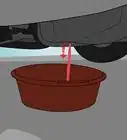
4Prepare for the oil drainage. Line the floor with garbage bags, locate the oil drain bay, and put the oil pan slightly behind where the oil drain hole is located. The oil will drain in an arch and will not go straight down. Place the spotlight in a way so that it shines its' light onto the oil drain bay so that a clear visual can be attained.
-
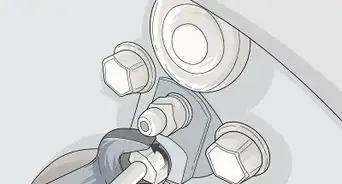
5Take the ratchet and the 14 mm head. Unscrew the screw until it can be unscrewed by hand. This is done by turning the screw counter-clockwise. The oil will begin rushing out of the bay in an overreaching arch. The oil pan should be positioned so that the arch can fall inside the pan and part of the pan should still be directly underneath the drain hole. During the draining process, find the new oil filter and open it.
Adding New Oil
-
1Screw the bay screw back in, turning it clockwise. Tighten it by hand. Then, tighten it with the ratchet being careful not to strip the screw by overtightening it. Leave the oil pan in place and leave the car jacked in the air.
-
2Find the oil refill cap and remove it. The cap is located on the left side of the engine and has a picture of an oil pump. Stick the cone, or the top of an old oil bottle to avoid spilling the new oil. Open the new bottle of motor oil and line the grooves of the new oil filter (where the oil filter screws into the engine) with a thin layer of oil. Slowly pour about 4 quarts into the engine.
-
3Check the dipstick. Once the oil appears on the dipstick, slowly add more oil until the oil level is in the middle of the safe area in the dipstick. If the oil level is too high, then the excess oil must be drained from underneath the car. Screw the oil fill cap back on after the desired level is reached.
-
4Turn the engine on and let the car run for about a minute. Afterwards, turn the engine off and check the oil level on the dipstick, making sure that it is in the middle of the safe area.
- If it is less than the safe area, unscrew the oil fill cap, slowly add small amounts of oil until the dipstick shows that the oil is in the safe area. Then screw the oil fill cap back on and turn the car on for about another minute, check the dipstick, and repeat the process if needed.
- If the oil level will suffice, make sure that everything that does not belong underneath the hood is removed, the dipstick is put back in place, the oil fill cap is screwed on tightly, the oil filter is screwed on tightly, and the close the hood by lowering the hood until it is about an inch away from the latch, and drop the hood. Gravity will cause the hood to latch itself back in place.
Finishing Up
-
1Clean up. Remove the oil pan, trash-bags, and spotlight, and dispose of the oil, responsibly, and store the oil pan and the spotlight. The trash bags can be thrown away. Then, lower the car and release the parking break. The car may roll forward, slightly, which is normal after being jacked in the air. The old oil filter, and gloves can be thrown away; place the funnel in storage.
-
2Check the dipstick to make sure the oil level is correct. If the oil level is low, slowly add a bit more oil. After that, the oil level should remain constant until the next oil change.
- If the car is losing oil, for some reason, there may be a leak in the car. To check for a leak, place white paper towels underneath the engine bay, on the garage floor, and let it sit overnight. If the paper towels have anything on them, besides water, there may be a leak. If the color is brown, it is oil. Any other color may indicate a leak elsewhere.
-
3Check the oil level every few thousand miles.
- Also, check the color of the oil by wiping the dipstick off with a paper towel. If the oil is a light brown, then the motor oil is in good condition. If the oil is dark brown or black, the oil must be changed soon.
- Finally, if the oil glistens in the light, like there is some type of metal in the oil, then there is some friction in the engine and the engine is in danger of breaking. Immediately visit your local Volkswagen dealership so that they can take a closer look at the engine. Oil is one of the many diagnostic tools used to catch early engine problems, and will show engine problems before the "check engine" light turns on.
Community Q&A
-
QuestionHow many quarts does a 2010 VW CC take?
 Community AnswerWith filler, 4.9 quarts. Add 0.5 qt less than the capacity shown, start the engine, let it run until the operating temperature is approx. 60 C (140 F), switch the engine off, wait 3 minutes, check the dipstick and fill to the full mark as indicated on the dipstick.
Warnings
- When purchasing motor oil, if not Castrol GTX synthetic motor oil, make sure that the motor oil purchased is synthetic. Conventional motor oil will cause the engine to break down.⧼thumbs_response⧽
- Do not drive the car for too long before changing the oil. This will cause the oil to become hot enough to burn your hand during the draining process.⧼thumbs_response⧽
- Make sure to wear gloves during the oil draining and filling process. Motor oil can cause severe irritation to the skin, and is known to be toxic.⧼thumbs_response⧽
- Add the oil into the engine slowly. Always consult the owner's manual to know how much oil to add. After having the oil appear on the dipstick, add a small amount at a time. It is always easier to add more oil than to remove excess oil.⧼thumbs_response⧽
- Be sure to turn the parking brake on while the car is jacked by pushing in the parking break button, which has a large "P" on it, located to the left of the steering wheel.⧼thumbs_response⧽
Things You'll Need
- Castrol GTX synthetic motor oil (works best for the CC)
- An oil filter purchased from the Volkswagen dealership
- Ratchet with a 14 mm attachment
- Gloves (latex gloves will suffice)
- Spotlight
- Two car jacks (four can be used to keep the car level in the air)
- Car keys
- Oil pan
- Trash bags
- A funnel (the top of an empty oil bottle can work as a funnel)
- If desired, an oil filter wrench (this can be bought for very cheap, and makes the process of removing an oil filter much easier)
-CC-Step-1.webp)
-CC-Step-2.webp)
-CC-Step-3.webp)
-CC-Step-4.webp)
-CC-Step-5.webp)
-CC-Step-6.webp)
-CC-Step-7.webp)
-CC-Step-8.webp)
-CC-Step-9.webp)
-CC-Step-10.webp)
-CC-Step-11.webp)
-CC-Step-12.webp)
-CC-Step-13.webp)
-CC-Step-14.webp)
-CC-Step-15.webp)
-CC-Step-16.webp)
-CC-Step-17.webp)


