This article was co-authored by Homer Flores and by wikiHow staff writer, Hannah Madden. Homer Flores is an Appliance Repair Specialist and Training Manager at PreFix, a home maintenance company out of Austin, Texas. With over 15 years of experience, Homer specializes in home improvement, remodeling, and construction. Homer’s dedication to the PreFix mission of providing hassle-free one-stop-shop service for home care, in addition to their completion of the Capital Factory and Techstars Accelerators, has contributed to their growth of service to over 50 zip codes throughout the greater Austin area.
There are 16 references cited in this article, which can be found at the bottom of the page.
This article has been viewed 229,225 times.
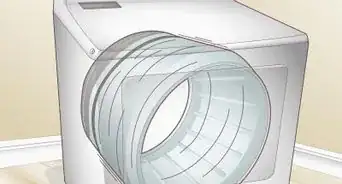
Most newer Whirlpool washing machines come equipped with Lid Lock technology that prevents them from being opened while in use. This feature seems pretty handy—until it malfunctions and you need to look inside the washer while it’s running. While there are a number of ways to unlock your machine under normal conditions, opening one that’s on the fritz will require a magnet or some basic wire splicing skills. These kinds of renegade fixes may void your warranty, so keep that in mind if you do attempt them.
Things You Should Know
- Access the lid lock switch by unplugging your washer from the wall and turning off the water.
- Press a magnet against the lid lock mechanism for a quick, easy way to bypass the lid lock.
- Cut the 1st and 3rd wire (or 1st and 4th wire if there are 4 wires) that attach to the lid lock to permanently bypass it.
Steps
Accessing the Lid Lock Switch
-
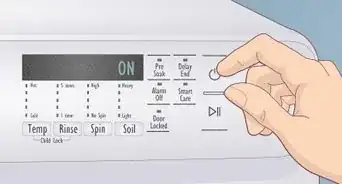
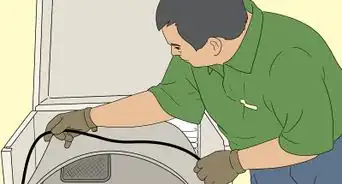
1Turn off the washing machine and unplug it from the wall. If you need to, scoot the appliance away from the wall just enough to expose the main power cord. Pull the cord free from the wall socket to disable the power to the washer.[1]
- Once you’ve unplugged your washer, lay the power cord flat against the side of the cabinet and tape it down to keep it from accidentally getting wet or becoming damaged while you work.
- If you decide to tinker with your washer without first unplugging it, you could be putting yourself at risk of electrical shock.[2]
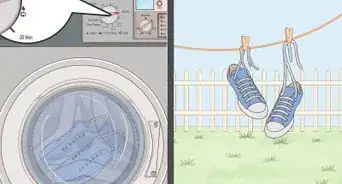
- The lid lock mechanisms on some washers are heat-activated, which means overriding them is as simple as letting them cool off. Let the washer sit unplugged for about 10 minutes, then try lifting the lid. If it opens, you're all set. If it still won’t budge, proceed to the next steps.
-
2Shut off the water by turning the twin supply valves counterclockwise. These valves will either be located in a recessed nook on the wall behind the unit or under the utility sink, if your laundry room has one. When you find them, grip the rotating dials and twist them all the way to the left until you can’t move them anymore. This will guarantee that there’s no water flowing to the machine.[3]
- Sometimes, the supply valve dials will be color-coded red and blue to clearly indicate which one corresponds to hot and cold water.[4]
- It’s not safe to make any sort of mechanical modifications to your washing machine without first cutting the water supply, even if it’s unplugged.
Advertisement -
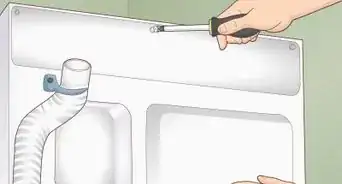
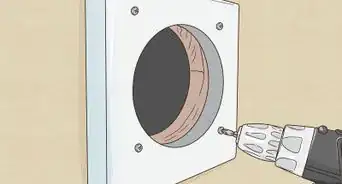
3Open the washer’s top panel by disengaging the hidden retention clips. You’ll find one of these clips on either side of the upper part of the unit’s front face. Slip a screwdriver blade under the edge of the housing on one side of the machine and push directly against the clip inside to release it. Repeat this process on the second clip, then raise the panel to get it out of your way.[5]
- On certain models, you may need to undo the hinge screws on the backside of the washer’s upper control console in order to lift the top panel.
-
4Identify the lid lock switch on the underside of the top panel. This is the electronic mechanism that actually controls the washer’s locking function. On most models, it will be housed in a small box made of gray or black plastic. Chances are, this little widget is responsible for the issue you’re experiencing.[6]
- The lid lock switch assembly will still be connected to its wire harness, which is usually secured to the underside of the washer’s top panel via a series of clips. To avoid making more work for yourself, leave both of these attachments as they are.


Overriding the Locking Mechanism with a Magnet
-
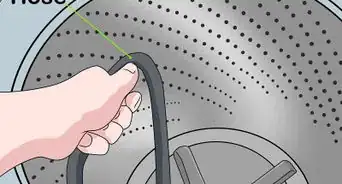
1Set a magnet on the site where the lid lock switch meets the washer cabinet. Just under the unit’s housing at this spot there is a solenoid, which is a type of powerful electromagnet. Placing a separate magnet there will create a stable electromagnetic connection with the solenoid and “trick” the machine into thinking that the lid is closed when it’s really open.[7]
- Any type of small magnet should do the trick. Just make sure you choose a thin one, like a refrigerator magnet, so you can close the lid completely.
- The lid lock technology on many older washing machines works by using a strong magnetic charge to keep the lid shut during the wash cycle.
- Use duct tape to tie down magnets that are poised precariously or won’t rest flat on their own.
-
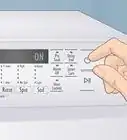
2Replace the top panel, plug the washer in, and perform a test wash. Don’t forget to turn the water supply back on beforehand. If your magnet is positioned properly, it will be possible for you to open and close the lid at will during regular use. This won’t affect the machine’s normal operations in the slightest.[8]
- This work-around may be useful if you want to be able to throw additional items in later on in the wash cycle without the machine cutting off every time.
-
3Adjust the placement of the magnet if your washer is still stopping. Assuming the appliance continues to behave the way it normally does, you may have no choice but to open it back up and give it another shot. Try to line up your magnet with the exact spot on the top panel where the lid lock switch usually hovers. If that doesn’t take care of things, hunt around for a stronger magnet.
- Double-check that the attractive side of your magnet is facing down. Otherwise, it may not generate a solid link with the solenoid.
- If you're having trouble finding a magnet strong enough to maintain a connection, just unscrew the one that's set into the edge of the washer lid. You can always put it back when you’re done.[9]


Cutting the Wires for the Lid Lock Switch
-
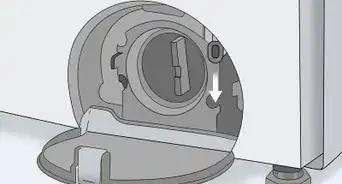
1Remove the lid lock switch assembly. Use a 1⁄4 inch (0.64 cm) nut driver to loosen the 2 mounting screws holding the box in place on the bottom of the panel. Lower the assembly carefully and let it dangle freely from its wire harness at around chest level. That way, you’ll have no difficulty accessing it with your tools.[10]
- Place the mounting screws in a shallow dish or similar container so you won’t lose them. If they disappear, you won’t be able to get the switch back in its proper place at the end of your project.
-
2Pry the cover off of the assembly. These sorts of covers are almost always secured using retention clips. Simply pull up on the clips with the edge of your thumb to disengage them. Then, lift off the cover and set it aside.[11]
- In some cases, it may be necessary to take out a couple of small screws in order to remove the switch cover.
-
3Examine your washer’s tech sheet to determine which wires to cut. Scan the included wiring diagram until you find the wires labeled “lid switch” and “lock switch.” The majority of washing machine lid lock switches are powered by 3 or 4 wires, each of which performs a different function. Hopefully, these will be color-coded. If not, the tech sheet will map out the arrangement of the wires on the control board.[12]
- Most washing machine models come with a thin booklet attached to the back or bottom interior portion of the cabinet. Inside this booklet (known as the “tech sheet”) you’ll find a diagram that lays out the exact configuration of your appliance’s electrical wiring.[13]
- If your switch has 3 wires and the lid switch and lock switch are assigned to positions 1 and 3, cut the wires on either side of the middle wire.
- If your switch has 4 wires and the lid switch and lock switch are assigned to positions 1 and 4, cut the 1st and 4th wire.
-
4Snip the wires corresponding to the lid lock mechanism and lid switch. Grab a pair of pliers or some sharp scissors and make a nice clean cut right through the center of each wire. Without an intact connection, the wires won’t be able to channel the electrical current that causes the lid to remain locked.[14]
- Messing with your washing machine’s wiring may cause it to stop working correctly, and it will definitely violate the terms of your warranty. Unless you’re confident that you can do this right the first time, call a Whirlpool repair technician.
-
5Strip about 1 inch (2.5 cm) of insulation from the end of each wire. Position the blades of your wire strippers at the appropriate spot along the first wire and clamp the handles together forcefully. Without letting go of the handles, drag the tool towards the loose end of the wire to slide off the insulated coating.[15]
- Stripping the wire just removes the excess material from the cut section, allowing you to work freely and efficiently.
-
6Twist the ends of the two wires together and join them with a wire connector. Take each wire and gently roll the exposed strands between your thumb and forefinger to group them. Once the strands are neatly mingled, hold the two wires side-by-side and twist them together like a candy cane. Screw a plastic connector over the conjoined wire ends to secure them.[16]
- You can also use a strip of electrical tape if you don’t happen to have any spare wire connectors on hand.
- Smoothing the strands on the ends of the wires before you twist them together will prevent them from sticking out awkwardly and ensure a clean connection.
-
7Reassemble the washer and try it out. Tuck the newly joined wires back into the switch casing, reinstall the removable cover, and press down on it until it clicks. Reposition the switch on the underside of the machine’s top panel and tighten the mounting screws, then secure the top panel once again. Finally, plug the washer back in and start it up. If you’ve done everything correctly, you should be able to open the lid at any point during the machine’s various cycles.[17]
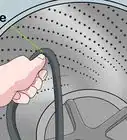
- Unlike standard washing machines, lid lock models won’t stop automatically when you open them after skirting the locking mechanism. For this reason, you’ll need to be extremely careful not to get your limbs, clothing, hair, or jewelry too close to the spinning agitator while you have the lid open.[18]


Warnings
- Make sure your washer is unplugged before doing any work on it. Working on a washer that’s plugged in is extremely dangerous.⧼thumbs_response⧽
Things You’ll Need
Accessing the Lid Lock Switch
- Screwdriver or putty knife
- Duct tape (optional)
Overriding the Locking Mechanism with a Magnet
- Small magnet
- Screwdriver (optional)
Cutting the Wires for the Lid Lock Switch
- Screwdriver
- 1⁄4 inch (0.64 cm) nut driver
- Pliers or sharp scissors
- Wire strippers
- Wire connector or electrical tape


References
- ↑ https://www.bobvila.com/articles/how-to-drain-a-washing-machine/
- ↑ http://www.clevelandutilities.com/document_center/customer%20service/homesafety.pdf
- ↑ https://www.architecturelab.net/how-to-turn-off-the-water-for-plumbing-repairs/
- ↑ https://www.bobvila.com/articles/how-to-drain-a-washing-machine/
- ↑ https://www.youtube.com/watch?v=Zpbtwc2Pfck&feature=youtu.be&t=9
- ↑ http://www.appliance-repair-it.com/Whirlpool-washer-lid-switch.html
- ↑ https://www.youtube.com/watch?v=wqzfOmQdDoo&feature=youtu.be&t=60
- ↑ https://www.youtube.com/watch?t=67&v=wqzfOmQdDoo&feature=youtu.be
- ↑ https://www.youtube.com/watch?v=wqzfOmQdDoo&feature=youtu.be&t=30
- ↑ https://www.youtube.com/watch?v=J4-Esnd8eCE&feature=youtu.be&t=95
- ↑ https://www.youtube.com/watch?v=Zpbtwc2Pfck&feature=youtu.be&t=28
- ↑ https://d3nevzfk7ii3be.cloudfront.net/igi/CrtiHixxLIZUWxWe.full
- ↑ https://www.youtube.com/watch?v=0zmzSSUc8dI&feature=youtu.be&t=80
- ↑ https://www.youtube.com/watch?v=Zpbtwc2Pfck&feature=youtu.be&t=58
- ↑ https://www.youtube.com/watch?v=o-xf6KooHl0&feature=youtu.be&t=20
- ↑ https://www.youtube.com/watch?v=bmwlv8ddEEI&feature=youtu.be&t=106
- ↑ https://www.youtube.com/watch?v=J4-Esnd8eCE&feature=youtu.be&t=183
- ↑ http://www.appliance-repair-it.com/Whirlpool-washer-lid-switch.html
About This Article