This article was co-authored by wikiHow Staff. Our trained team of editors and researchers validate articles for accuracy and comprehensiveness. wikiHow's Content Management Team carefully monitors the work from our editorial staff to ensure that each article is backed by trusted research and meets our high quality standards.
This article has been viewed 18,299 times.
Learn more...
Escape rooms are becoming more and more popular as a way to spend an hour or so bonding with friends. The idea of the escape room is to collect a series of clues or puzzle pieces that point the players towards a key or code that lets them out of the room. You can build a DIY escape room in your home or classroom without much special equipment. Start with a fun theme and story to motivate your participants. Then, move on to creating a series of puzzle pieces in your escape room. Finally, write difficult (but not impossible!) clues to guide your participants to the puzzle pieces.
Steps
Creating a Storyline
-
1Identify your audience when you are creating your storyline. Are you creating an escape room for students? Choose a story that is related to a lesson you are teaching. Are you creating an escape room for a group of friends? Think about different movies or shows your friends enjoy and choose a similar theme.[1]
- For example, for a student escape room in a math classroom, the story could be a detective story in which students need to stop a villain. The clues will be math-based, but the engaging storyline will keep them interested.
- If you are creating an escape room for friends who like science fiction, consider an outer space theme for your escape room.
- If you don't want to come up with your own storyline and props from scratch, consider looking for an escape room kit or template.
-
2Create a story that is suitable for your space. If you are constrained to a classroom or a one-room apartment, it won't be possible to create a multi-room escape experience or a life-size maze. For a DIY escape room, it's best to focus on brain-teaser clues and hiding clues in clever spots.[2]
- Make use of physical resources you have access to. For example, if you have a classroom with lockers or cubbies, figure out a way to lock them to hide clues or puzzle pieces.
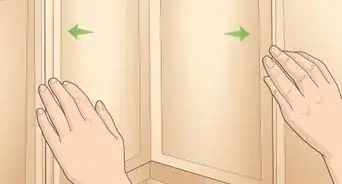
- If you live in a home with built-in closets, cupboards, or shelves, start thinking about how you can use them to your advantage.
Advertisement -
3Plan your escape room to last 30-60 minutes. Most professional escape rooms last between 45-60 minutes. For your first time creating an escape room, it can be easier to aim for a shorter experience of around 30 minutes.[3]
- If you are creating a classroom escape room, make sure that the story can be completed in one class period. It's also possible to create a short, 10-minute icebreaker escape room.
- For younger children, a shorter escape room of around 30 minutes might work better.
- To immerse your friends in a world of puzzles, you can extend the escape room into a full-day experience.
-
4Give your participants a quest. The escape room participants will be the heroes of the story––as long as they solve it. Giving the story a mission will give your participants motivation to solve the clues.[4]
- For example, for a detective-themed storyline, the participants might be trying to solve a murder. Or, for a younger group, they might be looking for something precious that has gone missing.
- For a social studies classroom, you might be teaching your students about Ancient Egypt. The quest could be uncovering an ancient tomb.
-
5Use your theme to write out the main events of the story. Like all good stories, escape rooms need a beginning, middle, and end. Write down the major plot points your participants will encounter. You can use this as a guide when you are writing your clues.[5]
- For example, if your participants are playing archaeologists, the story might start out with the threat of an ancient temple being destroyed. Throughout the story, the participants find out more and more about the temple, such as the presence of hidden doors, traps, or a key hidden in the temple. At the end, the temple is saved if the participants are successful.
- In a detective story, you can start by explaining that something precious was recently stolen, such as a diamond ring. The players can learn more about where the criminal may have hidden the ring through the clues, allowing players to follow in the thief's footsteps. Then, it can be recovered and returned to the rightful owner or lost forever if the participants don't solve the puzzles.
-
6Brainstorm some objects that can be used in your storyline. The objects you use can hide puzzle pieces, provide clues, or contain information to help participants decode clues. Depending on your budget, you may have to improvise and ask your participants to use their imaginations.[6]
- Some commonly-used hiding places include books with a hidden chamber, drawers, on top of tall surfaces or ledges, or inside coat pockets.
- Some more involved hiding places might include underneath floorboards, behind a false wall, or behind pieces of furniture.
-
7Decorate the room according to the theme. Depending on how elaborate you want your escape room to be, you can add as much or as little decoration as you like. To create a more immersive experience, there is no such thing as too much decoration. For a classroom or party escape room that you will use once, it's appropriate to hang up a few themed pictures or add some on-theme elements.
- For example, for an immersive archaeology-themed escape room, you might want to cover the walls of the rooms with a texture like stone, invest in some statuettes, and paint lockboxes so that they look like treasure boxes.
- Think about all the senses. Is it hot or cold in the story? Can participants rely on the texture a prop to reveal something, such as a clue written in braille or a hidden door that opens by pressing a brick that feels different?
-
8Choose props that fit with the theme. Props are another way to make your story come to life in the escape room. Not all props need to be clues. In fact, it's better to have some props that aren't clues so that participants have to hunt for them. Props can be red herrings (false clues) or simply add to the sense of place in your story.[7]
- For example, for a detective story, you could include a detective's hat, coat, badge, and magnifying glass scattered around the room.
- For an Ancient Egypt classroom escape room, print some pictures of Ancient Egyptian art and hang them up around the room. If you have the budget, think about adding some small statuettes or prop bones.


Hiding Puzzle Pieces
-
1Start with standard lock boxes and different kinds of locks. The easiest way to hide clues or puzzles is to use lock boxes. No need for any fancy DIY decorations or handmade hiding spaces unless you really want to go above and beyond.[8]
- This is especially useful for an escape room for friends or students. If you are hoping to open a professional escape room, you may want to invest in more customized hiding spots.
- Clues can lead participants in order to the next clue. Alternatively, they can be part of a larger puzzle. Once participants collect all the pieces, they reveal a code to unlock the door.
-
2Hide objects just out of reach. Have participants look for something to grab a puzzle piece or key with, such as a magnet, a stick, or a grabby tool. This is a tantalizing motivation strategy.[9]
- For example, for a prison-themed escape room, you could leave the keys to the room beyond reach behind some bars. A steel key ring will stick to a magnet.
-
3Use ordinary objects as hiding places. You can go for something obvious like hiding a set of keys in a flower pot or money and clues inside of a book. Or, you can get more involved by hiding clues inside of walls, false bricks, or even old electronics with their insides removed.[10]
- Your imagination is the limit when it comes to hiding clues. Think about your theme and brainstorm any possible related object. Think about how you could make those objects into a hiding place.
- For example, in a detective-themed room, you could hide a clue in the pocket of the detective's coat. The clue could be the last lead the detective had on the case.
- As another example, for an archaeology-themed room, a decoding document could be hidden inside of a book.
-
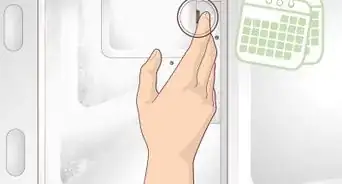
4Try "hiding" clues in plain sight. Escape room participants are often so preoccupied with finding hidden clues and puzzle pieces that they often don't notice clues right in front of their faces. This could include a photo or artwork with a clue or an object that could be used to get to a clue or key.[11]
- For example, a piece of artwork on the wall could double as a cipher to decode a clue.
- For a more high-tech setup, have players step on footprints to open a hidden door.
-
5Use a blacklight to reveal clues. Write clues on a wall or object using a blacklight marker. Then, hide a blacklight somewhere in the room. Once participants find it, they will turn it on to reveal a code or clue.[12]
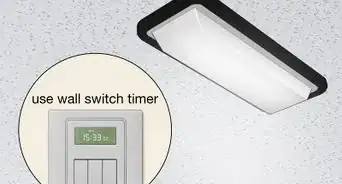
- Alternatively, you can have a blacklight fixture in the room that turns on automatically from a specific action.
-
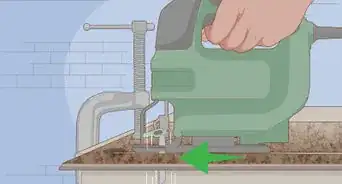
6Incorporate a maze into your escape room. Mazes can come in any number of shapes and sizes. The easiest way to include a maze is to use a handheld, horizontal puzzle maze that is hollow and has a hole in it. Participants would need to get a piece out of the maze.[13]
- A room-sized maze is a great immersive experience, if you're able to create one.
- It's also ideal to have participants escape from a different door from the one they entered. Using a maze is one way to move them from one door to another.


Writing Clues
-
1Write the clues to your escape room after you have it set up. Once you have the story and setup of the room in place, write clues that connect the different hiding places. It's important to have the room set up already just in case the setup is different from what you originally had planned.[14]
- Just because you write clues down doesn't mean they have to be placed somewhere in the room. You can also convey the clue to the participants using a speaker.
-
2Decide if you want the clues to be revealed in a specific order. There are 2 ways to reveal clues in an escape room: you can either allow the players to discover them in no particular order and put them together to reveal a solution, or you can write the clues so that one leads to the other. The second way is the more difficult way, but it can also be more satisfying for players.[15]
- If you want the clues to be revealed in a particular order, make sure the players won't accidentally discover one too early.
-
3Reveal codes for combination locks through clues. One of the most common formats for escape room clues is to reveal a code for a lock through a clue or series of clues. Use some kind of combination lock to reveal a series of numbers that will open it. The inside could hide a key that opens the escape room, or it could reveal the next clue.[16]
- How much you reveal in each clue depends on your audience. For students, revealing the entire combination through some arithmetic problems can work well to keep the game moving. For adults, you may want to make them hunt down each number individually.
-
4Use ciphers to code clues. Ciphers are pieces of writing that are coded. Hide a decoding key somewhere in the room. Once players find the key, they will be able to decipher the clue and may lead them to a key or puzzle piece.[17]
- Some common ciphers include Morse code, braille, or substituting specific letters or numbers for other letters.
- For an Ancient Egypt-themed escape room, use hieroglyphics. Match each symbol to the letter it represents to spell out clues.
-
5Make ordinary groups of objects into coded clues. Use objects that belong together to spell out a clue. Players will need to collect all of the objects and assemble them in order to reveal the meaning.[18]
- For example, write a series of words that spell out a clue on the back of some cards. Players will need to arrange them in the right order to get the clue.
- Another option is to write a clue on a puzzle and hide the pieces around the room. Players will need to find all the pieces and put together the puzzle to reveal a final clue.
-
6Consider using a powerpoint with clues for a classroom escape room. A powerpoint allows you to include more educational content and visual aids. You can also advance the powerpoint to the next clue if students take too long to solve the clues.[19]
- Since you will be in the room with your students while they solve the clues, you can also consider having a series of hints written down that you can give them if they run into trouble.
-
7Avoid clues that are based on trivia or pop culture. These kinds of clues assume that your participants have specific information memorized and can easily recall it. If your participants can't recall the information, they won't be able to move forward with the game, which can be frustrating rather than fun.[20]
- An exception to this would be a themed escape room. For example, if you created a Harry Potter escape room, including trivia-based clues is entirely appropriate.
- Another exception would be classroom escape rooms that depend on students remembering information from class.


Warnings
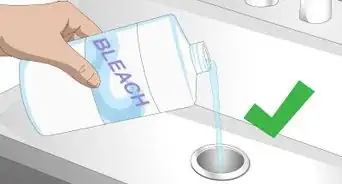
- Don't hide clues in fake electrical outlets or ceilings. This is a safety hazard.⧼thumbs_response⧽


References
- ↑ https://nowescape.com/blog/18-essential-strategies-for-creating-a-great-escape-room/
- ↑ https://www.classcraft.com/blog/features/escape-room-education/
- ↑ https://nowescape.com/blog/18-essential-strategies-for-creating-a-great-escape-room/
- ↑ https://nowescape.com/blog/18-essential-strategies-for-creating-a-great-escape-room/
- ↑ https://nowescape.com/blog/18-essential-strategies-for-creating-a-great-escape-room/
- ↑ https://escaperoomtips.com/design/escape-room-puzzle-ideas
- ↑ https://escaperoomtips.com/design/escape-room-puzzle-ideas
- ↑ https://escaperoomtips.com/design/escape-room-puzzle-ideas
- ↑ https://escaperoomtips.com/design/escape-room-puzzle-ideas
- ↑ https://nowescape.com/blog/101-best-puzzle-ideas-for-escape-rooms/
- ↑ https://nowescape.com/blog/101-best-puzzle-ideas-for-escape-rooms/
- ↑ https://escaperoomtips.com/design/escape-room-puzzle-ideas
- ↑ https://escaperoomtips.com/design/escape-room-puzzle-ideas
- ↑ https://nowescape.com/blog/18-essential-strategies-for-creating-a-great-escape-room/
- ↑ https://nowescape.com/blog/18-essential-strategies-for-creating-a-great-escape-room/
- ↑ https://nowescape.com/blog/18-essential-strategies-for-creating-a-great-escape-room/
- ↑ https://nowescape.com/blog/101-best-puzzle-ideas-for-escape-rooms/
- ↑ https://escaperoomtips.com/design/escape-room-puzzle-ideas
- ↑ https://www.weareteachers.com/build-a-classroom-escape-room-lesson/
- ↑ https://nowescape.com/blog/18-essential-strategies-for-creating-a-great-escape-room/
About This Article