This article was co-authored by wikiHow Staff. Our trained team of editors and researchers validate articles for accuracy and comprehensiveness. wikiHow's Content Management Team carefully monitors the work from our editorial staff to ensure that each article is backed by trusted research and meets our high quality standards.
There are 7 references cited in this article, which can be found at the bottom of the page.
This article has been viewed 55,467 times.
Learn more...
A properly built PVC bike rack will give you a lightweight, stable place to park your bike when you’re not using it. Even better, this is an inexpensive alternative to store bought bike racks that are of similar quality. All you need is about 27 ft (8.23 m) of PVC pipe, some tools, and some elbow grease, and you’ll soon have a homemade bike rack of your own.
Steps
Cutting and Sanding the PVC
-
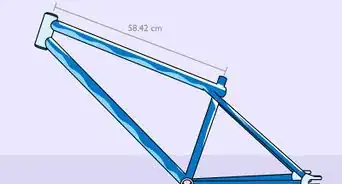
1Measure and mark your PVC. If you bought PVC in long pieces, you’ll have to cut these down to smaller segments. Use a tape measure and a felt tipped marker to draw guide lines for cutting the following lengths of 1½ inch (3.8 cm) thick PVC:[1]
- Eight 24 in (61 cm) long pipes
- Four 2 in (5 cm) long pipes
- Four 3 in (7.6 cm) long pipes
- Two 12 in (30.5 cm) long pipes
- Two 36 in (91.4 cm) long pipes
-
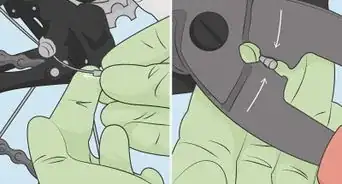
2Cut your bike rack PVC segments with a hacksaw. At the drawn-on guide lines, cut the PVC with a hacksaw. To prevent the PVC from moving while you cut it, you may want to hold it in place with a vice or clamp it to a sturdy surface.
- Use a smooth, moderately paced back-and-forth motion when sawing the PVC. Keep an eye on your guide line while cutting so you cut the exact length you need.[2]
Advertisement -
3Sand rough edges of the cut PVC smooth. You’ll want to use sandpaper that falls between a grit rating of 60 and 100.[3] With moderate pressure, rub the sandpaper over the cut edges of the PVC to remove plastic burrs and sharp edges.
- It shouldn’t take too much effort to sand away burrs and sharp edges. Avoid over sanding, as this can shorten the overall length of your PVC.
- If you’re using especially durable PVC, it may be easier to use a metal file instead of sandpaper. Pass the file back and forth over the PVC until sharpness and burrs are removed.[4]
-
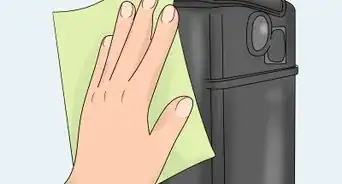
4Clean up dirt and debris. Vacuum the PVC after sanding to remove plastic shavings. Dirt, dust, or other debris can be wiped away with a clean, dampened, lint-free cloth. Follow this with a quick pass from a clean, lint-free dry cloth and you’re ready to move on.[5]
- Small bits of PVC knocked loose from sanding can get stuck in PVC cement (glue), resulting in a bike rack frame that fits together poorly.
- PVC burrs are easily tracked through the home and can cause splinters. Take care to vacuum up all PVC shavings in your work area.


Assembling the Frame
-
1Put together the outer right and left sides. The outer right and left sides of your bike rack will be composed of two 36 in (91.4 cm) long segments of PVC and four 90° elbow joint pieces. Attach the elbow pieces to both ends of the PVC segments.[6]
- The elbow pieces should be oriented to face the same direction.
-
2Add a T-connector to the elbow joints. Four 3 in (7.6 cm) lengths of PVC will connect each elbow connector to a T-connector. Insert the 3 in lengths into the elbow joints, then add on the T-connector.
- The T-connectors should be positioned so the stem of the T is 45° from the ground (halfway between flat and straight up-and-down) and facing the inside of the rack.[7]
-
3Follow the first T-connector with a second. In line with your first 3 in (7.6) segment of PVC, in the opposite side of each T-connector insert a 2 in (5 cm) piece of PVC. At the free end of each 2 in piece, add a second T-connector.
- The second set of T-connectors should be oriented in the same fashion as the first, so that the stem of the T points inward at a 45° angle.[8]
-
4Join the left and right sides together. Both sides of the PVC frame should be positioned so that each elbow joint is facing an opposing elbow joint. Leave a little more than a foot (30.5 cm) of space between each side. Connect the four elbow joints with two 12 in (30.5 cm) PVC pieces.[9]


Finishing the Rack
-
1Put together the bike mounts. Connect two pieces of 24 in (61 cm) long PVC with a 90° elbow joint to form a V shape. Make a total of four of these Vs. These will form the rails/bars of the rack that the front tires of bikes can be parked between.[10]
-
2Insert the bike mounts into the T-connectors. The arms of each V should fit into the inward slanting stems of the T-connectors. In some cases, while assembling the frame you may have jostled the angle of the T-connectors, but this can be easily fixed by adjusting the connector with your hand.[11]
-
3Glue the rack together with PVC cement for improved sturdiness. Now that you know the frame fits together properly, remove the PVC pieces from joints one at a time. Brush cement onto the end of each PVC segment and the inside of each connector, then refasten the parts together.[12]
- PVC cement is pretty potent; wear rubber gloves and goggles when applying it to PVC. Avoid getting cement on your skin or in your eyes, and wash your hands after using it.[13]
- If you want an easy to disassemble bike rack, which might be preferred for trail riding, leave your rack unglued.
-
4Paint your PVC bike rack. If you just want a simple place to store your bike, plain PVC should do just fine. However, it takes little time and effort to add a coat of spray paint to your bike rack, and this touch can really improve its overall appearance.
- Black works for bike rack paint jobs. Generally, this color holds up well to rough usage without needing many touchups.
- Spray paint should only be used in a well-ventilated area. Use a drop cloth below your bike rack when painting it to prevent paint from spreading to the ground beneath the rack.[14]


Warnings
- Always take care when using tools. Improper usage could result in personal harm or property damage.⧼thumbs_response⧽
Things You'll Need
- 1½ in 90° elbow PVC connectors (x8)
- 1½ in thick by 12 in long (3.8 by 30.5 cm) PVC pipes (x2)
- 1½ in thick by 2 in long (3.8 by 5 cm) PVC pipes (x4)
- 1½ in thick by 24 in long (3.8 by 61 cm) PVC pipes (x8)
- 1½ in thick by 3 in long (3.8 by 7.6 cm) PVC pipes (x4)
- 1½ in thick by 36 in long (3.8 by 91.4 cm) PVC pipes (x2)
- 1½ in thick PVC T-connectors (x8)
- Disposable plastic gloves
- Felt tipped marker
- Goggles
- Hacksaw
- PVC cement
- Sandpaper (with a grit rating between 60 and 100; or metal file)
- Shop towel (or old rag)
- Shopvac (or similar vacuum)
- Spray paint


References
- ↑ http://www.madebymarzipan.com/?tutorial=diy-pvc-bike-rack
- ↑ http://www.technologystudent.com/equip_flsh/hacksw2.html
- ↑ https://www.bobvila.com/articles/2145-quick-tip-choosing-sandpaper/#.WXZ3M4grLIU
- ↑ http://www.technologystudent.com/equip_flsh/hacksw2.html
- ↑ https://www.familyhandyman.com/plumbing/how-to-glue-and-join-pvc-plastic-pipe/view-all
- ↑ https://www.utahmountainbiking.com/goodies/TruckbedBikeRack.htm
- ↑ https://sunnysleevez.wordpress.com/2014/07/01/summer-vacation-build-a-pvc-pipe-bike-rack-with-the-kids/
- ↑ http://www.madebymarzipan.com/?tutorial=diy-pvc-bike-rack
- ↑ https://sunnysleevez.wordpress.com/2014/07/01/summer-vacation-build-a-pvc-pipe-bike-rack-with-the-kids/
- ↑ http://www.madebymarzipan.com/?tutorial=diy-pvc-bike-rack
- ↑ http://www.madebymarzipan.com/?tutorial=diy-pvc-bike-rack
- ↑ https://sunnysleevez.wordpress.com/2014/07/01/summer-vacation-build-a-pvc-pipe-bike-rack-with-the-kids/
- ↑ https://www.familyhandyman.com/plumbing/how-to-glue-and-join-pvc-plastic-pipe/view-all
- ↑ https://www.bobvila.com/articles/how-to-paint-pvc-pipe/#.WXaDY4grLIU
About This Article