This article was co-authored by Ivy Boyd. Ivy Boyd is a Makeup Artist and the Creator of the beauty blog, Ivy Boyd Makeup. With nearly a decade of makeup experience, Ivy specializes in makeup services for weddings, special events, and editorial photoshoots. She holds a BA in Graphic Design from The University of Northern Iowa. Ivy was a finalist in the Allure Beauty Blogger Awards and has been featured in numerous media publications such as People Magazine and Brides Magazine.
There are 11 references cited in this article, which can be found at the bottom of the page.
This article has been viewed 47,529 times.
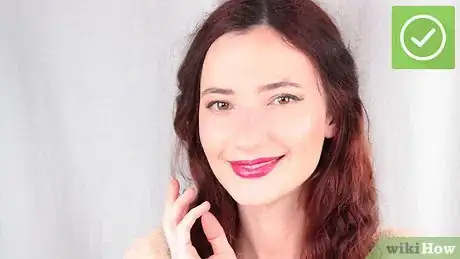
Pageant makeup should make you look bold and beautiful. It is the accentuation of classic looks. This look will be heavier and bolder than your normal day-to-day wear, and will make you glamorous during the show.
Steps
Preparing Your Skin for Heavy Makeup
-
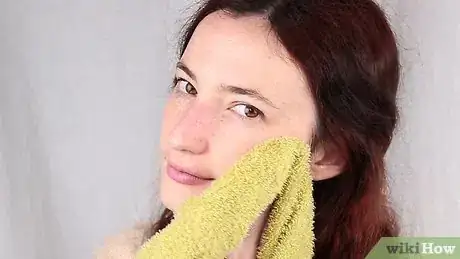
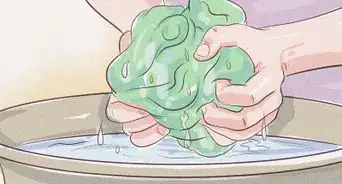
1Wash your face. You want to clean your face of any dirt or oil. Think of this step as preparing your face so it is a blank canvas. You want to prepare your skin as best as you can so your makeup brings out your best features.[1] To wash your face properly, follow these steps:
- Use lukewarm water and a cream cleanser to hydrate your skin and wipe off lingering oils.
- Avoid using hot water as it’ll dry out your skin. On the other hand, cold water will make your skin look red or splotchy.
- Dab your face with a towel; do not rub. Rubbing may damage your skin.
- If the skin around your eyes is particularly dry, use an eye cream to moisturize.
-
2Exfoliate to remove dead skin cells. Exfoliating your skin will remove the top, abrasive layer of your skin. Exfoliating too much may damage your skin, so be careful not to scrub too hard![2] To properly exfoliate your skin, do the following:
- Concentrate on the rough and dry patches of your skin. Find the dull, flakey, or uneven patches of your skin.
- Gently exfoliate upward, in smooth round motions. Do not be too heavy-handed as it may damage your skin.
Advertisement -
3Moisturize your skin. The type of moisturizer you apply will depend on your skin and the look that you are trying to achieve. Moisturizer will help your makeup look clean and smooth as opposed to cracked and scaly.[3]
- If you have oily skin, look for a moisturizer that will combat the oil and not leave your face shiny.
- If you have dry skin, look for an oil based moisturizer with natural ingredients.
- If you use a tinted moisturizer, that can act as your primer.
-
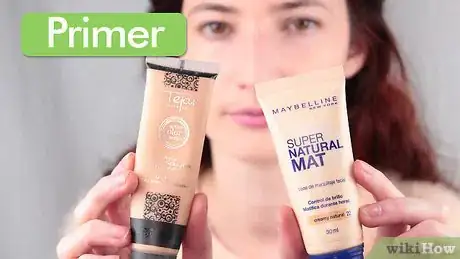
4Apply a primer to your skin. A good primer is essential to building a blank canvas before applying makeup. It helps to hydrate and to smooth out the skin on your face. It will combat shininess or unevenness. This is similar to using a base coat when painting your nails; some may see this as an unnecessary step, but you will find it will elevate your makeup.[4]
- Primer is essential for pageant wear since you'll be under harsh light.
- Use your fingertips to work the primer into your skin.
- Primers come in gel, cream, or powder form and can offer varying levels of coverage or blurring/smoothing effects.
Applying Foundation to Your Face
-
1Pick the right foundation for your skin type. You will want to pick a foundation will work with not only your skin tone but also your skin type. Generally, foundations come in powder, stick, gel, or cream form.[5] Follow these tips to pick the right formula for your skin:
- If you have dry skin – Choose a foundation specifically designed for hydration.
- Liquid and stick foundations are creamier and may help moisturize your skin. Use a powder foundation to mask any stickiness from the foundation.
- If you have oily skin – Choose an oil-free foundation.
- Using a powder foundation may help absorb your skin’s natural oils, giving your skin a matte, healthy look.
- If you have a combination of oily/dry skin – Choose both a creamy and a powder foundation to help create an even and healthy skin tone.
- Try out foundation looks before applying the makeup for a pageant.
- Pick something that will look good during pictures, interviews, and under stage lights.
- Since pageant makeup is traditionally heavy coverage, start with a strong foundation to apply color and more unique details.
-
2Decide on the right foundation color. You can find foundation in just about every shade imaginable; finding the perfect match should not be too difficult. Keep in mind that you are looking for a color that is more dramatic than everyday wear. You want something that will make you stand out on stage and hold up to stage lighting. Follow these tips to find what tone will work with your skin:
- If you can, dip a cotton swab in your desired foundation and apply it on your jaw line.
- If it doesn't stand out and looks invisible, you've found your match!
- Determine if you should use cool, neutral, or warm tones.
- Use a cool tone with a reddish or blueish base if the veins on your wrists stand out as blue, you burn easily, and you easily flush pink.
- Pick a warm tone with a yellow or gold base if the veins on your wrist appear a greenish color and if you quickly bronze or tan in the sun.
- Choose a neutral tone (with either warm or cool colors) if you have an equal number of green and blue veins on your wrists.
- If gold looks good on you, you’re more than likely “warm.”
- If silver looks good on you, you’re a “cool.” If both look great on you, you are a lucky “neutral.”
-
3Apply the foundation with a brush or a sponge. You want to apply your foundation evenly over your face. Makeup artists argue which tool to use when applying foundation.[6] Some argue that brushes are the best with liquid foundations, while others suggest sponges for blending. Use your favorite application and apply these tips for best coverage:
- Apply heavier layer of foundation on blemishes to make your skin look even and healthy.
- Don't worry if it looks uneven on the first pass through. You can smooth and blend these spots out.
- Blend the foundation around hairline and jawline so it looks natural and smooth.
-
4Use foundation on your eyelids. Just like primer will create a healthy canvas for your face, foundation will apply a canvas for your eyelids. This will help your eyeshadow and eye makeup stand out and stick to your skin.
- Don't get the makeup in your eyes or it can be painful!
- Use a small brush or your fingertips to apply it in delicate locations.
- Buff out any creases caused by the foundation.
- Once you've applied the first layer of foundation, go back through with a sponge and use a sweeping motion over your skin.
- Pay particular attention to where the makeup cakes over blemishes, creases, lines, etc.
-
5Pick a good concealer. You can use your foundation to help combat dark circles or other blemishes on your face. However, for extra coverage for stubborn areas, you must pick a good concealer. You want to choose one that blends well with your foundation.
- When picking and applying a concealer, choose one that'll blend smoothly.
- If you don't blend your concealer, stage lighting will reveal "layers" in your makeup and accentuate your blemishes.
- When buffing creases, look at your skin under different types of lights to catch any of these issues.
-
6Create a matte look with a layer of pressed foundation powder. By now, your face is probably feeling a bit sticky but for a pageant you will need a matte finish. Take a foundation powder, around the same shade as your first foundation, and dust it lightly over your face using a brush.
- Powder will help your foundation stick to your face longer, and help with the “stickiness.”
- It will also help your makeup look more natural and less like paint.
Highlighting Your Eyes
-
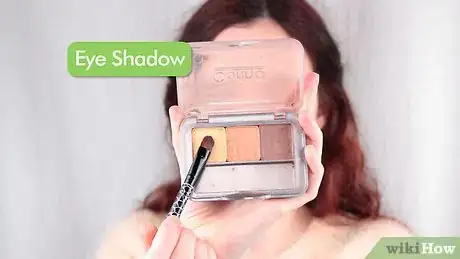
1Pick three colors of eye shadow for your desired look. You will use a light, a medium, and a dark color. The colors you pick are entirely up to you. You can pick colors based on your eye color or you can pick colors depending on what type of event you will be attending.
- For example, if you are participating in a night event, you may want to consider darker, bolder colors with a sparkle or shimmer.
- You may want to consider different looks for different parts of the pageant.
- For an interview, swap a very dramatic look for the neutral colors of a more professional look.
-
2Apply the three colors onto your eyelids. Divide your eyelid in thirds. Use each color on a third of your eyelid, starting with the lightest shade.
- Using the lightest shade, create a triangle on the inside corner of your eyelid, nearest to your nose.
- Brush a line of the lightest powder along your brow bone. This is the first step to creating a bold eye look.
- Apply the medium color to the middle of your eyelid. Make a medium-sized rectangle in the middle of your lid.
- Use the darkest shadow and make a triangle on the outside of your eyelid. This should cover the last third of your eyelid, on the outside of your lid.
-
3Blend your eye shadow. Now you want the colors to pop but look like they belong together. Take a small brush and use the medium color to blend light to medium and then dark to medium. Blending is important! You want the colors to blend into one, not look like three separate parts. Using the medium color will make the color change look more natural. It bridges the two colors together.
- Add a finishing touch using the darkest color.
- Use a thin eye shadow brush to contour your eye shadow.
- Swipe the brush from the outside corner of your eyelid crease to the inside corner of your eyelid.
-
4Shape your eyebrows. Pick an eyebrow pencil that is slightly darker than your natural eyebrow color. Determine what shape eyebrow you are going for. Do you want a thicker look or a more arched look? Again this depends on what look you want.
- Using short strokes, form the desired eyebrow shape on your eyebrows.
- Use your eyebrow bone as a guide for a more natural shape and always follow the direction of your hair.
- Fill out your eyebrows well and make them bold so they'll stand out on stage.
- Stick with a color that fits your hair and skin tone to prevent "bold" from being over-the-top.
-
5Apply eyeliner. If you are comfortable using eyeliner and have applied it before, you may go for a liquid or gel eyeliner. If you are new to using eyeliner, you may use a pencil eyeliner as it is easy to fix if you make a mistake.[7]
- If the liquid or gel eyeliner comes in a small pot, apply it using an eyeliner brush.
- If you're using a pencil eyeliner, hold it like you would a normal pencil in your dominant hand.
- Apply a thin line on the top inside of your eyelid, forming a thicker line as you move outward.
- For your bottom lid, make a line on the inside of your eyelid (also called the water line).
- Be careful not to poke yourself in the eye!
-
6Pick a mascara that will add volume to your eyes. You can even layer two different mascaras to get your desired effect. For example, some mascaras are great for volume while others are great for color. Use both for a fuller, darker look.
- Slide the brush out of the tube slowly, making sure there is an even amount of mascara on the sides of the brush.
- Apply the mascara to your eyelashes, starting with your top eyelashes.
- Move the brush from the bottom of your lashes to the ends of your lashes in one fluid motion.
- You can apply several layers of mascara, but avoid applying so much that you create clumps.
- You can also carefully apply 1-2 coats of mascara to your lower lashes (though you’ll likely have fewer lower lashes).
Creating Beautiful Lips
-
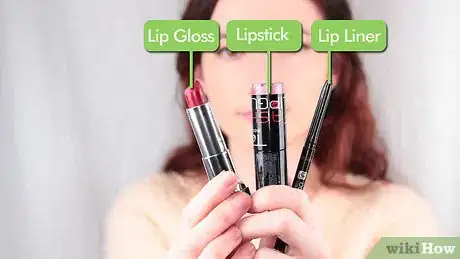
1Pick your favorite lip liner, lipstick, and lip gloss. Your choice of lipstick with depend on your skin tone and your look.[8] Always try to find a bold color to help you stand out from the crowd.[9]
- Identify your skin undertone. Is your undertone more yellow or pink?
- Yellow is warmer, and pink is cooler. Pick a lip color that goes with your undertone.
- For instance, if you have a cooler skin tone, choose reds that have some blue in them. If you have a warmer skin tone, choose orange-based reds.
- Ask a beauty consultant at your local makeup store for more advice if you have trouble determining your skin tone.
-
2Put lip liner on your lips. Using short strokes with the liner pencil, fill in your lips. This will help the lipstick pop and stick to your lips. Think of the lip liner as adding foundation to your lips, preparing them for the lip color.
- Make your top lip look a bit bigger that your bottom.
- Use your lip liner and gently shape your desired lip shape.
- Make this look bold, but natural. Don't exaggerate this too much or it will look unnatural.
- You can also play around with the liner to make the shape that you want.
-
3Apply the lipstick. Follow your lip liner and apply the lipstick to your lips. Try to do this in a fluid motion, running the lipstick over your top lip and your bottom lip.
- Once you apply the lipstick, fold a piece of clean tissue in half and close your lips over it to seal in the color.
- Open your mouth and smile to confirm you don't have lipstick on your teeth.
-
4Dab lip gloss in the middle of your top lip and bottom lip. Avoid putting gloss all over your lips; instead, you want to contour your lips with the gloss.
- This tip is very similar to how you can contour your nose to look different. Applying lip gloss on the center of your lips will make them look fuller.
- Lip gloss will also help your lips photograph well and make them noticeable from the stage.
Applying the Finishing Touches
-
1Use a large, puffy brush to apply highlighting powder. Highlighting powder can be a good final touch for your face and help to bring attention to your stand out features. You should select a highlighting powder based on your skin tone.[10]
- For fair skin, use a pearl-colored pressed powder.
- For fair to medium skin tones, select a champagne-toned highlighter or a pale pink highlighter.
- For medium to dark skin tones, go for a highlighter in a neutral peach shade and avoid highlighters with any yellow in them.
- For darker skin tones, go for a highlighter with a gold shimmer.
- Start by lightly running the highlighting powder underneath the arch of your eyebrows and in the inner corner of your eyelids.
- Apply highlighter on the bridge of your nose just between your eyes. Make sure you brush the powder away from your nose and eyes.
- Run the brush on the high points of your cheeks to help your cheekbones pop and add dimension to your face.
- Finally, put a small amount of highlighter above your lips, at your Cupid's bow.
- Always brush out, moving away from your nose and mouth to avoid getting powder on your lips.
-
2Apply bronzer to your cheeks. This will help to thin out your cheeks. Apply a small amount of bronzer; you do not want to make it look unnatural or out of place.
- Next you can finish your look by applying blush right above your bronzer to emphasize the apples of your cheeks.
- The darker color blush you use, the bolder the look will be.
- If you want a thinner nose, use a brush and brush the bronzer down the sides of your nose. This will highlight your nose and manipulate the way it looks.
-
3Review your work! Go over your face and add more color if you need to. Or, you can go back and buff out any trouble spots that you notice.
- Because you have applied this look in layers, you can easily touch up any spots that you are unhappy with by repeating the steps of this process.
- Remember to add a translucent setting powder to prevent shine on stage.[11]
- Finish the process with a setting spray to keep your make up from sliding off under the hot lights of the pageant.[12]
Community Q&A
-
QuestionAre beauty pageants harmful for children?
 Community AnswerNot necessarily. However, some kids may feel very stressed or pressured. They also might feel discouraged if they lose.
 -
QuestionDoes it cost a lot to enter a beauty pageant?
 Community AnswerEntry fees for a big pageant can be about $400. Costumes are around $300 to $500. So if you consider that a lot, yes, it can get pretty pricey.
 -
QuestionHow can I make my nose thinner?
 DaniCommunity AnswerContouring! Use a few shades darker than your natural skin color and look up a good tutorial on YouTube. Contouring is extremely helpful when it comes to making minor changes to your facial appearance.
References
- ↑ http://www.instyle.com/news/5-steps-correctly-washing-your-face
- ↑ http://www.bustle.com/articles/24800-20-skincare-mistakes-that-are-damaging-your-face
- ↑ http://baucemag.com/best-moisturizers-to-wear-under-makeup/
- ↑ http://www.huffingtonpost.com/2015/01/16/what-is-makeup-primer_n_6463190.html
- ↑ http://www.oprah.com/style/How-to-Choose-and-Use-the-Right-Foundation
- ↑ http://www.makeup.com/foundation-application-tools
- ↑ https://intothegloss.com/2014/12/how-to-apply-gel-eyeliner/
- ↑ https://www.youtube.com/watch?v=UnHmtnFaewQ
- ↑ Ivy Boyd. Makeup Artist. Expert Interview. 4 August 2021
- ↑ http://www.refinery29.com/highlighter-skin-tone#slide
- ↑ Ivy Boyd. Makeup Artist. Expert Interview. 4 August 2021
- ↑ Ivy Boyd. Makeup Artist. Expert Interview. 4 August 2021
- Videos provided by MakeupByAlli
