This article was co-authored by Yuka Arora. Yuka Arora is a self-taught makeup artist who specializes in abstract eye art. She has been experimenting with makeup art for over 5 years, and has amassed over 5.6K Instagram followers in just 5 months. Her colorful and abstract looks have been noticed by Jeffree Star Cosmetics, Kat Von D Beauty, Sephora Collection, among others.
This article has been viewed 23,522 times.
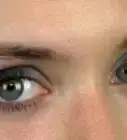
When it comes to applying eyeliner, brushes can be intimidating. Unlike using an eyeliner pencil or an applicator in a liquid eyeliner bottle, brushes require a particular technique to ensure the product goes on evenly. This type of application, however, allows you to turn any of those gorgeous pots or pans of makeup into eyeliner with just the dab of a brush. Learning the proper way to apply eyeliner with a brush is a great way to expand your potential makeup looks.
Steps
Selecting Your Products
-
1Select your eyeliner brush. You can find an assortment of different brushes at beauty supply stores or your local drugstore. Different types of eyeliner brushes are useful for different purposes. They can also be great for different types of products, like gels, creams, powders, and liquids. A variety of eyeliner brushes is a worthwhile investment to your beauty arsenal.[1]
- Flat, angled eyeliner brushes have stiff bristles that are longer at one side. These brushes are pretty multipurpose, and can achieve tight lines along the lash line.
- Your basic eyeliner brush is a straight brush with a small, sparse tip. It’s perfect for thin lines, thanks to its thin tip.
- A flat tip brush is similar to the angled eyeliner brush, but without the angle! This one is good for simple, straight lines.
- The angled bent eyeliner brush is a funny looking brush that almost looks like it’s been broken. It has a smaller tip, and is used to draw super thin lines. It’s particularly good for curved wings.
- The dome shaped semi flat brush has a bigger tip than the others, so it’s great for applying thicker lines.
-
2Pick your eyeliner product. Again, the beauty of applying eyeliner with a brush is that virtually any makeup product can become eyeliner. If you love a certain eyeshadow or powder, you can use it to line your eyes with a softer, smudged line. Gels and creams are smooth and pigmented, and typically last for a long time. Liquid eyeliner is dramatic and precise, but it can be difficult to apply. This one might take a bit of practice![2]Advertisement
-
3Pair the proper product and brush. With an array of brushes and a variety of products, your eyeliner potential is seemingly endless. To choose the appropriate product and brush, it’s important to consider the final look you want to achieve. Selecting your supplies is half the battle.
- Liquid eyeliners are great for super defined, sharp lines. To apply these, select a brush with a very fine tip, like the classic eyeliner brush or the angled bent eyeliner brush.
- Gel and cream eyeliners are rich and smooth, with a great staying power. The dome shaped semi flat brush is recommended for applying these.
- Powders are better for a soft look, and using a flat angled eyeliner brush or a flat straight eyeliner brush both work well for this.


Lining Your Eyes
-
1Make sure your brushes are clean. If they’re straight out of the package, you don’t need to worry about this. Otherwise, you should clean your eyeliner brushes between applications. While this is important for all makeup brushes, it’s particularly important for the brushes you’re using near your delicate eyes. You want to limit the amount of bacteria you’re spreading near your eyes – plus, the application is typically smoothest when the brush is clean before dipping it into product.
- Learn about different ways to clean your brushes here.
-
2Dip your brush into the product. Here’s a helpful tip: you can always add more eyeliner, but it’s trickier to remove it. In other words, start with less product and build up, rather than vice versa. Make sure the tip of your brush is coated in a layer of product, but don’t pack it on. If you need to add more product, you easily can.
-
3Begin at your top inner corner.[3] Line your brush up to the inner corner of your top lash line, or as far inwards as you want your liner to extend. Then, drag or brush the product outwards to your outer corner.[4] You can stop your liner at the outer corner, or extend it to a cat eye or a wing.
- If you are nervous to draw a line in one fell swoop, you can first add dots along your top lash line. Then, simply connect the dots!
-
4Line your bottom lash line. Bottom eyeliner can be a bit trickier, because it can make your eyes look very severe and dark if done incorrectly. Again, start inwards and move outwards. However, unlike the top eyeliner, you should start about 2/3 into the eye, omitting product from your inner corner. Lining the outsides of your bottom eye make your eyes look bigger and open, while lining the entire thing can make your eyes look very dark and stern.
- Make sure to connect your eyeliner to the outer corner of your eye, thus also connecting with the top eyeliner. This will make your eye look unified and natural.
- Typically, you’ll want to create a softer, lighter line on your bottom lash line.

What You’ll Need
- Eyeliner brush (basic, flat tip, flat angled, angled bent, or dome shaped)
- Eyeliner product (powder, gel, cream, or liquid)
References
- ↑ http://www.beautyhows.com/eye/eye-makeup/eyeliner/best-eyeliner-brush-reviews-how-to-choose-and-best-types/
- ↑ http://www.paulaschoice.com/expert-advice/eyes/_/apply-eyeliner-like-a-pro
- ↑ Yuka Arora. Makeup Artist. Expert Interview. 30 August 2018.
- ↑ http://www.paulaschoice.com/expert-advice/eyes/_/apply-eyeliner-like-a-pro
About This Article