This article was co-authored by Ndeye Anta Niang. Ndeye Anta Niang is a Hair Stylist, Master Braider, and Founder of AntaBraids, a traveling braiding service based in New York City. Ndeye has over 20 years of experience in African hair including braiding box braids, Senegalese twists, crochet braids, faux dread locs, goddess locs, kinky twists, and lakhass braids. Ndeye was the first female of her tribe in Africa to move to America and is now sharing her knowledge of African braids passed on from generation to generation.
There are 17 references cited in this article, which can be found at the bottom of the page.
This article has been viewed 79,216 times.
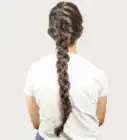
Braids are a popular, protective style for natural or transitioning hair. You can add hair to box braids to make them even longer than they already are. You can also add Marley hair to cornrows for a more natural look that you can straighten, curl, and style in any way you want.
Steps
Lengthening Box Braids with Extensions
-
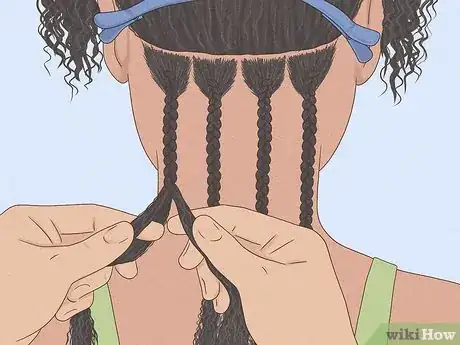
1Start box braids on clean, dry hair. Wash, condition, and dry your hair as usual, then section it off. Clip up any sections that you aren't planning on adding to the braid. Install your extensions into your natural hair using your preferred method, then begin to braid the extensions. Stop when you are a few inches/centimeters past your real hair, and are only braiding with the extension hair. You will continue braiding and lengthening them 1 at a time.
- This method works best on skinny braids, such as box braids or goddess braids. It is not recommended for thicker braids, such as pigtails.
-
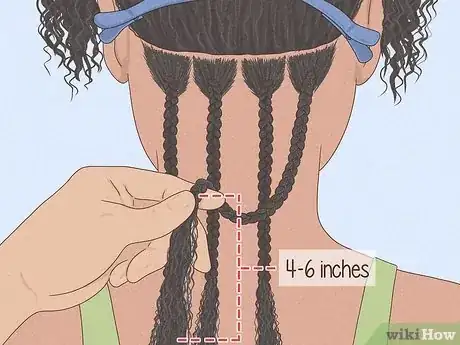
2Braid the extension hair until you have 4 to 6 inches (10 to 15 cm) left. Choose a braid to add hair to, and continue braiding it. Stop when you have about 4 to 6 inches (10 to 15 cm) of hair left.[1]Advertisement
-
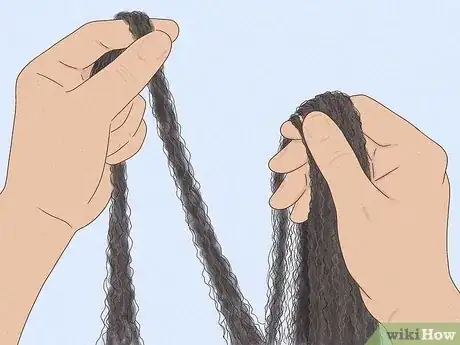
3Pull a thin strand of hair from your pack of extensions. The strand needs to be about the same thickness as the strands making up your braid. You can match the color to your existing braid, or you can use a different color for an ombre effect.
- Kanekalon braiding hair is the standard type of synthetic hair used for box braids.[2] It will work the best for thin, micro braids. Its wavy, crimped texture will be easier to work with and won't be visible in the completed braid.
- If synthetic hair gives you an allergic reaction, you can use real human hair instead. Or, for a more cost-effective alternative, try hypoallergenic synthetic hair.[3]
- If you are working on a single braid or a pair of pigtails, match the extension hair to your real hair’s texture.
-
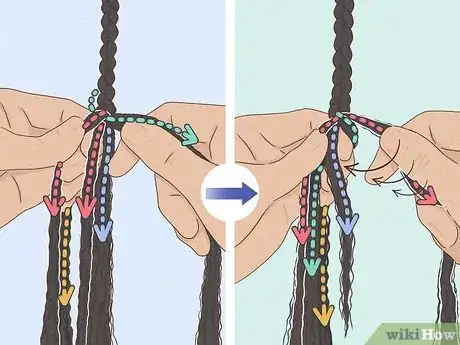
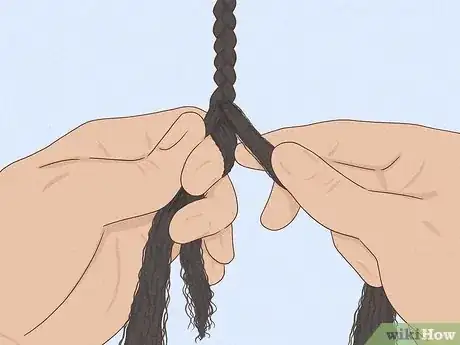
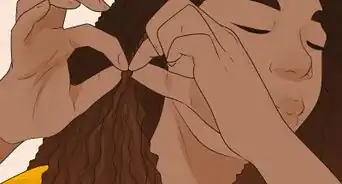
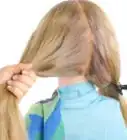
4Add the extension hair to the left and right strands of your braid. Keep the 3 strands on your braid separate, so that you have a left, middle, and right strand. Place the strand of extension hair behind the braid. Add the left end of the extension to left strand on your braid, and right end of the extension to right strand. The middle strand should not have any hair added to it.[4]
-
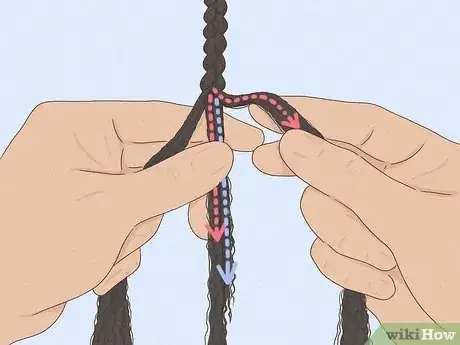
5Braid your hair for a few stitches. Cross the long/thick left and right strands over the middle one. Do this for a few stitches until the long/thick strands are back on the outside of the braid, and the short/thin strand is back in the middle.[5]
- Make sure that you still have a few inches/centimeters of hair left on the short/thin strand.
-
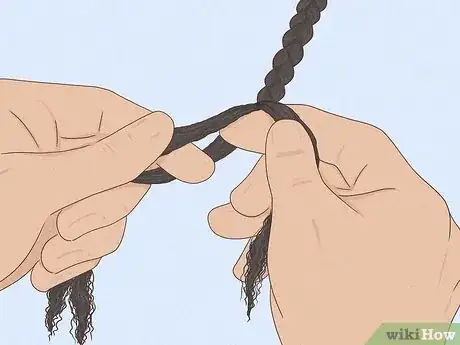
6Split 1 of the thicker strands and add it to the thin strand. Choose 1 of the long/thick outer strands and split it in half. Add 1 of the halves to the short/thin strand in the middle, and keep the remaining half on the outside.[6]
-
7Continue braiding your hair as normal. All 3 strands should now be the same length and width. Keep braiding as before by crossing the left and right strands over the middle one until the braid is the length you want it to be. If you want to make an even longer braid, you can add another extension using the same technique.[7]
-
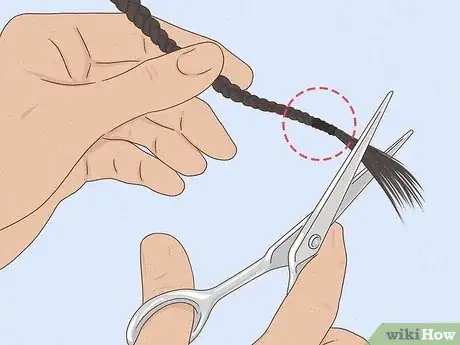
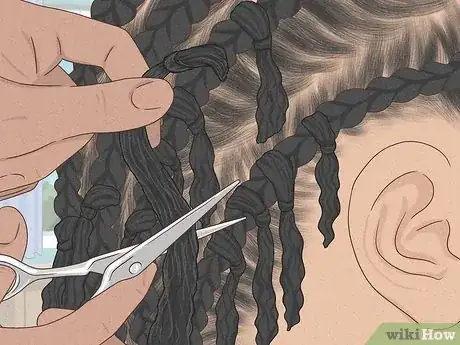
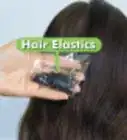
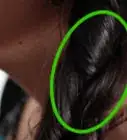
8Tie the braid, then trim off the excess. Wrap a clear elastic around the end of the braid, and cut the rest of the hair off. Use a pair of scissors for a blunt cut, and a pair of thinning sheers for a more natural look. Straighten the end of the braid to make the crimped hair look smoother.
- Real hair: straighten the hair with a flat iron on a low setting.
- Synthetic or kanekalon hair: dip the hair in boiled water, then pull it out. Wrap the hair in a towel to remove as much water as possible, taking care to not burn yourself. Then, smooth the fibers out with your fingers and let the hair dry.
Adding Marley Hair to Braided Cornrows
-
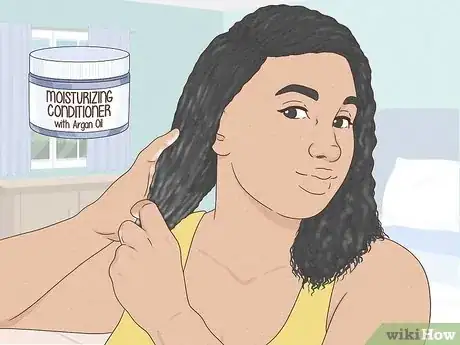
1Start with clean, dry, moisturized hair. Wash your hair with a cleansing shampoo, then follow up with a deep conditioner. Let your hair dry naturally, then apply a moisturizing cream and oil to it. You can use store-bought creams and oils, or you can use natural products, such as shea butter and coconut oil.
-
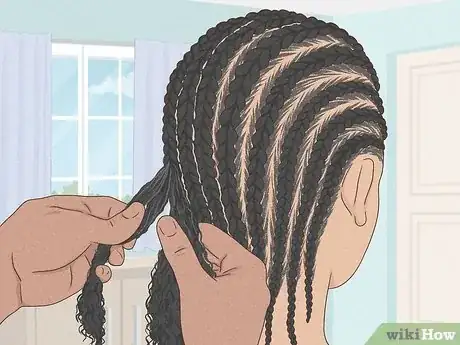
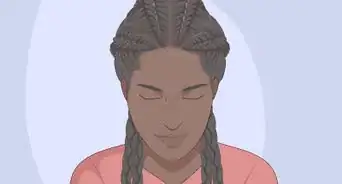
2Braid your hair into cornrows. Use a braiding technique that you are comfortable with. Make sure that the cornrows are running in the same direction, from your forehead down to the back of your nape. How many cornrows you create is up to you, but the more you make, the thinner and less bulky they will be.[8]
- If your hair very long, finish the cornrows as regular braids. Tuck them against your nape, and sew them to the adjacent braids.
-
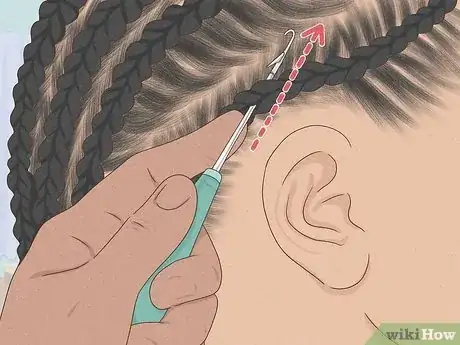
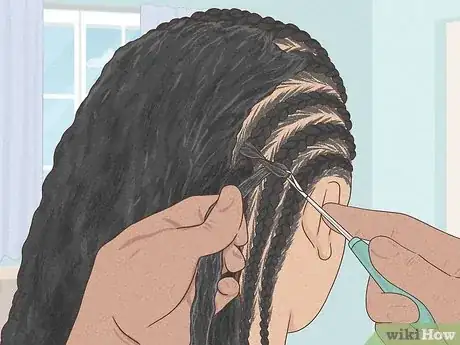
3Open up a latch hook and slide it under your cornrow. Work the latch hook between the stitches on the cornrow so that you are not forcing your way between strands of hair. Whether you start on the front or end of the cornrow is up to you. Most people find it easier to start on the end of the cornrow (back of head).[9]
- This style is known as crochets.
-
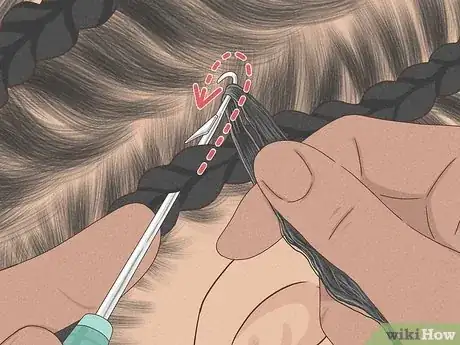
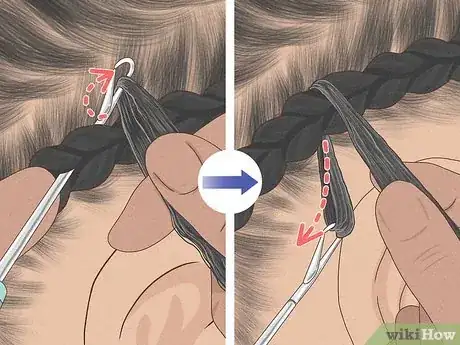
4Catch a strand of folded Marley hair onto the hook. Pull a strand of Marley hair out of your pack of extensions. Cut it shorter, if desired, then fold it in half to create a loop. Slip the loop onto the hook.[10]
- Marley hair is very fluffy. If you pull on it, the strands will come together and appear smoother.
- Marley hair separates into locks on its own. If it doesn't, pull out a pencil-thick lock that shrinks to the thickness of yarn when stretched out.
-
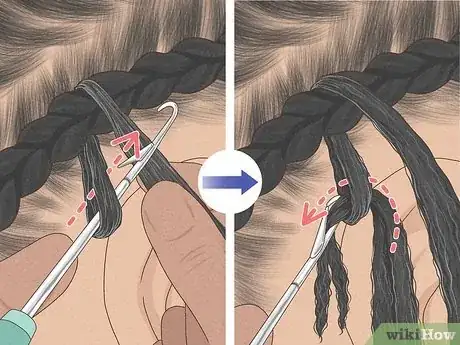
5Close the hook and pull it back through the cornrow. Flip the latch over the hair caught on the hook first. Pull the hook back through the cornrow until you have about 2 inches (5.1 cm) of the looped Marley hair sticking out from under it.[11]
-
6Remove the latch hook and pull the tails through the loop. Flip the latch hook open and slide it off of the looped Marley hair. Gather the 2 loose ends of the Marley hair, and feed them through the looped end. Do not pull on the ends of the Marley hair to tighten the loop just yet, however.[12]
-
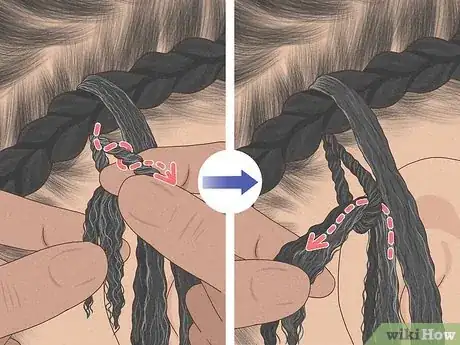
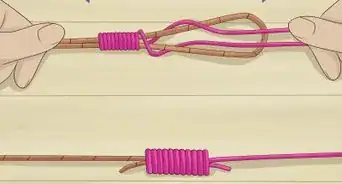
7Twist the loop and pull the tails through it. Slip your fingers through the loop, so that the tails are under them. Twist the loop, then remove your fingers. Feed the tails through the twisted loop. Do this step twice for good measure.[13]
-
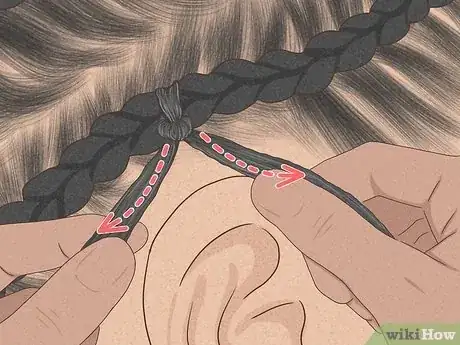
8Pull on the tails to tighten the loop. Tug on the tails first to tighten the loop. Next, pull the 2 tails apart and away from each other to further tighten the knot. Let go of the tails and allow them to drape against your hair. You have just added your first strand of Marley hair to your cornrow![14]
-
9Repeat the process until you have filled every cornrow. Work your way back-to-front (or front-to-back if you prefer). Fill up the entire cornrow with strands of Marley hair before moving onto the next cornrow. When you are done, your entire head should be covered with Marley hair. The cornrows should not be visible.[15]
- Plan on leaving about 1 to 2 inches (2.5 to 5.1 cm) of space between the strands in the back of your head, and even less space in the front.
- Use thicker strands in the back, and thinner strands in the front. This will help your hair look fuller while still staying natural in appearance.
- Go over your head with your fingers when you are done, then fill in any areas that feel too thin.
-
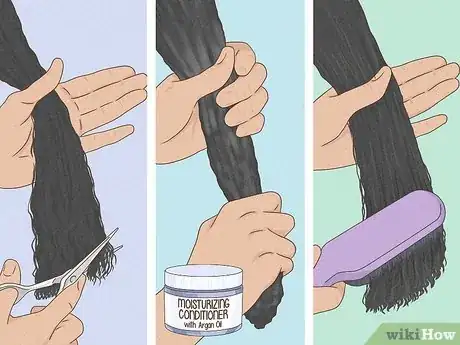
10Trim, moisturize, and brush the Marley hair. Look in the mirror and take note of any strands that appear too long. Trim them with scissors until they are the same length as the other strands. Next, work in small sections to brush the hair out and apply a moisturizing hair cream to it.[16]
- Brush the hair like you would your own hair: gently and starting from the ends.
- Applying product is optional and not always necessary. You want the hair to be moisturized, but not so much that it looks shiny or becomes matted because you used too much product.
-
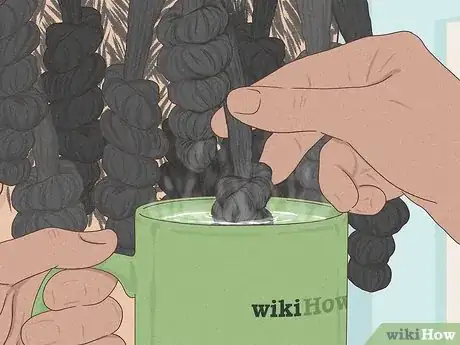
11Curl the strands using bantu knots and hot water. Marley strands are made from synthetic hair, so using a curling iron will damage them. Instead, wrap and twist the strands into loose bantu knots. Dip the knots individually into a cup of boiling water. Let the hair dry completely before unraveling it.[17]
- You can try curling the strands using a no-heat method, such as foam rollers, but they may still end up frizzy.
- Refill the cup with hot water periodically. If the water cools down too much, it won't curl the hair.
-
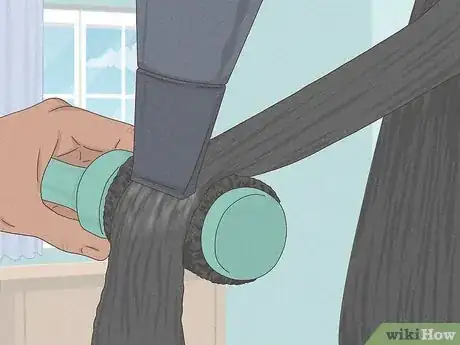
12Blow dry the strands straight if you want a sleeker the look. Clip the upper layers of your hair out of the way, then pull it straight and run the nozzle of a hairdryer along the top and underside of the strand. Hold the nozzle as close as possible to the hair. Work your way around your hair in layers, working in thin strands. [18]
- Depending on the quality of your Marley hair, the highest setting on your hair dryer should be safe. If you need to, hold the nozzle further away from the strands.
- The sections you are working in should be just a little narrower than the width of your hairdryer's nozzle.
-
13Remove the extensions after your cornrows start to loosen. This will take about 2 to 8 weeks, depending on how fast your hair grows. Once your cornrows feel loose, cut the Marley hair as close as possible to your cornrows. Undo the braids, and comb out the rest of the Marley hair.
Expert Q&A
Did you know you can get expert answers for this article?
Unlock expert answers by supporting wikiHow
-
QuestionWhat kind of hair should I use for box braids?
 Ndeye Anta NiangNdeye Anta Niang is a Hair Stylist, Master Braider, and Founder of AntaBraids, a traveling braiding service based in New York City. Ndeye has over 20 years of experience in African hair including braiding box braids, Senegalese twists, crochet braids, faux dread locs, goddess locs, kinky twists, and lakhass braids. Ndeye was the first female of her tribe in Africa to move to America and is now sharing her knowledge of African braids passed on from generation to generation.
Hair Stylist & Master Braider The standard synthetic hair generally used for box braids is soft-pressed, Kanekalon expression hair and the pre-stretched Kanekalon hair. Some people like using human hair because they're allergic to synthetic hair or don't like the weight. There's also hypoallergenic synthetic hair you can use if you can't have the regular synthetic hair and human hair extensions are too expensive for you. For spiritual reasons, some individuals use yarn hair for Senegalese twists, box braids, goddess locks, and cornrows.
 -
QuestionWould the Marley hair look good on white people?
 Community AnswerYes, I'm sure it would look good on people of all races. It just depends on what look you're going for.
Warnings
- Do not use curling irons or flat irons on synthetic hair, or it will melt.⧼thumbs_response⧽
Things You'll Need
Lengthening Box Braids with Extensions
- 1 to 2 packs of braiding hair extensions
- Clear hair elastics
- Scissors or thinning shears
- Hot water
- Comb
- Hair clips
Adding Marley Hair to Braided Cornrows
- 2 to 3 packs of Marley hair
- Latch hook
- Hairbrush
- Comb
- Moisturizing cream, for hair
- Hot water or hairdryer
References
- ↑ https://www.youtube.com/watch?v=_R_mrx71Yw4&feature=youtu.be&t=15s
- ↑ Ndeye Anta Niang. Hair Stylist & Master Braider. Expert Interview. 10 January 2020.
- ↑ Ndeye Anta Niang. Hair Stylist & Master Braider. Expert Interview. 10 January 2020.
- ↑ https://www.youtube.com/watch?v=_R_mrx71Yw4&feature=youtu.be&t=20s
- ↑ https://www.youtube.com/watch?v=_R_mrx71Yw4&feature=youtu.be&t=35s
- ↑ https://www.youtube.com/watch?v=_R_mrx71Yw4&feature=youtu.be&t=45s
- ↑ https://www.youtube.com/watch?v=_R_mrx71Yw4&feature=youtu.be&t=1m
- ↑ https://www.youtube.com/watch?v=phJvNpzAo-Y&feature=youtu.be&t=15s
- ↑ https://www.youtube.com/watch?v=phJvNpzAo-Y&feature=youtu.be&t=1m
- ↑ https://www.youtube.com/watch?v=phJvNpzAo-Y&feature=youtu.be&t=1m5s
- ↑ https://www.youtube.com/watch?v=phJvNpzAo-Y&feature=youtu.be&t=1m10s
- ↑ https://www.youtube.com/watch?v=phJvNpzAo-Y&feature=youtu.be&t=1m25s
- ↑ https://www.youtube.com/watch?v=phJvNpzAo-Y&feature=youtu.be&t=1m30s
- ↑ https://www.youtube.com/watch?v=phJvNpzAo-Y&feature=youtu.be&t=1m40s
- ↑ https://www.youtube.com/watch?v=phJvNpzAo-Y&feature=youtu.be&t=1m50s
- ↑ https://www.youtube.com/watch?v=phJvNpzAo-Y&feature=youtu.be&t=3m
- ↑ https://www.youtube.com/watch?v=phJvNpzAo-Y&feature=youtu.be&t=3m20s
- ↑ https://www.youtube.com/watch?v=qKIZnCrL84E&feature=youtu.be&t=4m32s
