This article was co-authored by wikiHow staff writer, Darlene Antonelli, MA. Darlene Antonelli is a Technology Writer and Editor for wikiHow. Darlene has experience teaching college courses, writing technology-related articles, and working hands-on in the technology field. She earned an MA in Writing from Rowan University in 2012 and wrote her thesis on online communities and the personalities curated in such communities.
This article has been viewed 214,803 times.
Learn more...
Adding stickers, gifs, and emojis to pictures has become increasingly easy to do with popular social media apps. As well as using apps like Instagram and Snapchat, there are a number of other apps and online services that will help you edit your photos. This wikiHow teaches you how to add emojis and stickers to pictures with an online photo-editing tool called Editor by Photo Lab, an app called Adobe Photoshop Express[1] , and on popular image-sharing platforms.
Steps
Adding Emojis to Pictures on Instagram
-
1Open Instagram. This app icon looks like a multi-colored camera. You can find this app on either your home screen, in the app drawer, or by searching.
-
2Take a picture for your story.Advertisement
-
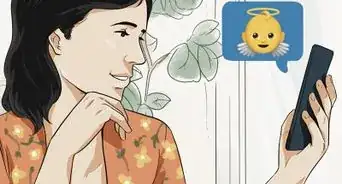
3Tap on the square smiley face icon. Once you take the picture, you will see this icon in the top-right of your screen. This will open up all of the stickers you can add to your picture, including all of the emojis.
- You can find the emojis by scrolling down.
-
4Tap an emoji or sticker. This will paste the emoji on your picture. You can drag the sticker around your photo and place it anywhere, and pinch in and out to resize the emoji.


Adding Emojis to Snapchat Pictures
-
1Open Snapchat. This app icon looks like a white ghost on a yellow background. You can find this app on either your home screen, in your app drawer, or by searching.
-
2Take a photo.
- You can take a photo using either the chat function, sharing from the Camera Roll, or Gallery.
-
3Tap the Post-It icon. Once you have the picture, you will see this icon in the top-right of your screen. This will open the Sticker Picker.
-
4Tap the smiley face icon. This is the last icon in the stickers menu along with the general stickers from Instagram, stickers using your Bitmoji, and your recently used stickers.
-
5Tap an emoji to add to your picture.
- Pinching in and out will resize your sticker.
- You can drag the sticker around your photo and place it anywhere.


Using a Photo Editing App
-
1Open the Google Play Store or the App Store . You can find this app on your home screen, in your app drawer, or by searching.
- If you opened the Google Play Store, you will be presented with the Home screen of the Play Store and lists of apps based on your activity.
- If you opened the App Store, you will see a list of recommended apps and top picks.
-
2
-
3Tap the green Install button or the blue Get button.
- Adobe Photoshop Express: Photo Editor Collage Maker will be added to your home screen and app drawer!
-
4Open Adobe Photoshop Express. This app icon looks like blue letters “P” and “S” in the middle of a diamond on a black background. You can find this app on your home screen, in your app drawer, or by searching.
-
5Tap Next through the tutorial.
-
6Log in. You can use your Google account, your Facebook account, or an Adobe ID.
- Once you've finished logging in and allowing permissions, you will see all your photos.
-
7Tap the photo you want to edit.
-
8Navigate to the sticker menu, the heart within a circle icon.
- You can do this by dragging your finger from the right side of your screen to the left over the menu below your picture to the heart within a circle icon. You will see a selection of filters and corrections you can use to edit your photo as well as the option to add text in the menu.
- Along the top of the menu are sticker categories such as Flowers, Decorate, Party, and Adventure.
- Dragging your finger across the menu shows you more sticker categories.
-
9Tap a category. All the stickers in that category will load. You can swipe your finger across the stickers to see more.
-
10Tap a sticker. The sticker will appear on your photo.
- You can pinch and pull the sticker with two fingers on the corners to make it smaller and bigger.
- The circle in the lower left of the sticker lets you rotate it.
- The X in the upper right of the sticker will delete it.


Editing a Picture on a Computer
-
1Open a web browser. Popular ones include Chrome and Firefox.
-
2Navigate to http://editor.pho.to/.
-
3Click Get Started. The editor will load and you will be asked to upload a photo or select one of the stock photos provided.
-
4Click the hat and moustache icon. This button is on the left. The button label Stickers will appear when you hover your mouse over the icon. A myriad of stickers will appear in a slide-out menu from the left.
-
5Click a sticker. It will appear on your photo.
- You can change the location of the sticker by dragging it where you want it.
- You can change the tilt of the sticker by clicking and dragging the lower right circle around the sticker.
- You can change the size of the sticker by moving the dial on the slider in the box next to the sticker.
-
6Click Save and Share. When you are done adding stickers and emoji to your image, you can share your image with your friends on Facebook or Twitter or save it directly to your computer.
- You can drag the sticker around your picture and place it anywhere.
-
7Tap or . This will open a page where you can select to add a watermark before either saving or sharing your edited picture.
- You can press to save the edited image to your gallery, send the picture through your email, or share the edited picture using Facebook Messenger.
- If you swipe your finger up from the bottom to the top of your screen, more options will appear. You can choose to set the photo as your wallpaper or print it.


About This Article

1. Go to http://editor.pho.to/.
2. Click Get Started.
2. Upload your own photo or select from the available photos.
3. Click the hat and mustache icon.
4. Select a sticker or emoji to add to your picture.