This article was co-authored by wikiHow staff writer, Darlene Antonelli, MA. Darlene Antonelli is a Technology Writer and Editor for wikiHow. Darlene has experience teaching college courses, writing technology-related articles, and working hands-on in the technology field. She earned an MA in Writing from Rowan University in 2012 and wrote her thesis on online communities and the personalities curated in such communities.
This article has been viewed 14,051 times.
Learn more...
After you've recorded a meeting, you can then rewatch it if you need to. This wikiHow will teach you how to access recorded Zoom meetings. If you recorded a meeting from Android or iOS, you've most likely created a cloud recording that you'll need to use a web browser to access; computer recordings are locally stored and can be viewed using the same computer.
Steps
Accessing Local Recordings
-
1Open Zoom. You can find the computer client in your Start menu of Windows or Applications folder in Mac.
- If you recorded meetings with your computer, you created local recordings and can only access them using the computer client.
- You can also find the file in:
- Windows: "C:\Users\[Username]\Documents\Zoom"
- Mac: " /Users/[Username]/Documents/Zoom"
- To change the default saving location of your recorded files, go to Settings in your Zoom client, then Recording and click to change or open your file storage.
-
2Click Meetings. It's on the left side of the window with an icon of a clock.Advertisement
-
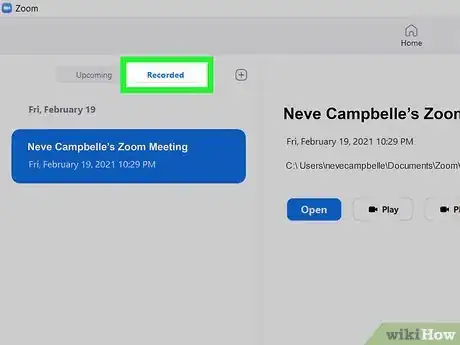
3Click the Recorded tab. This will display all the recorded meetings you have.
-
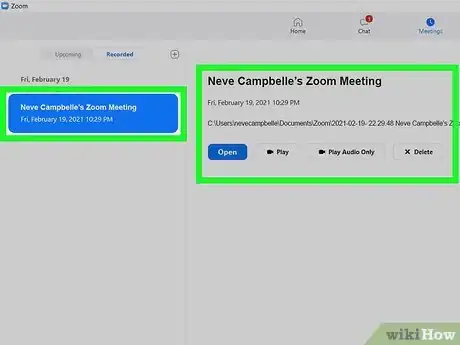
4Click the meeting you want to access. Once you do, it will show more options.
- Audio and video files are saved as MP4; Audio-only files are saved as M4A; a text-only file is saved as TXT.
- From the computer client, you can Open, Play, Play Audio, or Delete recorded meetings. If you only see the option to Open, then the file is a cloud recording. If a video file is showing as an audio file, click Convert and wait for it to convert to a video format.[1]
Accessing Cloud Recordings
-
1Go to https://zoom.us/profile and sign in. You can use any web browser to log into your account and access your cloud recordings.
-
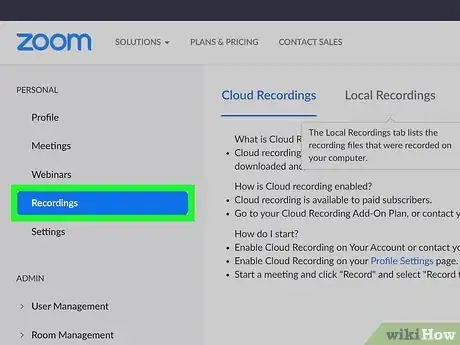
2Click Recordings (if you're a "User"). If you're labeled as admin on your Zoom account, click Account Management > Recording Management to see all the recordings of your meetings.
-
3Click a meeting you want to access. Meetings that haven't finished their conversion process will have a "Processing Recording" label and can't be accessed.
- You can also use the date range boxes to search for recordings within specific time frames or enter the meeting ID to find a specific recording.
- Meetings saved to the cloud are automatically deleted after 120 days.
- If the meeting was recorded in a shared screen with a speaker view, it will be in an MP4 format with video and audio showing both the active speaker and shared content. If the meeting was recorded in a shared screen with a gallery view, it will be in an MP4 format with video and audio showing both shared content and the gallery view. If the meeting was recorded in:
- Active speaker: MP4 with video and audio with the active speaker only.
- Gallery View: MP4 with video and audio with gallery view only.
- Shared Screen: MP4 with video and audio showing the shared screen only.
- Audio only: M4A with only audio.
- Audio transcript: VTT with a transcript of the audio.
- Chat file: text file of the chat from the meeting.[2]
References
About This Article
1. Open Zoom.
2. Click Meetings > Recorded.
3. Click the meeting you want to access.


