

PowerPoint 2013
Formatting Pictures
Introduction

There are a variety of ways to format the pictures in your slide show. The picture tools in PowerPoint make it easy to personalize and modify the images in interesting ways. PowerPoint allows you to change the picture style and shape, add a border, crop and compress pictures, add artistic effects, and more.
Optional: Download our practice presentation for this lesson.
To crop an image:
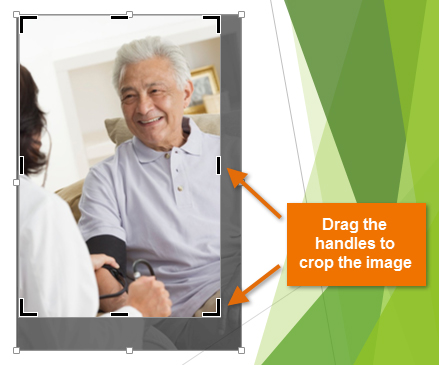
When you crop an image, a part of the picture is removed. Cropping may be helpful when a picture has a lot of content and you want to focus on only part of it.
- Select the image you want to crop. The Format tab appears.
- On the Format tab, click the Crop command.
 Clicking the Crop command
 - Cropping handles will appear around the image. Click, hold, and drag a handle to crop the image.
 Cropping an image
 - Click the Crop command again. The image will be cropped.
The corner handles are useful for simultaneously cropping the image horizontally and vertically.
To crop an image to a shape:
- Select the image you want to crop, then click the Format tab.
- Click the Crop drop-down arrow. Hover the mouse over Crop to Shape, then select the desired shape from the drop-down menu that appears.
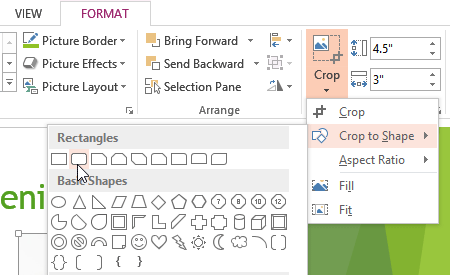 Selecting a shape
 - The image will appear formatted as the shape.
 The image cropped to a shape
You may want to crop the image to the desired size before cropping it to a shape.
To add a border to an image:
- Select the image you want to add border to, then click the Format tab.
- Click the Picture Border command. A drop-down menu will appear.
- From here, you can select a color, weight (thickness), and whether or not the line is dashed.
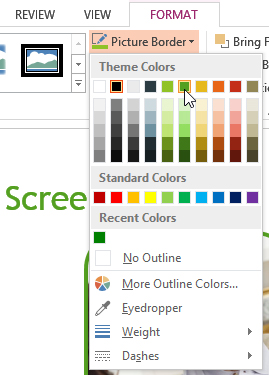 Changing the picture border
 - The border will appear around the image.
 A picture with a green border


